Homemade Graham Cracker Crust

This homemade Graham Cracker Crust is deliciously sweet, buttery, and crisp with just the right amount of crunch. Made with only three simple ingredients (graham crackers, butter, and sugar), it comes together quick and tastes so much better than store-bought. It’s the perfect base for all your favorite pie recipes, from creamy no-bake pies to rich baked classics.

EMAIL ME THE RECIPE!

A Note from Kim
A Foolproof Graham Cracker Crust
This homemade graham cracker crust is our go-to for so many pies. It comes together in just 10 minutes with 3 simple ingredients and has the perfect buttery flavor and crumbly texture. No blind baking needed, it’s so much easier than traditional pie crust.
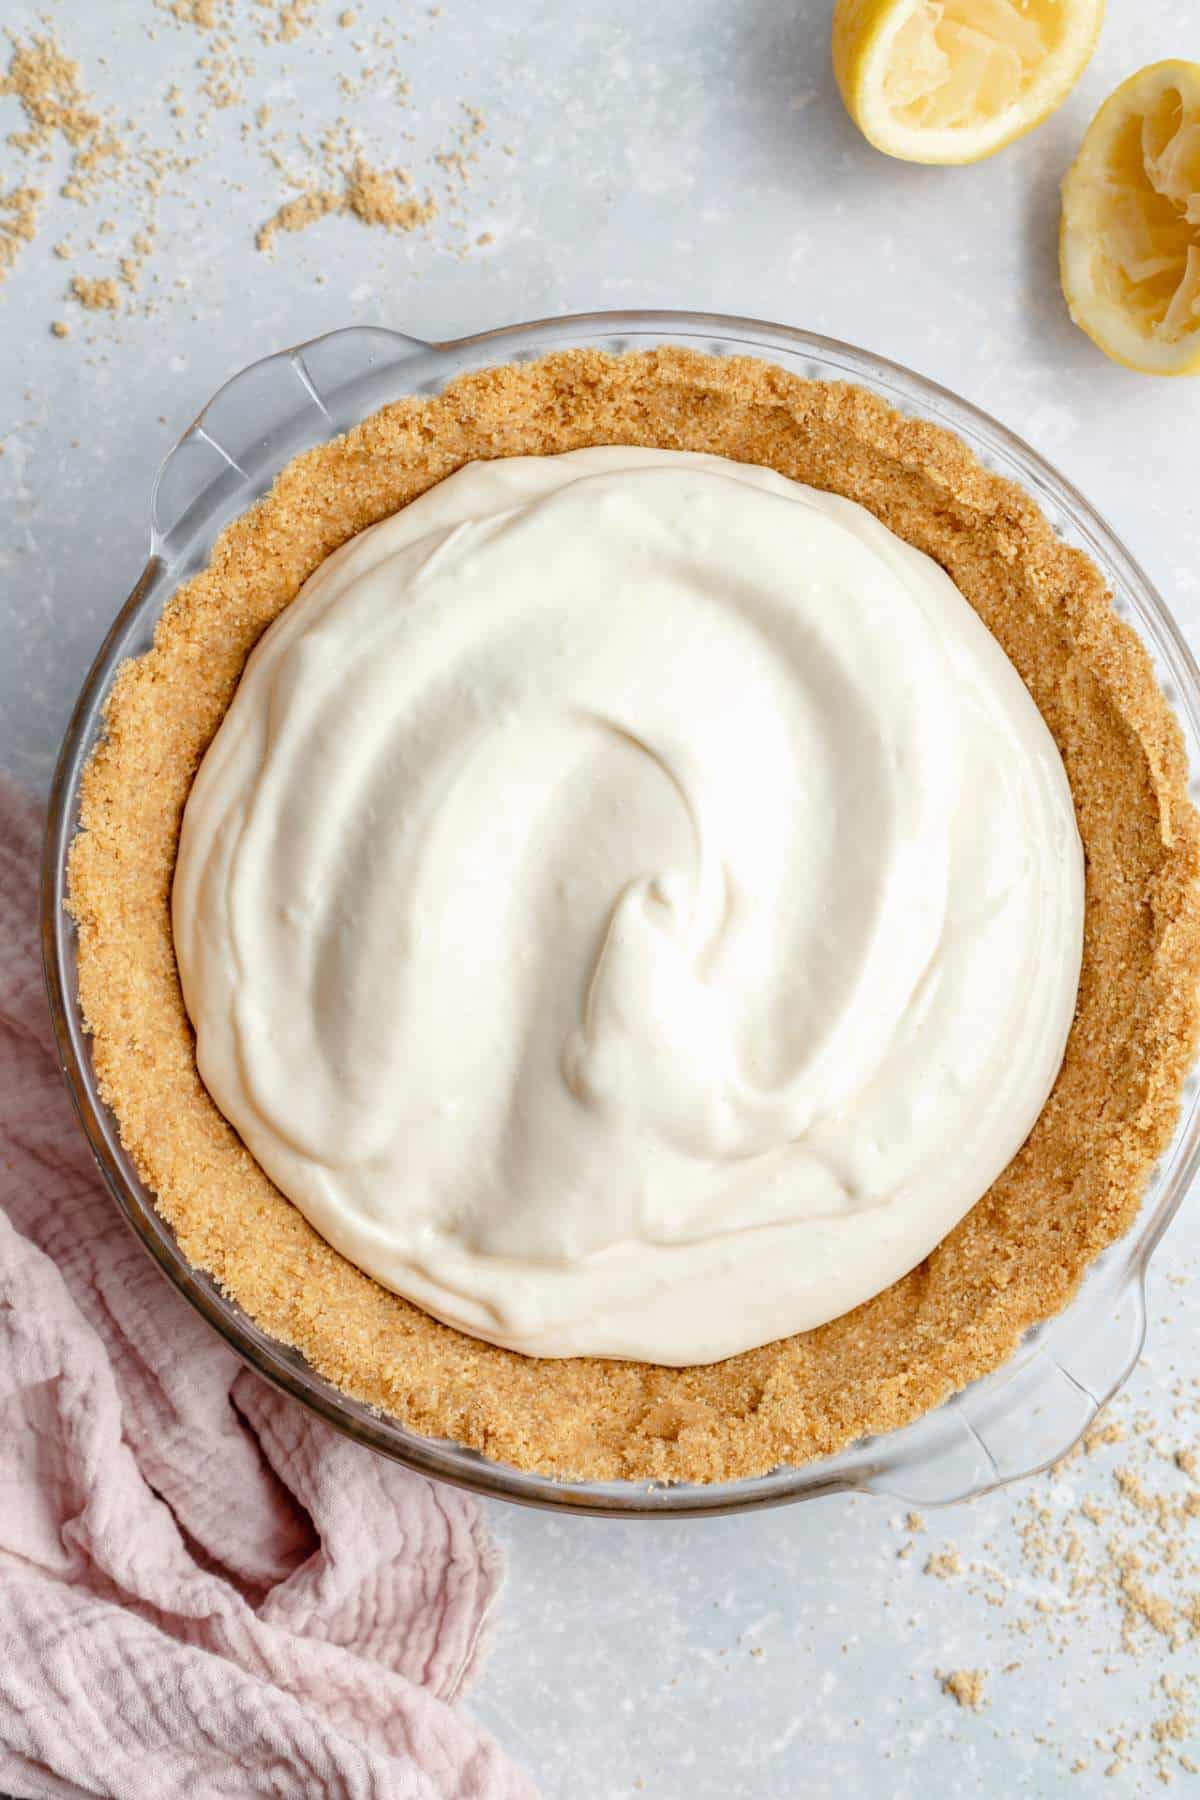
It’s sturdy, sliceable, and never gets soggy, even after a day or two. Plus, it’s super versatile. Use it for pumpkin pie, pudding pies, ice cream pies, cream pies, no-bake pies like my blueberry yum yum dessert, cheesecakes, or bars. You can even switch up the graham crackers for chocolate or cinnamon for a fun twist!
With love (and lots of good eats), ![]()
Seriously, this recipe is amazing. I’ve used it for several pies and it comes out perfect every time. My crusts look great now, and I couldn’t be happier with it!
— Hannah
What are the main ingredients in a graham cracker crust?
The ingredient list for this graham cracker crust recipe is short and sweet! Here’s what you’ll need to make it:
You can find the measurements in the recipe card below.
- Graham cracker crumbs. You need about 12 full graham cracker sheets, to yield about 1 1/2 cups of crumbs. You can also purchase graham cracker crumbs in most grocery stores in the baking aisle. If you want to make this crust gluten free, use gluten-free graham crackers.
- Unsalted butter. This is your binding agent and also adds rich flavor to the crust. For best results, do not try to reduce the amount called for in the recipe. To make the crust dairy free, simply use a plant-based butter. You can use salted butter, if preferred.
- Granulated sugar. To make the crust perfectly sweet with a neutral taste.
- Ground cinnamon. Depending on what type of dessert you will be making with the crust, it can be a nice addition to add a small amount of spice to the mixture. You can also add a pinch of salt to balance the flavors.
Tip: If you live outside of the United States in an area where graham crackers are not sold, you can use digestive biscuits instead.
Variations
There are lots of tasty ways to get creative with your crust. Here are a few ideas:
- Graham crackers. Depending on the dessert recipe, you can swap honey graham crackers with chocolate graham crackers or cinnamon graham crackers.
- Other cookies/crackers. Want to try something other than the classic graham cracker crumbs? Try using Biscoff cookies, vanilla wafers, or Ritz cracker crumbs. For an easy Oreo crust, see my Oreo Crust recipe.
- Brown sugar. For a deeper, richer flavor, try using a mix of sugars. Swap part of the granulated sugar for light brown sugar by using 2 tablespoons of each.
How to Make a Homemade Graham Cracker Crust
This graham cracker crust recipe only takes a matter of minutes to make and has the perfect buttery crumble. Here’s the simple process:
You can find the full set of printable instructions in the recipe card below.

Step 1: Mix. If needed, grind the graham crackers into fine crumbs using a food processor, blender, or by crushing them in a zip-top bag with a rolling pin. If baking the crust, preheat the oven to 350°F. In a medium bowl, stir together the loose crumbs, sugar, and cinnamon (if using).

Step 2: Add butter. Pour in the melted butter with the graham cracker mixture.

Step 3: Combine. Stir everything together until evenly combined. Break up any big chunks.

Step 4: Press into pie dish or pie pan. Add the crumb mixture into an ungreased 8-inch, 9-inch pie dish (or cake pan, springform pan, or square pan). Press the crumbs firmly and evenly into the bottom and up the sides with your fingers, then use the bottom of a flat measuring cup to compact it into a firm crust.
Kim’s Recipe Tips
- Use boxed crumbs. Pre-crushed graham cracker crumbs (found in the baking aisle) make prep even easier. If crushing your own, be sure they’re very fine so the crust holds together well.
- Choose crisp graham crackers. I love using Nabisco Honey Maid original graham crackers because they’re slightly crisper and create a sturdier crust. This is not sponsored, they’ve just given us the best results.
- Adjust for a larger size pan. If making a larger dessert in a 9×13-inch pan, increase the recipe by 1.5x.
- Press evenly with medium-firm pressure. Use the bottom of a flat measuring cup to firmly smooth the crust across the bottom. For pie plates, run a spoon along the corner where the base meets the sides to create a rounded edge and help prevent crumbling when slicing.
Frequently Asked Questions
You can use a store-bought graham cracker crust for most recipes, but I HIGHLY recommend a homemade graham cracker crust. It’s really very easy and quick to make. Also, pre-made crusts do not have near the flavor or texture of a homemade crust. This crust turns out buttery, sweet, crispy, crumbly, and you only need 3 ingredients.
Whether you need to bake or chill your crust is going to depend on the recipe. For classic cheesecake recipes, you typically are instructed to bake the crust before adding the filling. However, chilled recipes, like my cherry delight, no bake cheesecake or chocolate pudding pie, you only need to chill the crust before adding the filling.
Bake at 350°F (175°C) for 8–12 minutes, until the crust bakes to a light golden color. Cool completely before filling.
Cover formed crust tightly and freeze for 10 minutes or refrigerate for 20 minutes before filling to allow time for the crust to firm up and butter to re-solidify.
This particular recipe has the perfect ratio of crumbs to butter and should not fall apart. Just be sure to firmly press the mixture into the pan or pie plate.
If you feel that your crust has become too hard, it may be that you pressed too hard when forming the crust to your pan. You want to press firmly enough to get a good shape and keep the crumbs in place, but just use medium pressure.

Storage Recommendations
- Storing baked: This crust is best used the same day it’s made, but it can be baked up to 1 day ahead and stored, tightly covered, at room temperature. Don’t store an unbaked crust, uncovered, for more than a few hours, it will start to dry out and can become crumbly.
- Storing not baked: The prepared, unbaked crust can be kept in the fridge for up to 3 days before using in your recipe.
- Freezing: The crust can be stored in the freezer for up to 3 months. Cover the pan tightly in plastic wrap and then foil. Thaw before using.
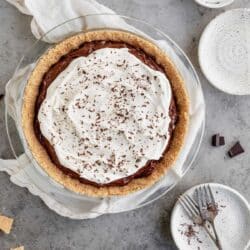
Graham Cracker Crust Pie Ideas


If you try this graham cracker crust recipe, let me know! Leave a comment and if your family loves it as much as mine does, be sure to give it a five star ⭐️ rating! Also, subscribe to our newsletter to receive more delicious recipes straight to your inbox.

Homemade Graham Cracker Crust
Ingredients
- 1 1/2 cups (180g) graham cracker crumbs, (about 12 full sheet graham crackers)
- 1/4 cup (50g) granulated sugar, (I typically use slightly less than a full 1/4 cup)
- 1/8 teaspoon ground cinnamon, optional
- 6 tablespoons (85g) unsalted butter, melted
EMAIL ME THE RECIPE!
Instructions
- If you have full graham crackers, use a food processor or blender to grind them into fine crumbs. You can also place them in a sealable bag and crush them into fine crumbs with a rolling pin. If you will be baking the crust for your recipe, preheat the oven to 350 degrees F (175 degrees C).
- In a medium bowl, stir the 1 1/2 cups (180g) graham cracker crumbs, 1/4 cup (50g) granulated sugar, and 1/8 teaspoon ground cinnamon (if using) together, and then stir in the melted 6 tablespoons (85g) unsalted butter until evenly combined. Break up any large chunks.
- Pour the mixture into an un-greased 8-inch, 9-inch, or 10-inch pie dish, cake pan, springform pan, or square pan. Using your fingers, pat the crumbs evenly across the bottom and up the sides ensuring the crust is nice and compact. You can also use the bottom of a flat 1-cup measuring cup to thoroughly compress the graham cracker crumbs into a firm crust.
- Bake in the preheated oven for 8 minutes and set aside to cool or chill the crust. (If baking, allow the crust to fully cool before adding the filling.) To chill: Cover formed crust tightly and freeze for 10 minutes or refrigerate for 20 minutes before filling to allow time for the crust to firm up and butter to re-solidify.
Notes
- Storing baked: This crust is best used the same day it’s made, but it can be baked up to 1 day ahead and stored, tightly covered, at room temperature. Don’t store an unbaked crust, uncovered, for more than a few hours — it will start to dry out and can become crumbly.
- Storing not baked: The prepared, unbaked crust can be kept in the refrigerator for up to 3 days before using in your recipe.
- Freezing: The crust can be stored in the freezer for up to 3 months. Cover the pan tightly in plastic wrap and then foil. Thaw before using in your recipe.
- Larger pan: If you’re making a 9×13-inch dessert, I recommend 1.5x the recipe.
Did you make this recipe?
Tag @kimscravings on Instagram and be sure to subscribe to our mailing list to receive more healthy and delicious recipes straight to your inbox!
Seriously, this recipe is amazing. I’ve used it for several pies and it comes out perfect every time. My crusts look great now, and I couldn’t be happier with it!
Finally, the perfect Graham cracker crust!! Much better than any other recipe I’ve tried.