Spider Cookies

Creepy, cute, and oh-so-delicious, these Peanut Butter Spider Cookies are the ultimate Halloween treat! Chewy, sweet, and topped with mini Reese’s cups and candy eyes, they’re as fun to make as they are to eat.
EMAIL ME THE RECIPE!

A Note from Kim
Creepy Crawly Peanut Butter Fun
I made these spider cookies with my grandsons, and we had the best time decorating each little spider. There was plenty of laughter, sticky fingers, and maybe a few Reese’s that didn’t quite make it onto the cookies. It’s the kind of simple, hands-on baking project that makes Halloween extra fun.
The cookies themselves are soft, chewy, and packed with that classic peanut butter flavor everyone loves. Between the melty Reese’s cups, the cute candy eyes, and that perfect bite of sweetness, these spooky treats are impossible to resist. Whether you’re making them for a Halloween party or just for fun, don’t expect them to last long!
With love (and lots of good eats), ![]()
If you’re hunting for even more Halloween treats, be sure to check out my spooky Graveyard Cake and my full roundup of the best Halloween desserts, from creepy cookies to festive drinks and everything in between!
Ingredients You’ll Need

- All-Purpose Flour: Provides structure and keeps the cookies soft yet sturdy enough to hold the peanut butter cups.
- Baking Soda: Helps the cookies rise and gives them a light, chewy texture.
- Salt: Enhances the peanut butter flavor and balances the sweetness.
- Unsalted Butter: Adds richness and moisture for tender, chewy cookies.
- Creamy Peanut Butter: The star flavor that gives the cookies that classic, nutty taste.
- Granulated Sugar: Adds sweetness and helps the cookies bake up with slightly crisp edges. You’ll also roll the dough balls in extra sugar before baking for that classic crackly finish.
- Brown Sugar: Adds moisture, chewiness, and a subtle caramel flavor.
- Egg: Binds the ingredients together and adds softness.
- Vanilla Extract: Enhances the overall flavor and brings out the peanut butter notes.
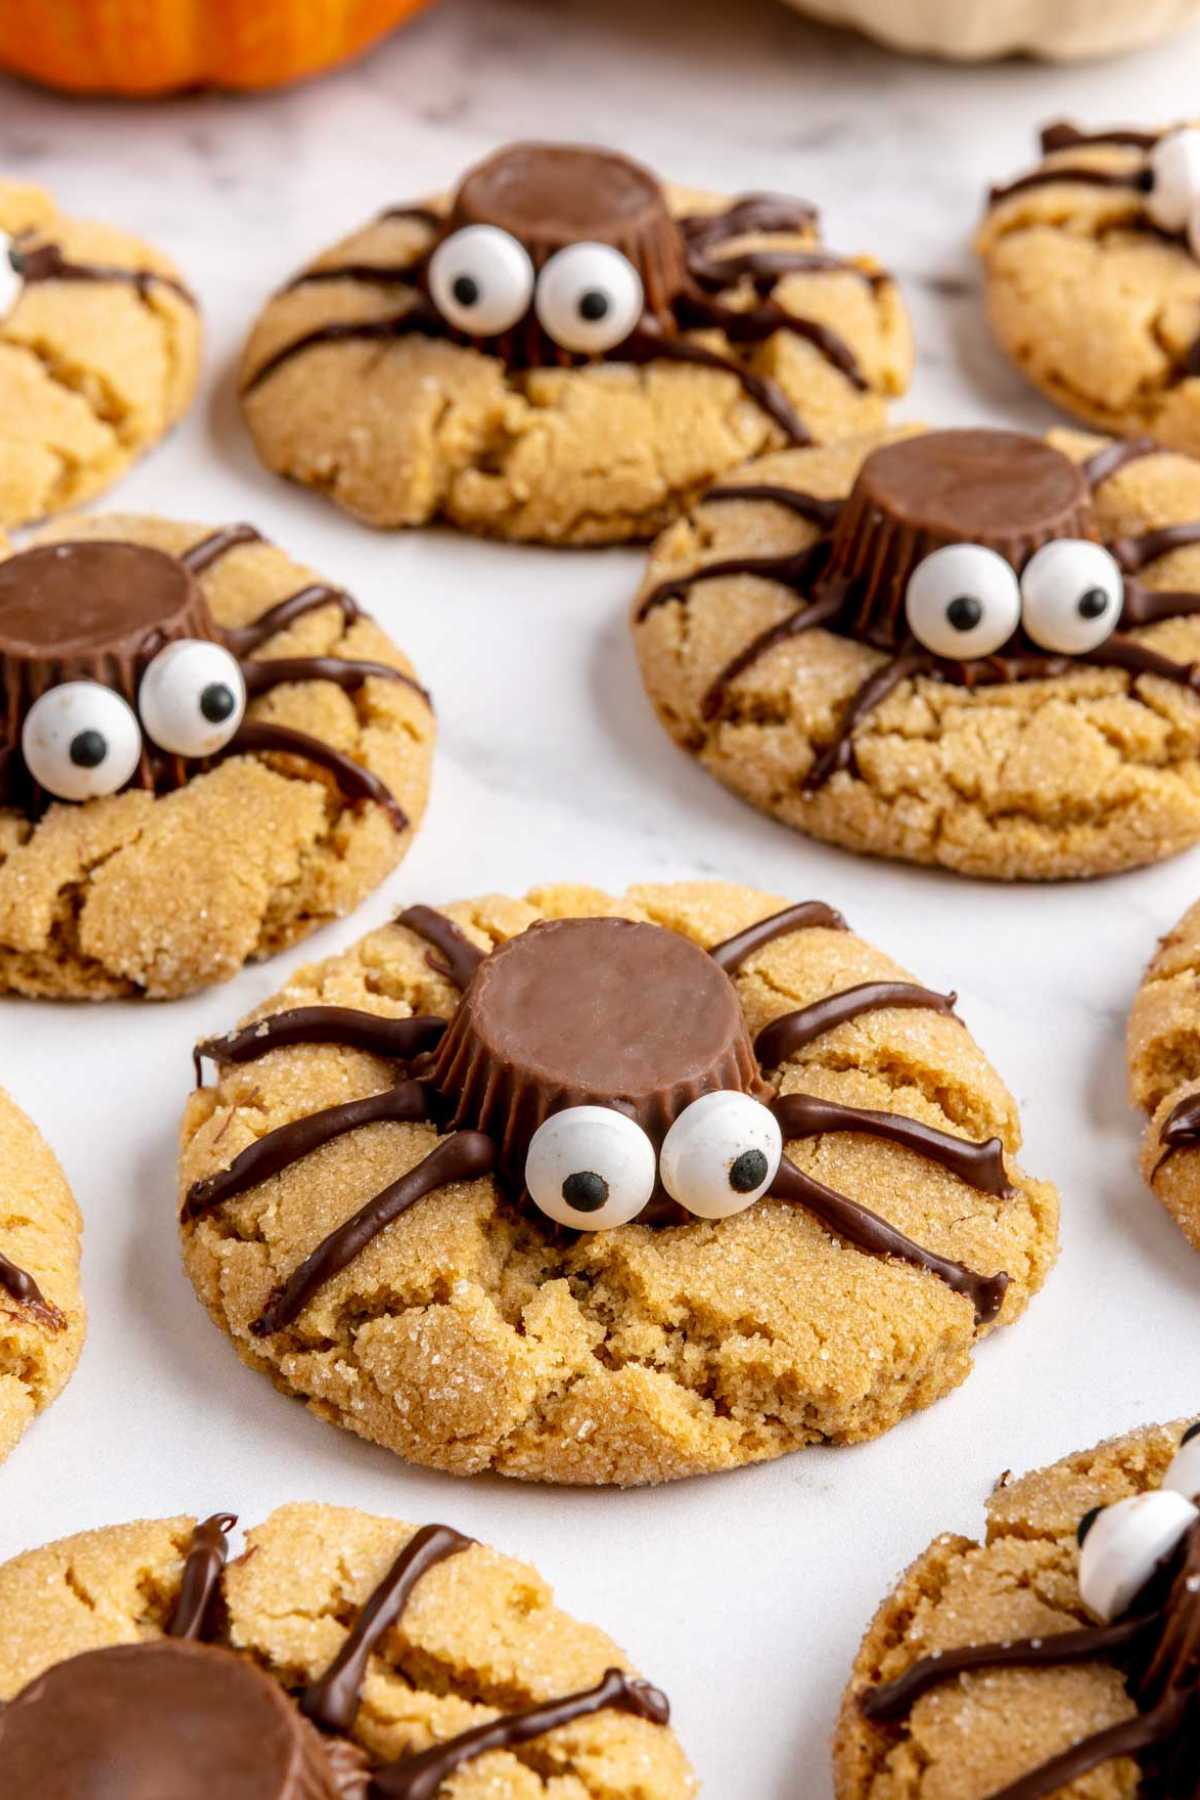
- Mini Reese’s Peanut Butter Cups: The fun center of each cookie, adding gooey peanut butter goodness.
- Chocolate Chips: Melted to form the spider legs, adding a touch of chocolate flavor and decoration.
- Candy Eyes: Googley candy eyeballs are the finishing touch that makes the cookies fun and festive for Halloween.
Change It Up!
- Swap the Peanut Butter Cups: Try mini chocolate squares, caramel-filled chocolates, or even Nutella-filled candies for a new twist.
- Use Crunchy Peanut Butter: Adds a little texture to the cookies and makes each bite extra interesting.
- Add Mix-ins: Fold in chocolate chips, chopped nuts, or toffee bits to make the cookies even more indulgent.

Spider Cookies
Ingredients
- 1 3/4 cups (218g) all-purpose flour
- 1 teaspoon baking soda
- 1/4 teaspoon salt
- 1/2 cup (112g, 1 stick) unsalted butter, softened
- 3/4 cup (120g) creamy peanut butter
- 1/2 cup (100g) granulated sugar
- 1/2 cup (112g) packed brown sugar
- 1 large egg, room temperature
- 1 teaspoon vanilla extract
Topping
- 1/2 cup (100g) granulated sugar, for rolling
- 28 Reese’s miniature peanut butter cups, unwrapped
- 1/4 cup (43g) chocolate chips
- candy eyeballs
EMAIL ME THE RECIPE!
Instructions
- In a medium bowl, whisk together flour, baking soda and salt. Set aside.
- In a large bowl, cream together the butter and peanut butter until smooth. Add both sugars and beat for 2–3 minutes, until light and fluffy. Mix in the egg and the vanilla extract.
- With the mixer on low, slowly add the flour mixture and beat just until combined. Cover the dough and refrigerate for at least 30 minutes, or up to 3 days.
- Preheat the oven to 375°F. Line baking sheet with parchment paper or a silicone baking mat and set aside.
- Roll the dough into 1-inch to 1.5-inch balls and roll each one in sugar. Place on a baking sheet about 2-inches apart. Bake for about 10 minutes, or until the edges are lightly golden.
- Remove from the oven and let cool for just 3 minutes. Then, gently press a mini Reese’s cup into the center of each cookie, working quickly. Transfer the cookies to a freezer-safe dish and freeze for 10–15 minutes, or until the peanut butter cups are set. (You can transfer them to the dish before pressing the Reese's, if you'd prefer.) It’s perfectly fine if they melt slightly.
- To make the spider legs, melt the chocolate chips in the microwave, stirring every 20 seconds until smooth. Transfer the melted chocolate to a plastic bag, with a very small snip off a corner, and pipe legs around each Reese’s cup. Add a small dab of chocolate to the back of the candy eyes and press them onto the Reese’s. Let the chocolate set before serving.
Notes
- Room Temperature: Store spider cookies in an airtight container for up to 3–4 days. Keep them out of direct sunlight to prevent the chocolate from softening too much.
- Freezing: Place baked and cooled cookies in a single layer in a freezer-safe container or zip-top bag. Freeze for up to 2 months. Thaw at room temperature before serving.
- Tip: If the Reese’s cups or chocolate legs soften, pop the cookies in the fridge or freezer for a few minutes to firm them up before serving.
Did you make this recipe?
Tag @kimscravings on Instagram and be sure to subscribe to our mailing list to receive more healthy and delicious recipes straight to your inbox!
How to Make Spider Cookies
These are your favorite peanut butter cookies, all jazzed up for the spooky season! Perfect for Halloween fun, they’re a treat your kids will love, and you’ll love them just as much!

Step 1: Mix Dry Ingredients. In a medium bowl, whisk together flour, baking soda and salt. Set aside.

Step 2: Combine Wet Ingredients. In a large bowl, cream together the butter and peanut butter with an electric mixer until smooth. Add both sugars and beat for 2–3 minutes, until light and fluffy. Mix the egg and the vanilla extract into the peanut butter mixture.

Step 3: Combine Wet and Dry Ingredients. With the mixer on low, slowly add the flour mixture and beat just until combined. Cover the dough and refrigerate for at least 30 minutes, or up to 3 days.

Step 4: Roll Cookie Dough in Sugar. Roll the dough into 1-inch to 1.5-inch balls and roll each one in sugar. Place on a baking sheet about 2-inches apart.

Step 5: Bake. Bake for about 10 minutes, or until the edges are lightly golden. Remove from the oven and let cool for just 3 minutes.

Step 6: Add Peanut Butter Cup. Gently press a mini Reese’s cup into the center of each cookie for the spider body, then place the cookies in a freezer-safe dish and freeze for 10–15 minutes, until the peanut butter cups set. A little melting is totally fine!

Step 7: Melt Chocolate. To make the spider legs, melt the chocolate chips in a small bowl in the microwave, stirring every 20 seconds until smooth.

Step 8: Add Legs and Eyes. Transfer the melted chocolate to a small piping bag (or plastic bag with a tiny corner snipped) and pipe legs around each Reese’s. Add a dab of chocolate to attach the candy eyes, then let set before serving.
Kim’s Recipe Tips
- Chill the Dough: Don’t skip the chilling step! It helps prevent the cookies from spreading too much and keeps them thick and chewy.
- Work Quickly with the Reese’s: Press them into the cookies while they’re still warm so they stick well. If they start to melt, pop the cookies in the freezer for a few minutes to set.
- Use a Piping Bag for Precision: A small zip-top bag with a tiny snip works great for drawing neat spider legs.
- Let the Chocolate Cool Slightly Before Piping: Warm chocolate can spread too much; let it thicken just a bit for clean lines.
- Store at Room Temp: Keep them in an airtight container for up to 4 days, or refrigerate if your kitchen is warm.
Frequently Asked Questions
Yes! While homemade gives the best flavor and texture, store-bought dough works in a pinch.
That’s totally normal! The warm cookies soften the chocolate. Just pop them in the freezer for 10–15 minutes to set before decorating.
You can make your own! Use small dots of melted white chocolate or frosting for the whites, then add mini chocolate chips or black icing for pupils.
Storage Recommendations
- Room Temperature: Store spider cookies in an airtight container for up to 3–4 days. Keep them out of direct sunlight to prevent the chocolate from softening too much.
- Freezing: Place baked and cooled cookies in a single layer in a freezer-safe container or zip-top bag. Freeze for up to 2 months. Thaw at room temperature before serving.
- Tip: If the Reese’s cups or chocolate legs soften, pop the cookies in the fridge or freezer for a few minutes to firm them up before serving.

More Craveable Peanut Butter Cookies


If you try these spooky spider cookies, let me know! Leave a comment and if your family loves them as much as mine does, be sure to give it a five star ⭐️ rating! Also, tag @kimscravings on Instagram with a picture of your creation. Be sure to subscribe to our mailing list to receive more healthy delicious recipes straight to your inbox.
Made these for a Halloween party and they were loved by everyone! So cute but more than that, they tasted amazing!
So happy to hear! Thanks for your comment!
These turned out so good! The perfect taste and texture, plus they’re so fun to make!