Homemade Pie Crust


Our favorite Homemade Pie Crust is tender, flaky and absolute perfection. This recipe is easy to follow and makes the best pie dough every time. Learn all my foolproof tips and tricks and you’ll see that making pie crust from scratch really is so simple.
EMAIL ME THE RECIPE!
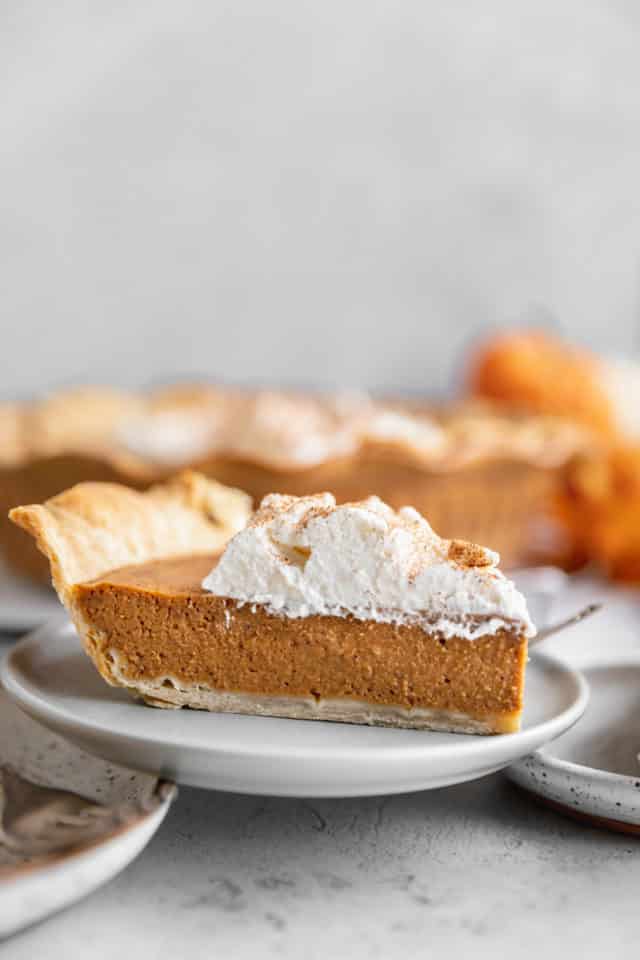
There’s nothing like a big slice of homemade apple pie or creamy pumpkin pie to share with friends and family.
Have you ever made your own pie crust from scratch? I was always too intimidated to try making a homemade pie crust, but after finally giving it a try, I realized it’s really very simple to make a delicious, flaky pie crust from scratch. Just like our easy oil pie crust, it’s one hundred times better than anything that you can buy pre-made at the store!
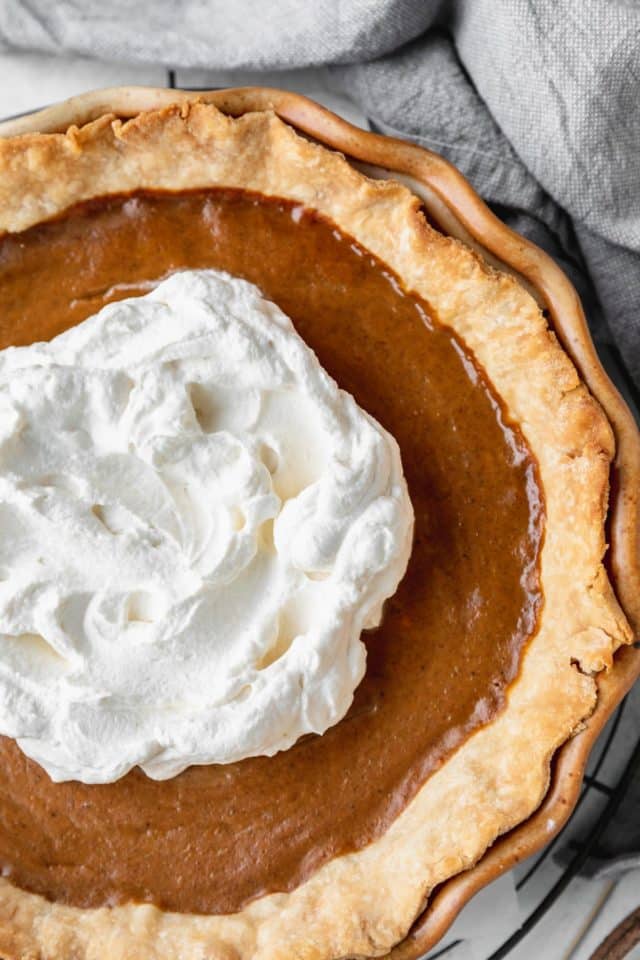
This homemade pie crust is versatile, too. Use it to make sweet desserts like our Dutch apple pie or for a savory dish such as chicken pot pie.
You’ll love how quick and effortless it is to make your pie crust from scratch! You only need 4 ingredients and just about 20 hands-on minutes!
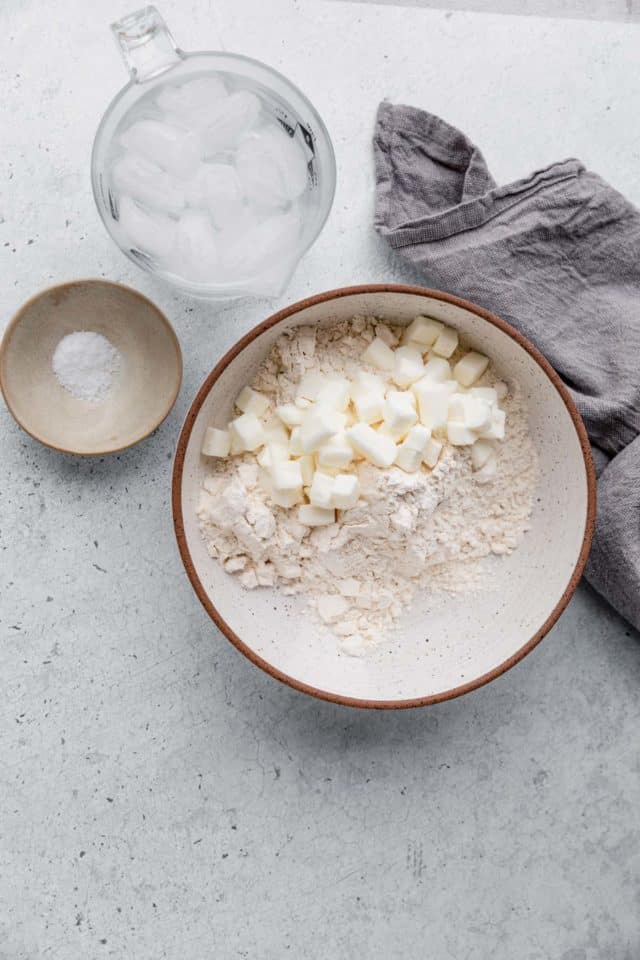
ingredients for a homemade pie crust
Here’s what you need for pie crust success:
- All-purpose flour. I definitely recommend using all-purpose flour for a flaky, yet sturdy crust for your pie. There are no substitutes that will yield better results.
- Salt. For flavor! Use regular table salt for even dispersement throughout the dough.
- Shortening. You can think and do whatever you want to, of course, but the truth is, to achieve perfect flaky pie crust, you’ve got to use shortening. Butter won’t get you there and butter substitutes surely won’t either. Trust me, I’ve messed around with both and have been forced to acknowledge the greasy truth on more than one account. It just is what it is.
- Water. For binding the ingredients together. Use only enough water to mold the dough together. To ensure your pie crust is perfectly flaky, you want the water to be ice cold. You can even pop a few ice cubes in the water, so it stays as cold as possible.
Pro tip: Shortening and Crisco are the same thing. You’ll find the Crisco down the baking aisle. It is a shelf-stable food.
How to make a homemade pie crust
Making homemade pie crust is actually really very simple. Just follow these steps and you’re sure to have recipe success!
- Mix dry ingredients. The first step is to whisk the flour and salt together in a large bowl.
- Add shortening. Use a pastry cutter (the one I own) or two forks to cut the shortening into the mixture until it resembles coarse meal (pea-sized bits with a few larger bits of fat is fine). A pastry cutter makes this step very easy and quick.
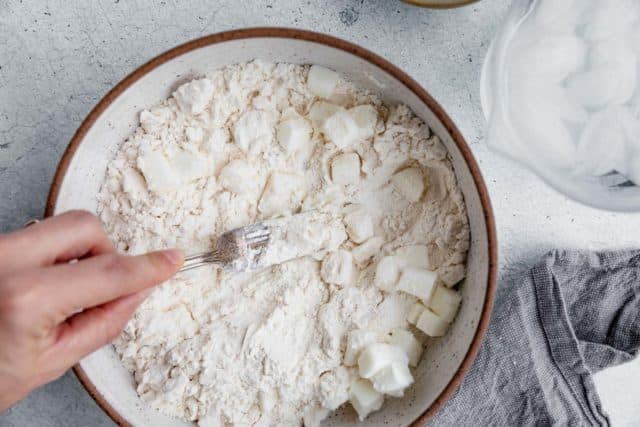
- Add water. Begin adding cold water and toss with a fork until the mixture is moistened. Do not add any more water than you need to. Stop adding water when the dough begins to form large clumps.
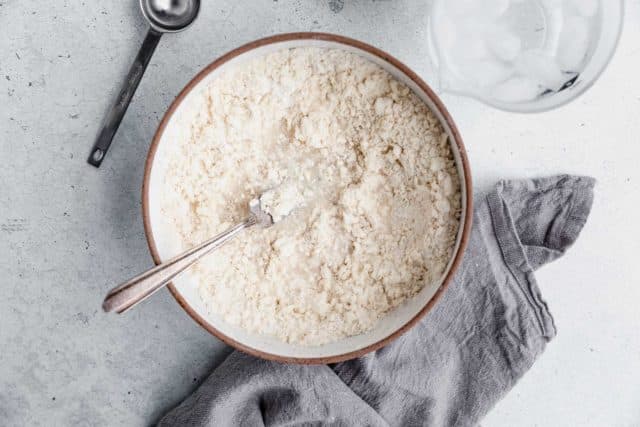
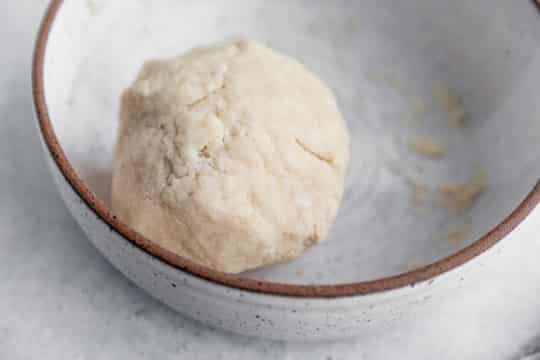
Once enough ice water is added and mixed in with the flour, dough should look like you see pictured below.
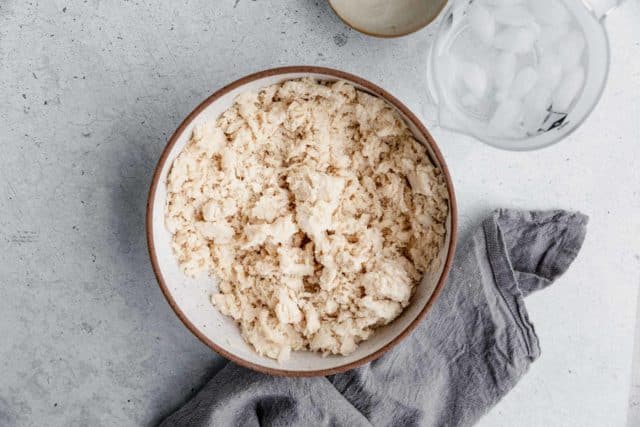
- Chill dough. Gather the dough into a ball and wrap in plastic wrap. Chill the dough for at least 2 hours, up to 4 hours is even better.

How to roll pie crust dough
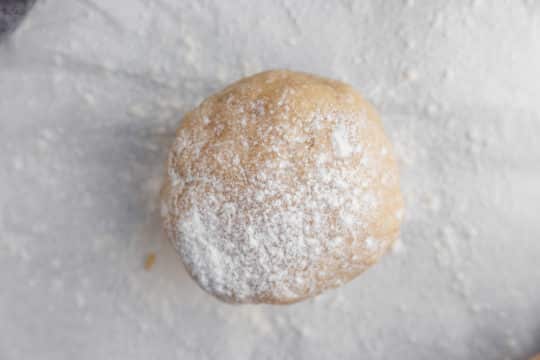
I like to roll my dough out on lightly floured wax paper. This floured surface will allow you to simply lift the wax paper up and flip the dough onto the pie dish. It makes it very easy and you often avoid ripped crust! I’ve found that slightly wetting the countertop before laying the wax paper down, then flouring the wax paper surface creates the best area for rolling. The water helps hold the wax paper down, and the flour will keep the dough from attaching to the wax paper.
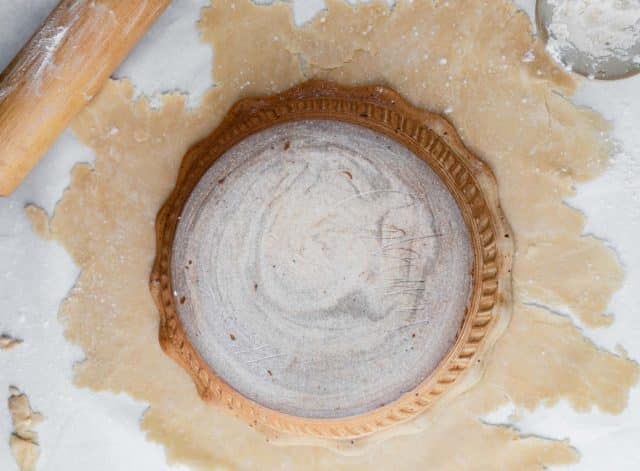
- Roll dough. Using a rolling pin, start rolling from the center and work your way out. I love this marble rolling pin. Marble is cooler to touch, which helps to keep the pie dough cool. Sprinkle a little flour over the top of the dough and on your rolling pin if the dough is too moist and sticks to your rolling pin. Roll out the dough to fit in your pie plate. For example, if you’re using a 10-inch pie plate, roll out the dough about 12 inches in diameter to allow for enough dough to go up the sides of the pie plate. Slide your wax paper over to your pie dish and in one quick motion flip the crust onto the dish. You can also lay the pie dish over the dough and then flip. Press in gently.
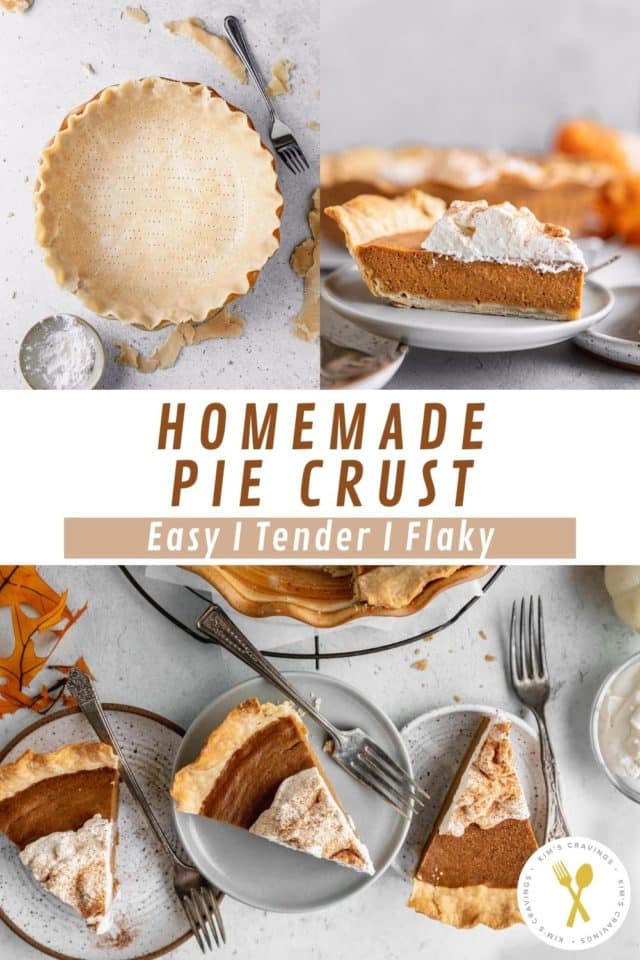
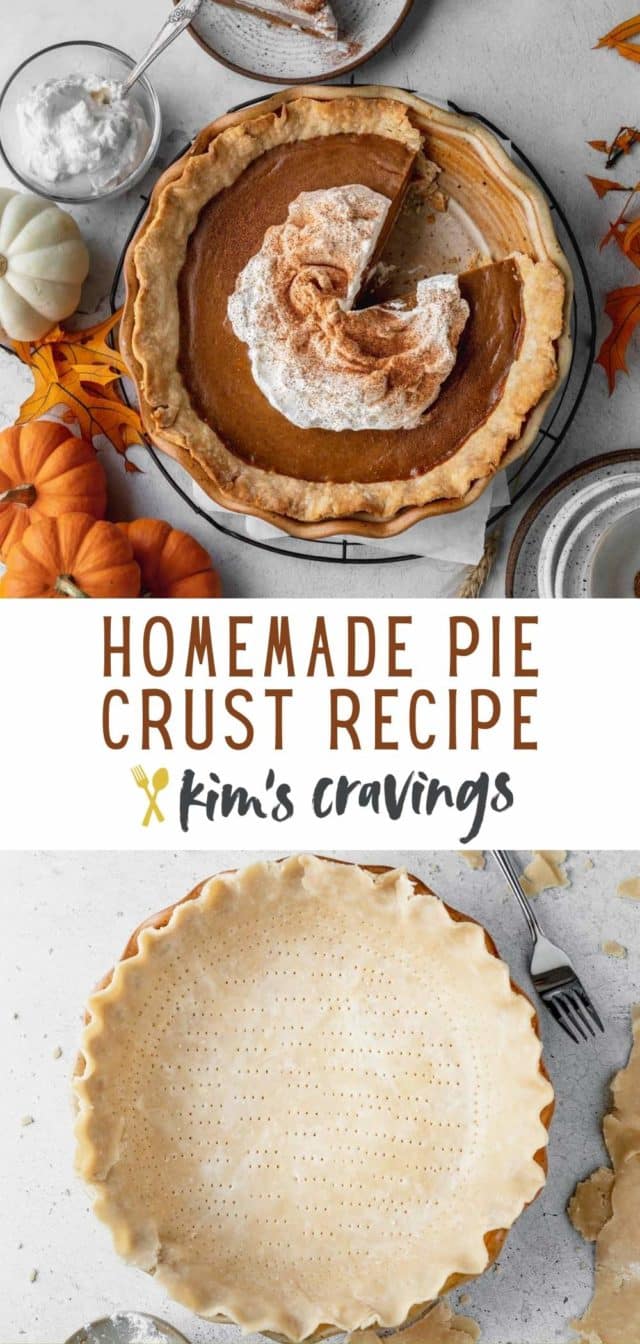
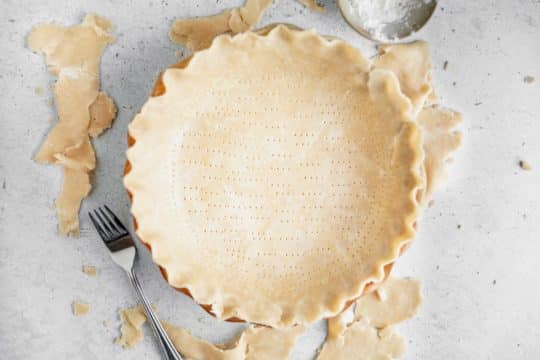
- Trim and flute. With a small, sharp knife, trim the extra overhang of crust and discard. Crimp the edges with a fork or flute the edges with your fingers, if desired. Use a fork to poke holes in the crust if the type of pie you are making requires a pre-baked crust. Proceed with the pie per your pie recipe instructions.

How to blind bake pie crust
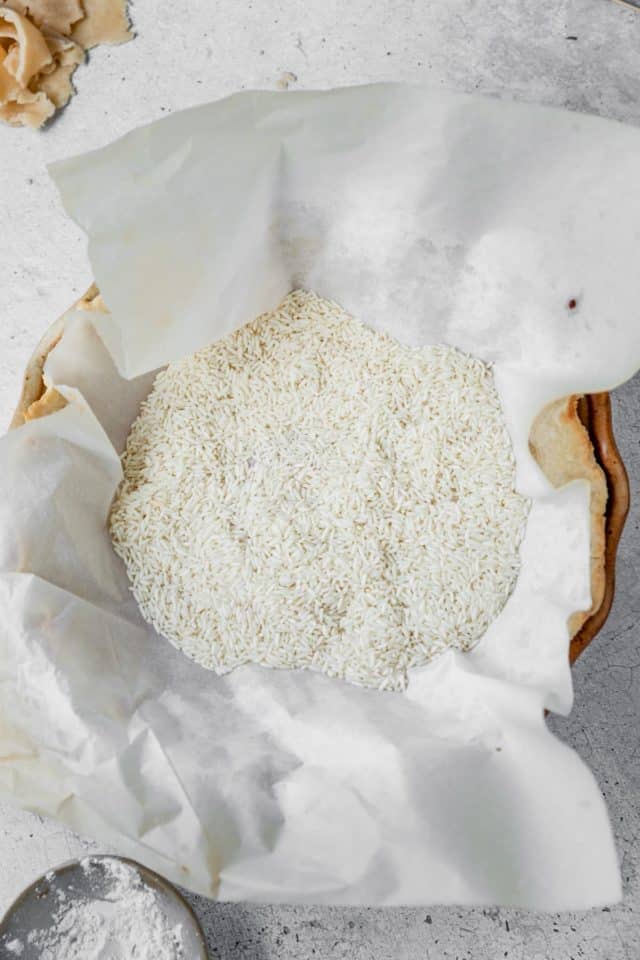
If your pie recipe requires pre-baking (blind baking) pie crust in the oven, typically needed for pies that have an especially wet filling, you’ll need to blind bake using pie weights, dried beans or dried rice. Without the pie crust being weighted down, the pie dough will puff up, then shrink. Place parchment or aluminum foil over the crust, then fill the empty pie crust with the weights, beans or rice. I really like using these pie weights. They are inexpensive and work great. You’ll need two packs for a standard pie crust recipe.
how to prevent burning pie crust
The edge of the pie crust is raised up and exposed to the heat while the pie is baking. It often browns before the center of the pie is done cooking, so you’ll want to protect it with a shield. I recommend placing a pie crust shield on the pie about halfway through the bake time. I like this adjustable silicone pie crust shield that’s easy to adjust. You could also cover the pie with a piece of aluminum foil. Then, cut a circle in the center, so the center of the pie is exposed.
Recipe tips for success
A few helpful tips to ensure your homemade pie crust is perfect every time you make it!
- Cold Ingredients. My top tip is to always use cold shortening and ice cold water when making pie crust. After you bring the dough together you’ll see little spots of shortening scattered throughout the dough. That’s a good thing! These little chunks are what make the dough flaky during the baking process.
- Shortening. I always use Crisco All-Vegetable Shortening. I prefer to use the baking sticks because they are easy to use and are packaged in a no-mess, measurable wrapper. The measurable wrapper helps a ton with this crust because the shortening needs to stay as cold as possible. Slicing off what you need instead of scooping and measuring keeps it cold.
- Avoid overworking the dough. Don’t work or handle the dough too much. Gluten will start forming in the flour and the ingredients will become warm. This can result in a tough pie crust.
- Rolling out the dough. I’ve found that slightly wetting the countertop before laying down your wax paper, then flouring the wax paper surface, creates the best area for rolling. The water helps hold the wax paper down, and the flour will keep the dough from attaching to the wax paper.
- Glass pie dishes. I recommend using a glass pie dish to bake your pie crust, as opposed to ceramic or metal pie dishes. A glass pie plate will conduct heat evenly, which allows the bottom of the crust to bake thoroughly. Also, you can easily see when the sides and bottom of the crust have browned. This is my favorite inexpensive pie dish.

Make Ahead & Freezing
Prepare the pie dough through step 3 and refrigerate for up to 3 days or freeze the ball of dough for up to 3 months. Thaw overnight in the refrigerator before using in your pie recipe.
Ways to use this homemade pie crust
Fill this pie crust up with wonderful homemade pie filling for an amazing dessert everyone will love! Here are some of my favorite pie recipes that would pair beautifully with this delicious crust!
If you try this homemade pie crust recipe, let me know! Leave a comment and if your family loves it as much as mine does, be sure to give it a five star ⭐️ rating! Also, tag @kimscravings on Instagram with a picture of your creation. It’s so fun to see what you’re cooking! Be sure to subscribe to our mailing list to receive more healthy delicious recipes straight to your inbox.

Homemade Pie Crust
Ingredients
- 1 1/2 cups all-purpose flour
- 1/2 teaspoon salt**
- 1/2 cup shortening, chilled
- 4 to 5 tablespoons water, very cold (I use ice water)
EMAIL ME THE RECIPE!
Instructions
- In a medium bowl, whisk together the flour and salt. Add the shortening and mix with a pastry cutter (the one I own) or fork until the dough is crumbly.

- Add in 3 tablespoons of very cold water and mix with a fork (not the pastry blender, if you used it on the previous step) until the dough is moist and comes together. Add more cold water a few drops at a time, if needed. Do not add any more water than you need to. Stop adding water when the dough begins to form large clumps. Be careful not to add too much water or the dough will be sticky and difficult to roll out.
- Gather the dough into a ball and wrap in plastic wrap. Chill the dough for at least 2 hours, up to 4 hours is even better.
- When you're ready to make your pie, lay out wax paper and sprinkle a bit of flour over it to roll out the dough on. This will allow you to simply lift the wax paper up and flip it onto the pie dish. It makes it very easy and you often avoid ripped crust! I’ve found that slightly wetting the countertop before laying the wax paper down, then flouring the wax paper surface creates the best area for rolling. The water helps hold the wax paper down, and the flour will keep the dough from attaching to the wax paper.
- Using a rolling pin, start rolling from the center and work your way out. Sprinkle a little flour over the top of the dough and on your rolling pin if the dough is too moist and sticks to your rolling pin. Roll out the dough to fit in your pie plate. For example, if you're using a 10-inch pie plate, roll out the dough about 12 inches in diameter to allow for enough dough to go up the sides of the pie plate. Slide your wax paper over to your pie dish and in one quick motion flip the crust onto the dish. You can also lay the pie dish over the dough and then flip. Press in gently.

- With a small and sharp knife, trim the extra overhang of crust and discard. Crimp the edges with a fork or flute the edges with your fingers, if desired. Use a fork to poke holes in the crust if the type of pie you are making requires a pre-baked crust. Proceed with the pie per your pie recipe instructions.


Notes
Did you make this recipe?
Tag @kimscravings on Instagram and be sure to subscribe to our mailing list to receive more healthy and delicious recipes straight to your inbox!
I am 75 years old and I have used this recipe my whole life. This is the recipe my grandma (mom’s mom) used. She would be over 120 years old so it is a very old recipe. I have never saw this recipe before so I was shocked when I saw it.
That’s so crazy! This is a family recipe too that’s been passed down for years and years!