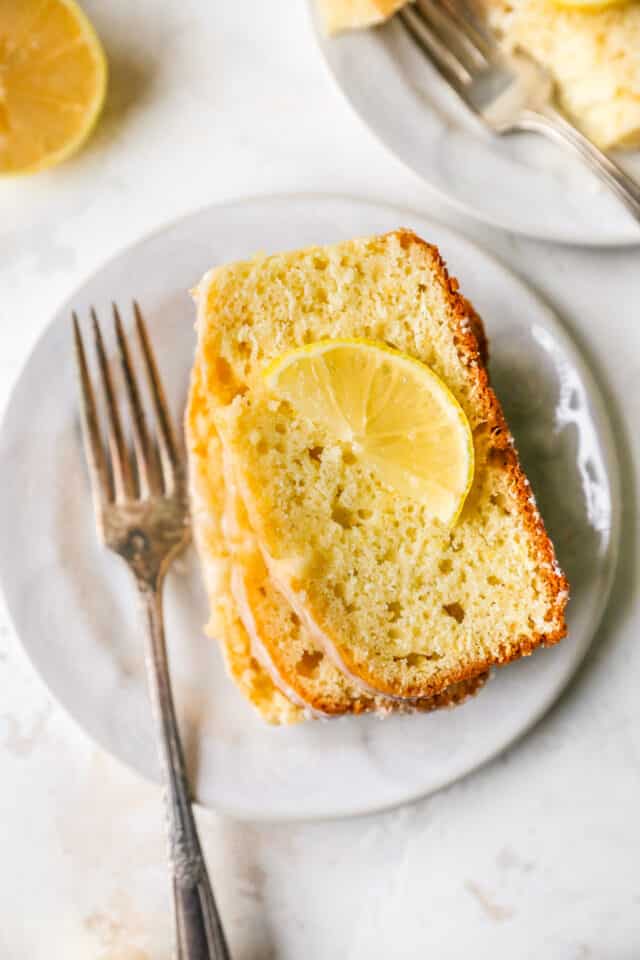
Easy Lemon Pound Cake
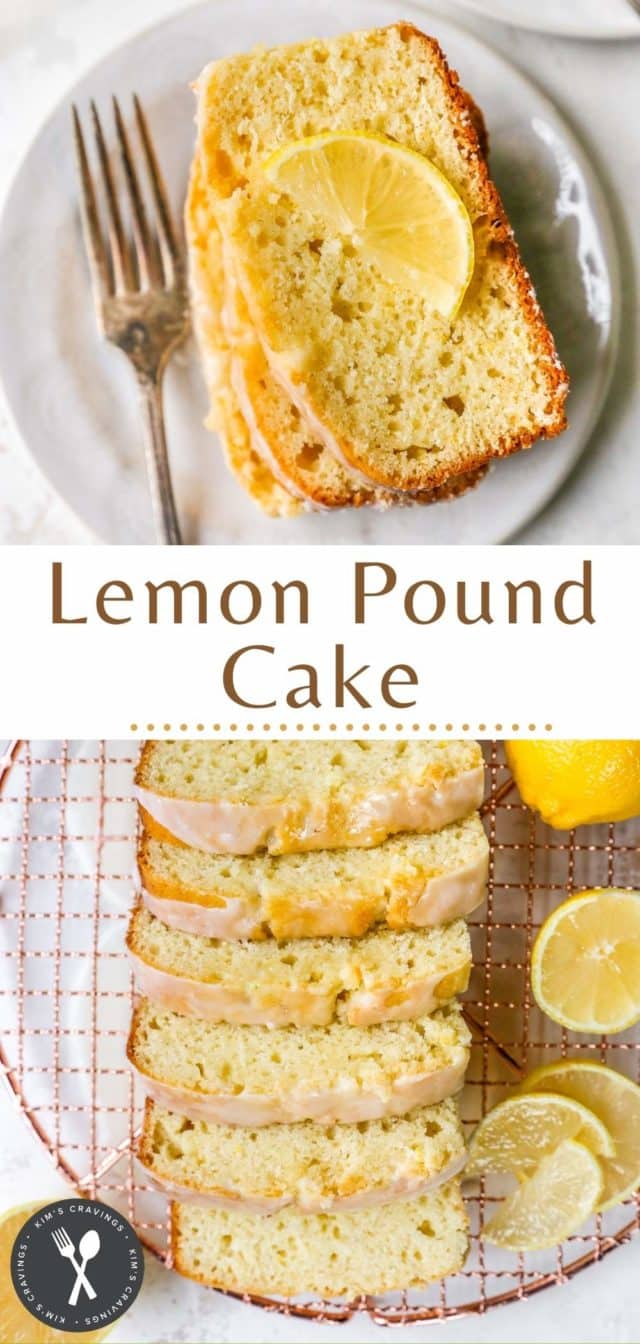
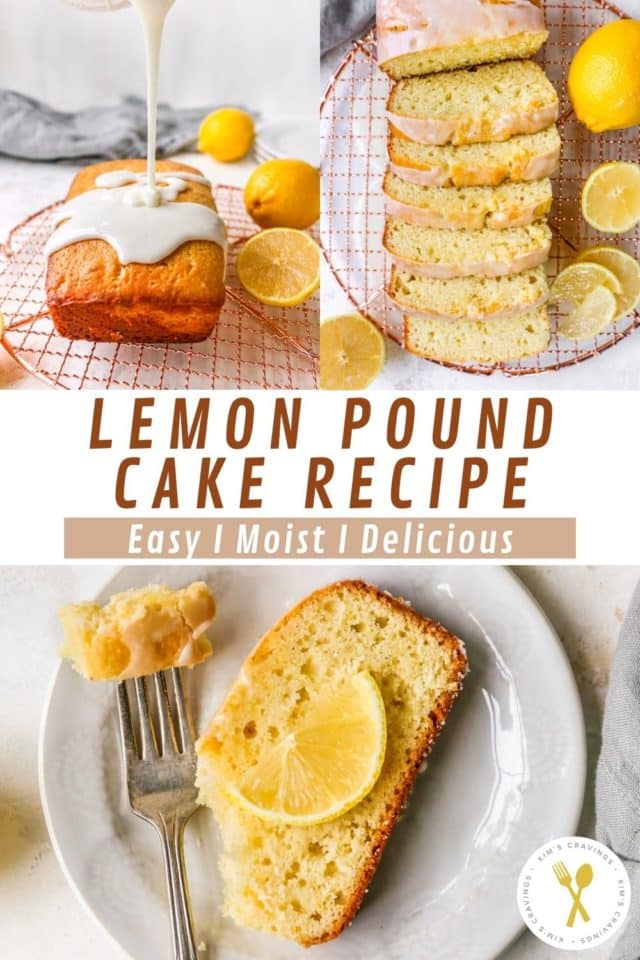
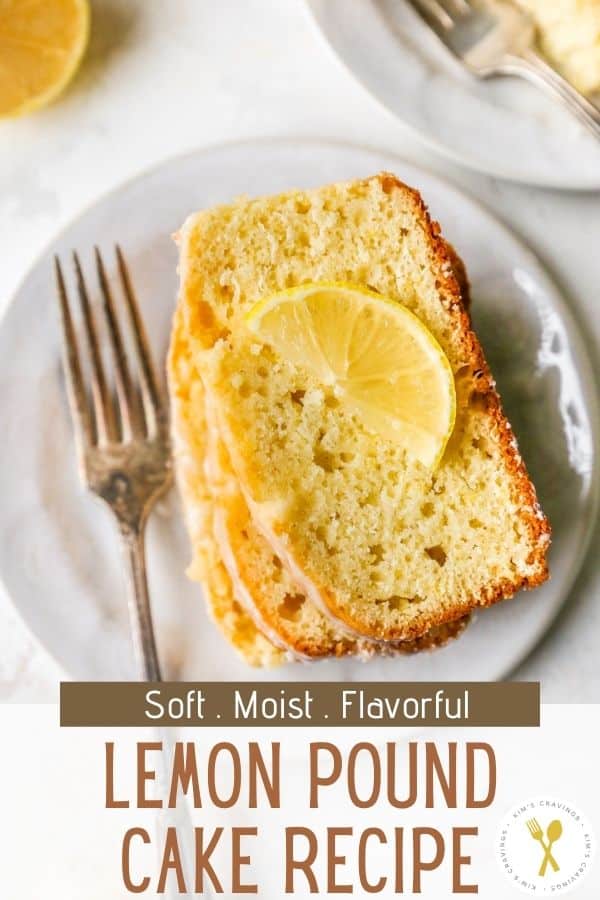
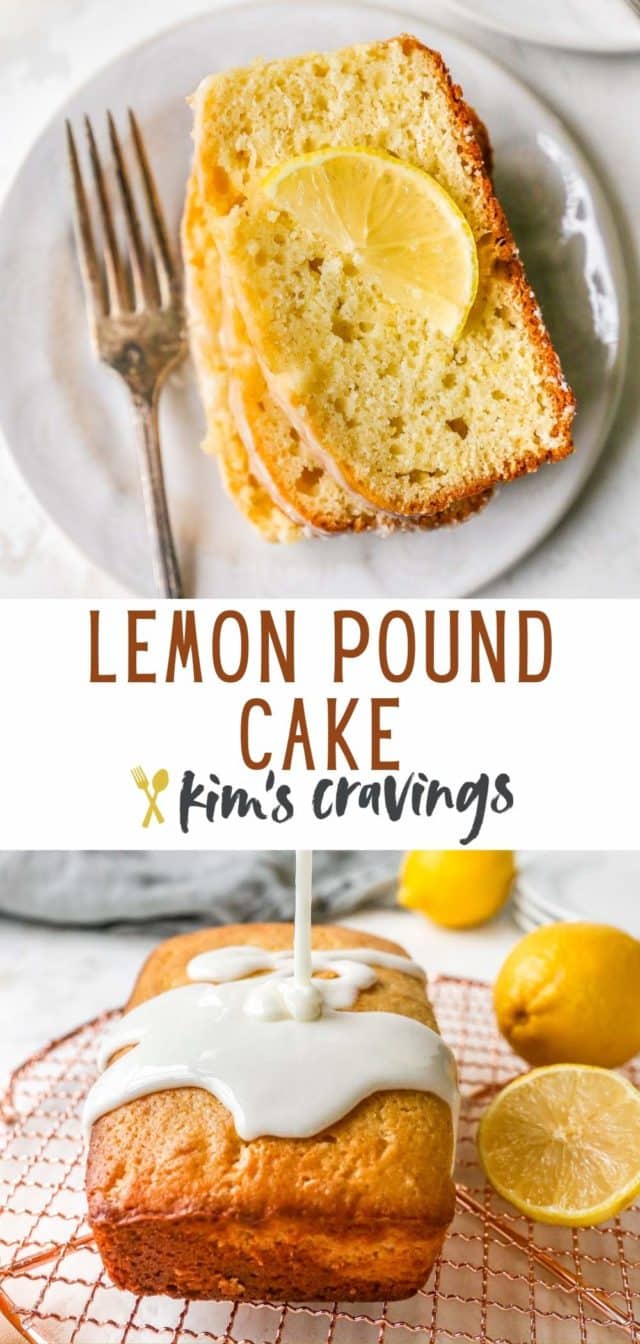
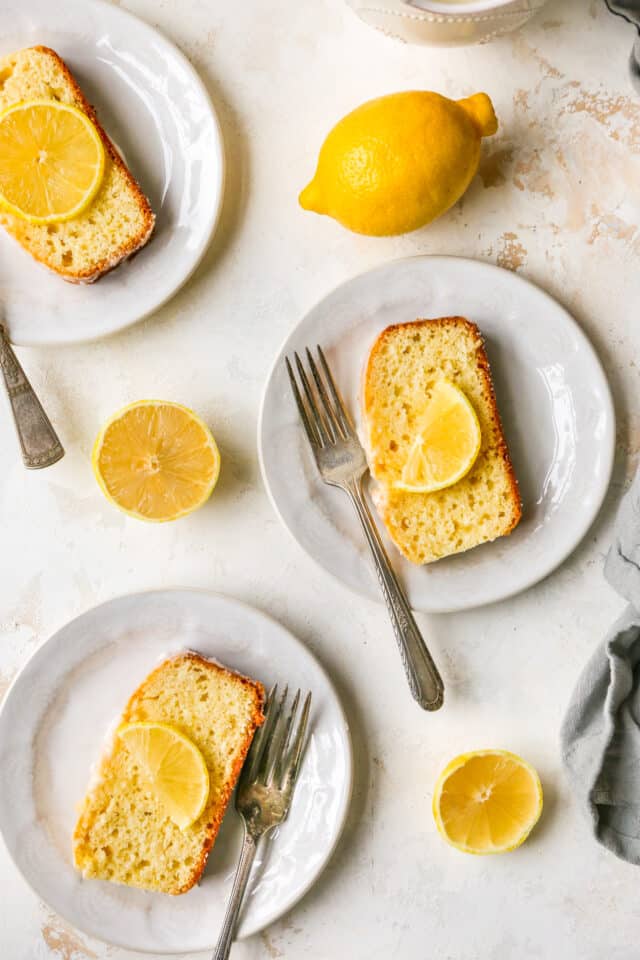
Lemon lovers, this easy Lemon Pound Cake is for you! Add this delicious citrus recipe to your springtime dessert menu. It’s SO scrumptious and perfectly soft and moist with a golden exterior and a tangy lemon glaze. Your families will LOVE this simple, yet elegant loaf that’s perfect for a birthday, Easter, or any other special occasion.
The time has arrived for all things lemon and this Lemon Pound Cake is a must try! I don’t know what it is about springtime and the approach of Easter, but this time of year always gives me a hankering for lemon recipes of any kind, and particularly desserts. And this year, that means a delectable, from-scratch, but oh so easy lemon pound cake recipe!
When there’s a special celebration, it’s inevitable that someone in my family requests a lemon cake… usually my son. I’m happy to oblige because this is one of my very favorite desserts! The cake has the most perfect lemon flavor and the tangy lemon glaze really makes this treat beyond incredible! I love it even more than classic pound cake!
This was great! I didn’t have buttermilk and it was still delicious. Big hit with the family!
— Olivia
Why you will love this recipe
- Major lemon flavor. To put the lemon in this lemon loaf cake, we’re adding lemon zest, freshly-squeezed lemon juice, and a splash of pure lemon extract. And then, of course, there had to be a puckery-sweet glaze to put everything over the lemon-lovin’ top, which was as simple as stirring more fresh lemon juice into powdered sugar.
- So easy. It’s hard to beat a good pound cake, but sometimes it’s not so simple to create one. Well, this recipe is SUPER easy! Landen, my teenage son, loves this so much that he has made the complete recipe himself!
- Perfectly tender & moist. This classic lemon pound cake gets its soft, dense texture and moist crumb from a combo of butter, buttermilk, and four eggs. It’s perfectly sweet with a wonderfully crisp, golden crust. And the added touch of a lemon glaze topping, is simply divine.
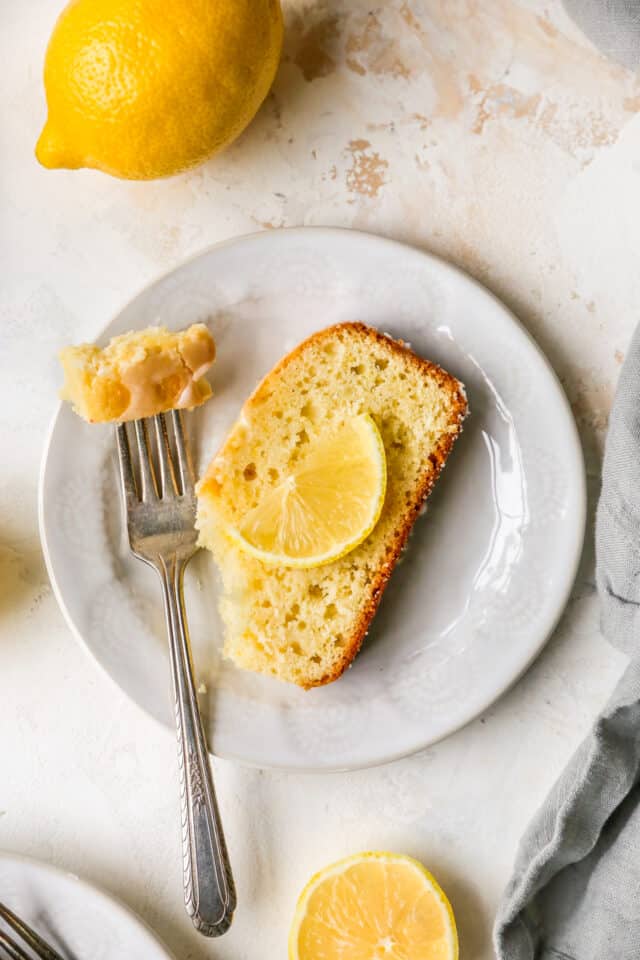
- Versatile. Enjoy a slice as a snack, for breakfast, or dessert! Also, feel free to omit the icing drizzle. My daughter, Madelyn, who’s not the biggest fan of lemon desserts, prefers this without the glaze.
- Great for any occasion. This sweet treat is the perfect antidote for any springtime lemon cravings. It will definitely be on my Easter and Mother’s Day menus! You could even skip the glaze and deck this out in red, white, and blue — with whipped cream and fresh berries — for Memorial Day or the Fourth of July. It’s definitely a hit at any cookout, pool party or BBQ all summer long!
Ingredients needed
This lemon loaf has the perfect soft, tender crumb, plus sweet, slightly tart flavor from both fresh lemon juice and lemon zest. Here are the ingredients you’ll need:
- Butter. I prefer to use unsalted butter in my desserts and then add in extra salt. If you only have salted butter available, simply leave out the 1 teaspoon of salt this recipe includes.
- Sugar. Regular granulated sugar is best, so as not to overwhelm the lemon flavor.
- Eggs. You’ll need four eggs to ensure the two lemon loaves bake properly.
- Lemon zest. The lemon zest is very important to the flavoring of this pound cake, so don’t skip it. Here’s the inexpensive zester I use.
- Flour. This lemon cake calls for regular flour. For the best texture, I do not recommend using any other flour other than all-purpose flour.
- Baking essentials. We’re using baking powder, baking soda and salt to ensure this bakes up with the perfect rise and texture.
- Lemon juice. I recommend freshly squeezed lemon juice for this recipe. Lemon concentrate, is too potent and may have an overly sour taste.
- Buttermilk. Adds moisture and richness.
- Lemon extract. For even more bright lemon flavor!
- Glaze. Powdered sugar and fresh lemon juice is all you need for a bright and flavorful glaze.

How to make this recipe
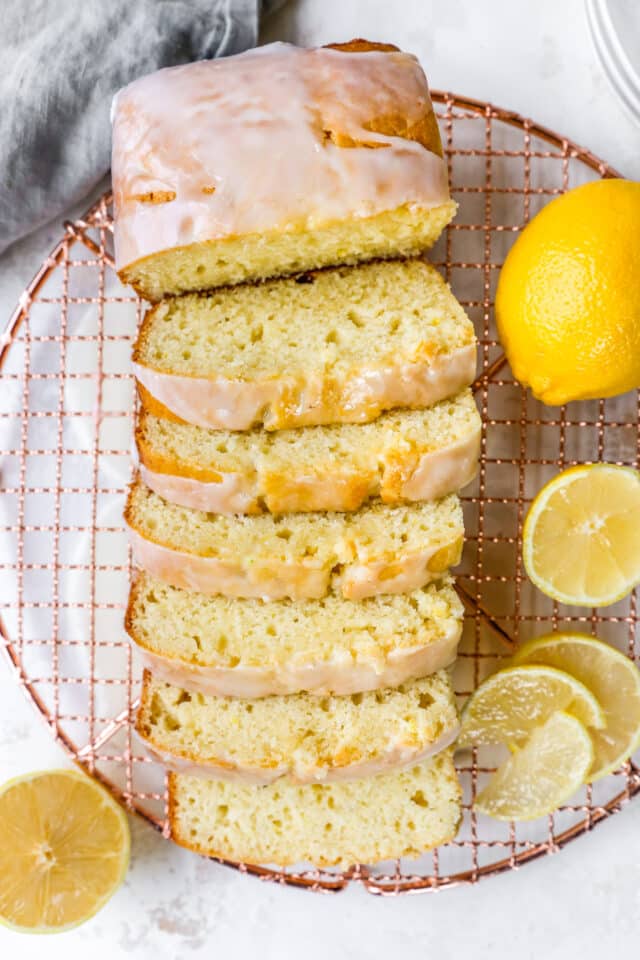
This recipe makes two loaves, so it’s the perfect dessert to serve a crowd. You could also freeze the extra one for later or give it to a friend! I recommend using either a hand or stand electric mixer, so that you can beat the butter and sugar together until the mixture is light and fluffy. I love this hand mixer or this KitchenAid mixer, which is well worth the investment!
- Prep. Start the recipe by preheating the oven and preparing your 8×4-inch loaf pans.
- Wet ingredients. In the bowl of a stand mixer, cream the butter and sugar until light and fluffy. Add in the eggs one at a time and the lemon zest too.
- Dry ingredients. In a separate medium bowl, whisk the flour, baking powder, baking soda, and salt.
- Stir together all ingredients. In another bowl, combine the lemon juice, buttermilk, and lemon extract. Gradually add the flour mixture and buttermilk mixture alternatively to the batter, stirring as you go, beginning and ending with the flour. Scrape the sides of the bowl as needed.
- Bake. Divide and pour batter into each prepared loaf pan and bake for 45 minutes to 1 hour, until a toothpick comes out clean. My loaves were cooked completely in 50 minutes.
- Let cool. Allow the lemon cakes to cool for at least 10 minutes and then remove them from the pans. Place them on a wire rack set over a tray or sheet pan.
- Make the glaze. Mix the glaze and while the cakes are still slightly warm, pour glaze over the tops and allow it to drizzle down the sides. Cool completely and then slice and enjoy.


Expert tips
This lemon pound cake is really very easy to whip up, but here are a few tips to make sure your cake is perfect every time!
Buttermilk for tenderness
You can always count on me to make little improvements to any recipe, and this one is no exception. I swapped out regular milk for thick, tangy buttermilk, the cultured kind you can find in your regular grocery store. I love the stuff – it makes such a difference in so many recipes. Buttermilk is acidic, and actually tenderizes cakes, but also adds lots of flavor.
If you don’t have buttermilk, here’s how to make your own buttermilk.
- Add a tablespoon of fresh lemon juice to a cup of whole milk and another variety of milk. Let sit for 15 minutes before using. While this doesn’t result in the thick, cultured-style buttermilk you find at the grocery store, it works in a pinch.
Use a premium butter
- I highly recommend a premium, super high-quality butter, like Plugrá or Kerrygold. These are great for optimal baking performance, with the right balance of moisture and fat for fluffy rising cakes, muffins and breads.
Use room temperature ingredients
- Using room temperature dairy products and eggs when baking gives them the best texture and ensures you’ll get that light, airy, fluffy texture. The butter will also whip together with the sugar more easily.
- Sit out: Allow the butter, eggs and buttermilk to sit out on the counter for about 1-2 hours before beginning your recipe. The amount of time depends on the weather and how cool you keep your kitchen. Here’s how to soften butter quickly, if you forget to sit it out. And here’s more information on how to bring dairy to room temperature.
- Test it: To test the butter, poke it with your finger. Your finger should make an indent without sinking or sliding down into the butter. The butter should not be shiny or greasy. It will be cool to touch, not warm.
How to measure flour properly
- When measuring flour, use the “spoon & level” method. Do not scoop the flour out of the container/bag with your measuring cup. Scoop the flour and you could end up with 150% of the correct measurement. Rather, using a spoon, scoop the flour into the measuring cup. Do not pack the flour down and do not tap the measuring cup– both cause the flour to settle in the cup. After you’ve spooned the flour into the measuring cup, use the back of a knife to level off the top of the measuring cup.
Use fresh baking powder & baking soda
- Shake up the baking powder and baking soda container a bit. Using a measuring spoon, lightly scoop out of the container. Use a knife to level it off. Baking powder and baking soda expire after 6 months, though I find they begin losing strength after 3 months. Write the date of opening on the container so you know when to replace.
Don’t overmix ingredients
- Once you start adding in the flour, you don’t want to overmix the batter. This may cause baked goods to become too dense and have a tough texture. Mix just until there are no more pockets of flour. And maybe a few more seconds to rid any big lumps.
Grease the pans properly
- Some people swear by a no-stick baking spray that contains flour, but I think the safest way to ensure that your pound cake will release from the pan is to very generously grease and flour the pan. Once my pound cakes cooled for 10 minutes, I ran a butter knife around the edges and then keeping one hand over the top of the cake, I turned the pan over and let the cake gently fall out into my hand. My pound cake came out of the pan without a problem.

Frequently asked questions
This pound cake stays plenty of moist because of the ratio of ingredients and the buttermilk. When storing leftovers, we recommend storing at room temperature with an airtight cover. Refrigerating a pound cake does extend its shelf life, but it also distorts the fresh texture and flavor of your cake. An average pound cake will remain fresh and delicious for about 3 to 4 days at room temperature.
If it’s dry, you may have over-baked it. It can also be too dry if you added too much flour (or not enough butter or sugar). Read the tip above about how to properly measure flour.
After removing from the oven, place the loaf on a wire rack, and let cool for at least 10 minutes in the pan. This allows the cake to become firm enough to remove from the pan without breaking apart. Just don’t cool in the pan too long or it may result in the cake becoming damp and sticking to the pan.
Storage recommendations
- Storing leftovers. Once the glaze has completely hardened, cover in plastic wrap or place in an airtight container and store for up to 3 days at room temperature or up to 1 week in the refrigerator.
- Freezing. This freezes beautifully for up to 3 months! Once it has completely cooled, wrap the entire loaf in aluminum foil and then place it in a freezer-safe baggie. When you’re ready to enjoy, allow it to thaw overnight in the refrigerator, then bring to room temperature before adding the glaze and serving.
More favorite dessert recipes
Looking for more spring dessert ideas? Give these favs a try:
If you try this recipe, let me know! Leave a comment and if your family loves it as much as mine does, be sure to give it a five star ⭐️ rating! Also, tag @kimscravings on Instagram with a picture of your creation. Be sure to subscribe to our mailing list to receive more healthy delicious recipes straight to your inbox.

Easy Lemon Pound Cake
Ingredients
- 1 cup (8 ounces, 2 sticks) unsalted butter, at room temperature
- 2 cups granulated sugar
- 4 large eggs, at room temperature
- 1/3 cup grated lemon zest, 3 to 4 large lemons*
- 3 cups all-purpose flour
- 1/2 teaspoon baking powder
- 1/2 teaspoon baking soda
- 1 teaspoon salt
- 1/4 cup freshly squeezed lemon juice
- 3/4 cup buttermilk, at room temperature
- 1 teaspoon lemon extract
For the glaze:
- 2 cups confectioners' sugar, sifted
- 3 1/2 tablespoons freshly squeezed lemon juice
Instructions
- Preheat the oven to 350 degrees F. Grease and flour 2 (8 1/2 by 4 1/4 by 2 1/2-inch) loaf pans. You may also line the bottom with parchment paper, if desired.
- Cream the butter and granulated sugar in the bowl of an electric mixer fitted with the paddle attachment, until light and fluffy, about 5 minutes. With the mixer on medium speed, add the eggs, 1 at a time, and the lemon zest.
- In a separate bowl, sift together the flour, baking powder, baking soda, and salt. In another bowl, combine lemon juice, buttermilk, and lemon extract. Add the flour and buttermilk mixtures alternately to the batter, stirring as you go, beginning and ending with the flour.
- Divide the batter evenly between the pans, smooth the tops, and bake for 45 minutes to 1 hour, until a cake tester comes out clean. Mine took 50 minutes to completely cook.
- When the cakes are done, allow them to cool for 10 minutes. Remove the cakes from the pans and set them on a rack set over a tray or sheet pan.
- For the glaze, combine the confectioners’ sugar and the lemon juice in a bowl, mixing well until smooth. While cakes are still slightly warm, pour glaze over the tops of the cakes and allow the glaze to drizzle down the sides. Allow cakes to cool completely before slicing.
- Cover and store leftover cake at room temperature for up to 3 days or up to 1 week in the refrigerator.
Notes
Did you make this recipe?
Tag @kimscravings on Instagram and be sure to subscribe to our mailing list to receive more healthy and delicious recipes straight to your inbox!
Hi
this lemon loaf, was delicious.
I am making it again today.
Simple yet delicious lemon cake recipe.

HI,
This cake was really delicious!
thank you for the recipe.
I will be making it again.
So glad to hear that! Thanks for your comment!
This was great! I didn’t have buttermilk and it was still delicious. Big hit with the family ✨
Yay! So happy to hear!
I have made this cake previously and liked it so much. I am making it again but, noticed I bought the wrong Irish butter I got salted and not unsalted. Will that make a big difference?
Thank you for your kind words! It will work fine, but I would reduce the salt called for in the recipe to just 1/2 teaspoon. Enjoy!
I have made this too. As I always keep salted butter on hand, and never unsalted, any recipe I make with salted butter automatically gets salt called for omitted.
This recipe turned out amazing. I plan on substituting orange for lemon this year and making orange curd to use as a spread this time around. I will let you know how it turns out.
Glad you like it!! I love the idea of using orange! Yum!
I loved how this lemon pound cake turned out!! I made it for a labor day barbecue and everyone just loved it. I followed the recipe as written but did not have buttermilk. As a substitute, I used a cup of milk and tablespoon of lemon juice. The texture was not as dense as a traditional pound cake but on the cakey side which I love even more. I was glad that all the lemon ingredients did not overpower this amazing cake. Do not pass up the icing! It was a little too thick but all I needed to do was to add a tablespoon of heavy cream. If you are in the mood for something sweet and refreshing, go make this cake ASAP!
So happy to hear that everyone enjoyed! Thanks so much for taking time to leave feedback!
This is so good!! My family loved it!!
Just made 2 loafs this afternoon..light and absolutely delicious..tastes as good as it looks..I used 1 single container of PLAIN Greek yogurt adding enough milk to equal the 3/4 cup instead of buttermilk..always my go to instead of buttermilk..Evie D.
Yay! So happy to hear that you enjoyed. Thanks for leaving feedback of exactly what you did!
Can I half this to fot one loaf pan? Or do you have a recipe for one loaf pan?
I haven’t tried halfing it, but I would think it would work. Let us know if you give it a try!
I made this over the weekend and it was absolutely DIVINE. It was perfectly moist, great crumb, great flavor, just the right amount of sweetness. I omitted the glaze as didn’t have powdered sugar on hand.
Can you use a bunt pan
I’m sorry, Ingrid, I’m not sure. It fits 2 loaf pans and maybe you could do some googling to see if that would work in a bundt pan. Please let me know if you try it.
Hi! I’m sure you’ve already made this already, but I figured I’d reply for anyone in the future who makes this. Yes you can make it in a bundt pan 🙂 it should fit both loaves just right, and the cooking time should be about the same. Halfway through, cover with foil so it doesn’t get too brown, and then remove near the last 5 minutes. Hope this helps 🙂
Thanks, Elizabeth!
I made this cake last night and it turned out so delicious, moist and soft!! Will definitely be making this regularly.
This is one of the best pound cakes ever! It has the perfect flavor and texture! I’ve already made it twice in a matter of a month!
Thank you so much for developing this recipe! I’ve never made a cake, but this recipe sounded delicious. Your instructions were super easy and it was a major hit with my husband and friends! I was so proud of myself! Thank you again!
So good! My 9 year old would of happily eaten the whole loaf. Super simple to make. I left off the glaze and I definitely didn’t miss it!
This is absolutely incredible! Followed to a T! Made it yesterday and one loaf is already gone!
What a great recipe! Made this for a family get together and everyone loved it. Our two picky eaters even went back for a second slice. I will definitely be making this again.
Just ate the last piece! Love that this makes two loaves. I kept one and gave one for hostess gift. LOVED it. Tasted better the 2nd day! Thanks so much!
Is it okay to substitute almond milk for regular milk?
Yes, that will work.
We love lemon cake in my house, this is such a perfect Spring dessert, and I can’t wait to make it.
I love lemon desserts especially for spring! They’re like a little ray of sunshine to brighten your day. Looks so moist and perfect.
Is it okay to substitute almond milk for regular milk?
I’m answering my own question 🤪 I read too fast and didn’t realize it was buttermilk. I have now gone online and found oodles of recipes to turn almond milk into buttermilk by adding cider! Who knew? I can’t wait to try this recipe, it sounds so good and reading everyone’s suggestions have been helpful too. 🙂