No-Bake Cheesecake Cups
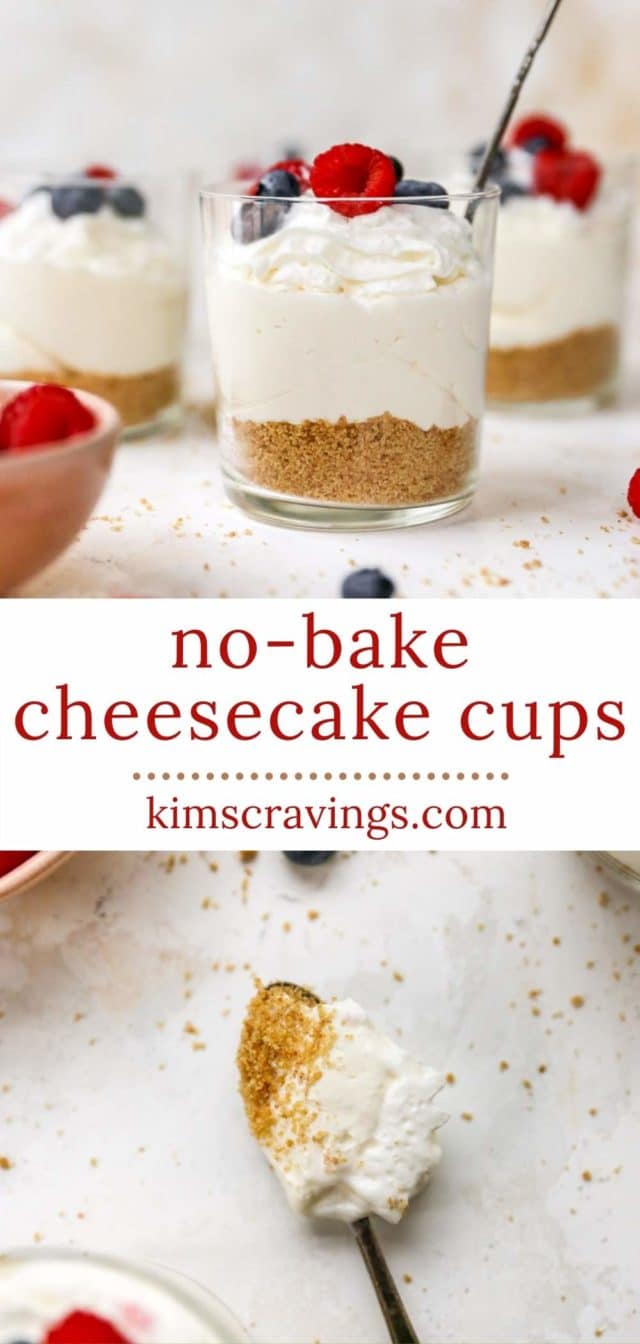


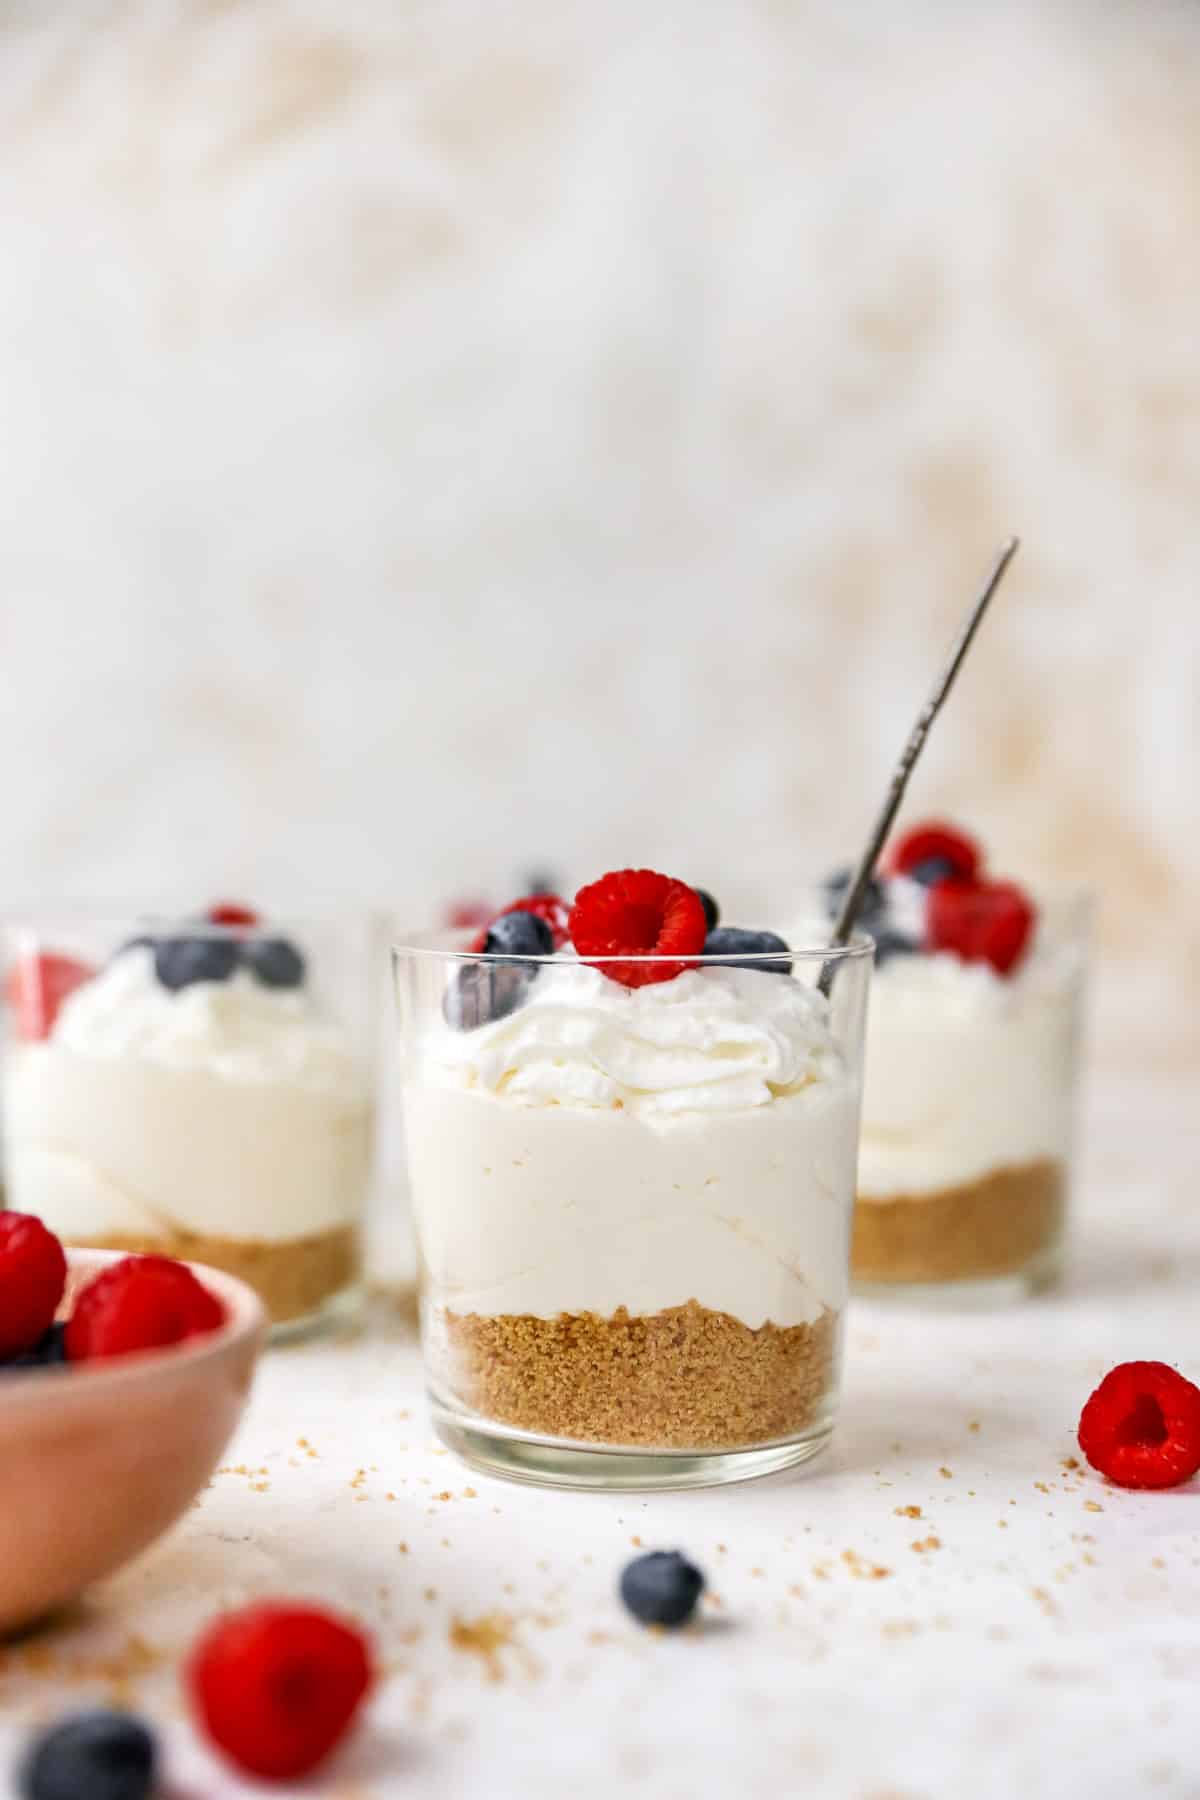
No-Bake Cheesecake Cups are an easy and delicious sweet treat for just about any occasion. They’re fun to make, and even more fun to eat! Light and fluffy cheesecake filling is layered with sweet graham cracker crust and topped with fresh berries in small glasses (or jars) to create a perfectly portioned, luscious, decadent dessert that everyone loves!
EMAIL ME THE RECIPE!
No-Bake Cheesecake Cups made for a great way to serve dessert at a recent baby shower that I hosted. Having the dessert already portioned into individual glasses was perfect for an easy grab-and-go option. My plan was to have the dessert cups made ahead of time, so I could easily set the mini cheesecakes out to let guests serve themselves as they wanted. It couldn’t have been a better idea! They were a huge hit!
Made these 2 times within a week! Not a fan of cheesecake but my family loves them, so I made it. They said they were amazing. Super simple to make, 6 cups were gone within 2-3 days!
— Cel
Reasons you will love this recipe
- Cute & perfectly portioned. Mini desserts are absolutely adorable and come with built in portion control!
- Simple & easy to make. The ingredient list is short and sweet and these require very little hands-on time.
- So delicious. Words cannot describe how incredibly delicious these turned out. I do have to warn you, though, once you dig your spoon into all the smooth, creamy, sweet layers, one serving might just not be enough!
- Versatile. These can be topped with a variety of toppings or served plain. They are wonderful to serve for potlucks, picnics, holidays or any other occasion.

Ingredients needed
This incredible no-bake cheesecake recipe is made with just 4 basic ingredients, plus the crust and topping. Here’s what you’ll need to make it:
- Crust. For the crust, you just need graham cracker crumbs, butter and sugar! And it’s so tasty!
- Heavy whipping cream. Gives the cheesecake a lovely texture and rich flavor.
- Cream cheese. Make sure you use a block of real cream cheese, not cream cheese spread. We like Philadelphia’s cream cheese best. You will want the cream cheese softened to room temperature, so it’s easy to mix with the other ingredients.
- Sugar. Just 4 tablespoons of granulated sugar adds the perfect sweetness to the filling.
- Vanilla extract. For an extra boost of flavor!
- Topping. We love to add a topping of whipped cream, more graham cracker crumbs and fresh berries. See more topping options below.
How to make this recipe
Not only is the ingredient list simple, but making these cheesecake cups is a cinch! Here’s a quick rundown of the process:
- Crust. In a medium bowl, stir together the graham cracker crumbs, melted butter and sugar. Divide the mixture into the bottom of 4-6 small glasses, cups or jars. Use a spoon to press the crumbs down.
- Cream cheese filling. In a large bowl, using an electric mixer, beat the heavy whipping cream until light and fluffy, and stiff peaks form. In a separate bowl, beat the cream cheese with sugar and vanilla until smooth. Now, use a large spoon to fold the whipping cream into the cream cheese mixture.


- Assemble the cheesecake cups. Transfer the filling mixture into a piping bag or a large ziplock bag, snip the corner to make a thumb-size hole, and pipe the filling on top of the crust, into the cups. Once cups are filled, chill in the refrigerator for at least two hours or overnight, if you have the time.
- Add topping & serve. Before serving, top with whipped cream, graham cracker crumbs and fresh fruit. Enjoy!


Expert tips
Even though this cheesecake cups recipe really could not be easier, here are some tips, so that they turn out incredible every time!
- Be sure that your cream cheese is softened, but not warm.
- The heavy whipping cream should be really cold, so it gets nice and fluffy when you beat it. Keep it in the fridge until right when you are ready to use it.
- In addition to the vanilla extract, you can also add a drop of almond extract, or finely grated lemon or orange zest for a different taste.
- When folding the whipping cream into the cheesecake mixture, be sure to do it gently, so you don’t lose too much air. You want your cheesecake batter to be light, airy and creamy.
- For best results, it’s important to allow time for these to chill. The filling will thicken and firm up a bit as it chills. We recommend making these the night before serving, or at least 4-6 hours in advance of serving.
- Wait to add the optional toppings until right before serving.
Frequently asked questions
This is definitely a personal preference. The key difference between baked and no-bake cheesecake is the texture. Baked cheesecakes have a more dense, thick, creamy texture, whereas no-bake cheesecake is fluffy, airy and smooth. Both are delicious in their own way.
We always use Philadelphia cream cheese for any recipe calling for cream cheese. However, ‘Taste of Home’ did a cream cheese comparison and Prairie Farms cream cheese ranked best for no-bake cheesecake.
To get cheesecake filling to firm up, it needs to be refrigerated for a minimum of 6 to 8 hours. If you skip this step, the texture of the cheesecake will be more like mousse.
Variations
We absolutely love these as-is with raspberries or strawberries and blueberries, but there are lots of tasty ways to get creative with your mini cheesecakes. Here’s a few ideas:
- Oreo cheesecake cups. Try using Oreo cookies for the crust, instead of graham crackers, and then top with Oreo crumbles and cookies. Totally trying this soon! Yum!
- Toppings. Instead of fresh berries, you could use countless other topping ingredients. Cherry pie filling and strawberry sauce pairs perfectly with the tang of no-bake cheesecake. For all my chocolate lovers, how amazing would a chocolate drizzle or chocolate ganache with fresh strawberries taste?! You could even try festive sprinkles, chopped candied nuts, chocolate shavings or candy. Another idea is to add a drizzle of salted caramel sauce.
- Full size no-bake cheesecake. Want this same delicious cheesecake flavor in a full size cheesecake? Try one of my all-time favorite desserts – no-bake cherry cheesecake!
- Gluten free. For a gluten-free option, simply use gluten-free graham crackers for this recipe.

Make ahead options
Because of the necessary refrigeration time, no-bake cheesecake cups are the perfect dessert to prep in advance! You can make the cups up to 2 days in advance. Cover and refrigerate before adding the topping. You can also make just the crust up to 2 days ahead of time. Cover and refrigerate up to 2 days before adding the filling.
Storing leftovers
I’ve found the easiest way to store the cups is on a large baking sheet and then I can cover all of the cups with one large strip of plastic wrap. Leftovers will keep well, covered, in the refrigerator for up to about 3 days. I seriously doubt they will last that long, though!

If you’re looking for the perfect summer potluck dessert or holiday sweet treat, these easy cheesecake cups are the BEST and always a hit!
More favorite no-bake desserts
If you try this recipe, let me know! Leave a comment and if your family loves it as much as mine does, be sure to give it a five star ⭐️ rating! Also, tag @kimscravings on Instagram with a picture of your creation. Be sure to subscribe to our mailing list to receive more healthy delicious recipes straight to your inbox.

Cheesecake Cups
Ingredients
For the crust:
- 1/2 cup graham cracker crumbs
- 3 tablespoons melted butter
- 1 tablespoon sugar
For the filling:
- 1 cup heavy whipping cream
- 8 ounces cream cheese, softened
- 4 tablespoons sugar
- 1 teaspoon vanilla extract
- whipped cream, graham cracker crumbs and berries for garnish, if desired
Equipment
- electric hand-held or stand mixer
- 6-8 ounce clear glasses, jars or cups
EMAIL ME THE RECIPE!
Instructions
- Combine graham cracker crumbs, melted butter and 1 tablespoon sugar in a small bowl. Divide mixture into the bottom of 4-6 glasses, cups or small jars. Use the curved side of the spoon to gently push crumbs down. Set aside.
- In a large mixing bowl, beat heavy whipping cream with an electric mixer until light and fluffy, and stiff peaks form (around 1 minute). Set bowl of whipping cream aside.
- In another large mixing bowl, beat softened cream cheese together with the 4 tablespoons sugar and vanilla. Whisk or beat until mixture is smooth and has no lumps.
- With a large spoon gently fold whipping cream into cream cheese mixture, being careful not to deflate whipped cream.
- Transfer cream cheese mixture to a large gallon size ziplock bag, gently squeeze the air out of the bag and seal. Snip the corner of the bag making a hole about as wide as your thumb, and “pipe” the filling on top of the graham cracker crust, into the cups. (can use a piping instead, if you have one)
- Once cups are filled, chill in the refrigerator for a minimum of two hours, preferably.
- Before serving, garnish with whipped cream, graham cracker crumbs and berries. Enjoy!
Notes
Did you make this recipe?
Tag @kimscravings on Instagram and be sure to subscribe to our mailing list to receive more healthy and delicious recipes straight to your inbox!
Love these! Made them for my daughter’s birthday and they were a huge hit!
hi I dont have yours so therefore I use springform pan or muffin pan when I make my cheesecakes ,so which pan would you recommend
These are no-bake, so you won’t need a pan at all. Take a look at the recipe card. Everything gets stirred together and then added to the glasses.
If making these using oreos for the crust, do you still add butter and sugar?
Yes, I would!
Has anyone trued freezing these yet?
can I make ahead and freeze?
I have not tried freezing these, so I can’t say for sure how the texture would hold up.
if I do the oreo instead of Graham crumbs would I use the filling of the oreo as well? or only the cookies? thank you!
I think either the plain filling or the Oreo filling would be delicious!
Going to try this today! How many ounces are the cups you’re using? Thank you!
8 ounces for the heavy cream and from what I can find, it looks like 1/2 cup graham cracker crumbs is 1.5 ounces. enjoy!
Oh I meant, how many ounces are the cups you are using to put the cheesecake in! Sorry for the confusion. Im planning to use 3 oz cups and want to know how many this recipe will make for that. Thank you!
Oh, no worries… I believe these are 6 ounce cups.
How many cups does this make? They look amazing!
Thanks! It makes 6 cups. Enjoy!
made these 2 times within a week! not a fan of cheesecake but my family loves them so i made it. they said they were amazing. super simple to make, 6 cups were gone within 2-3 days!
Yay! That makes me so happy to hear!