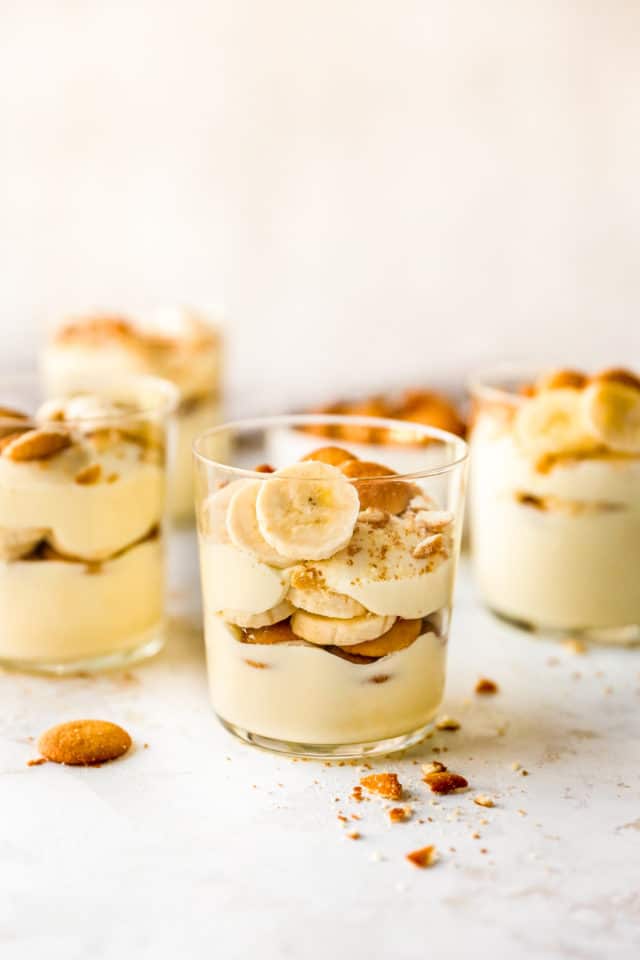
Banana Pudding Cups
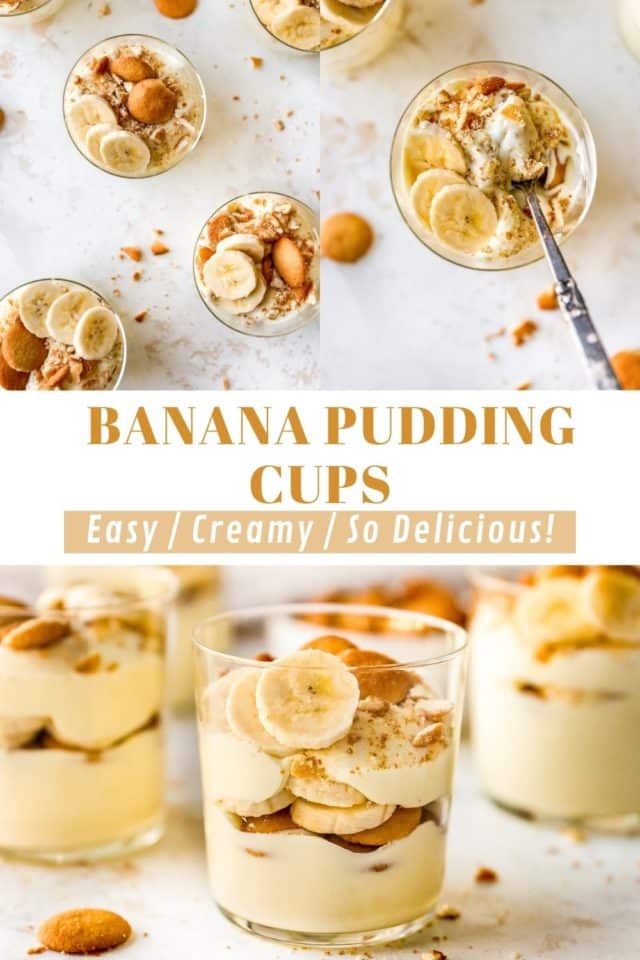
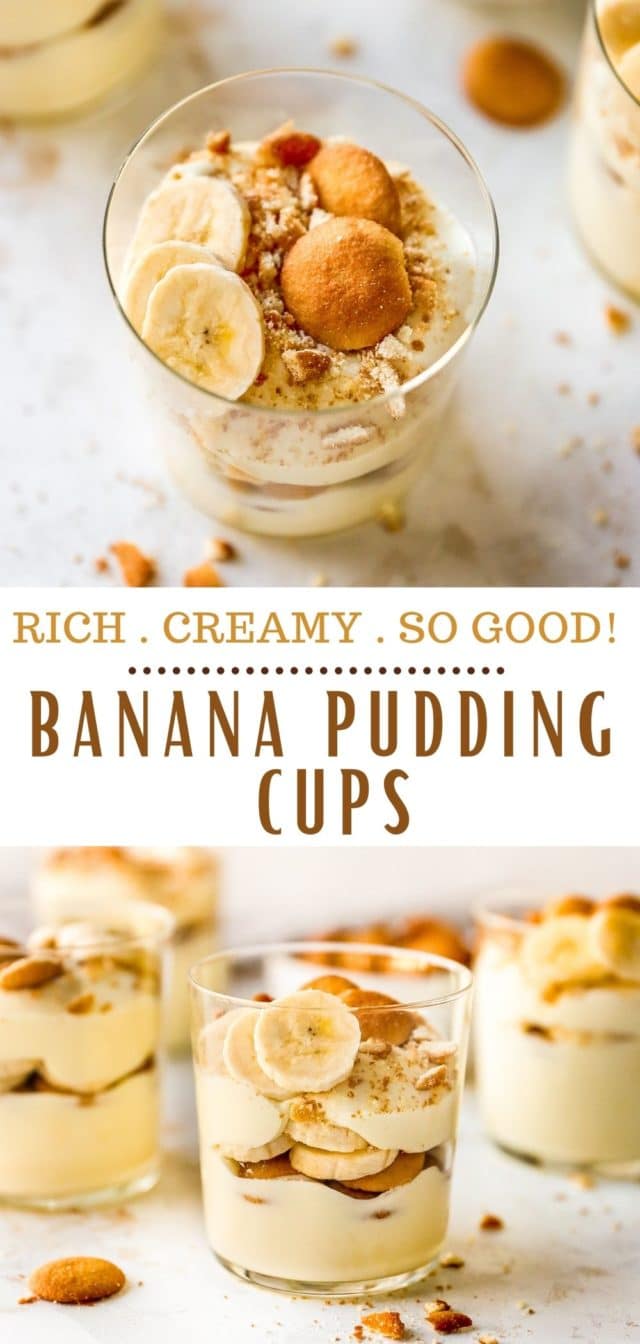
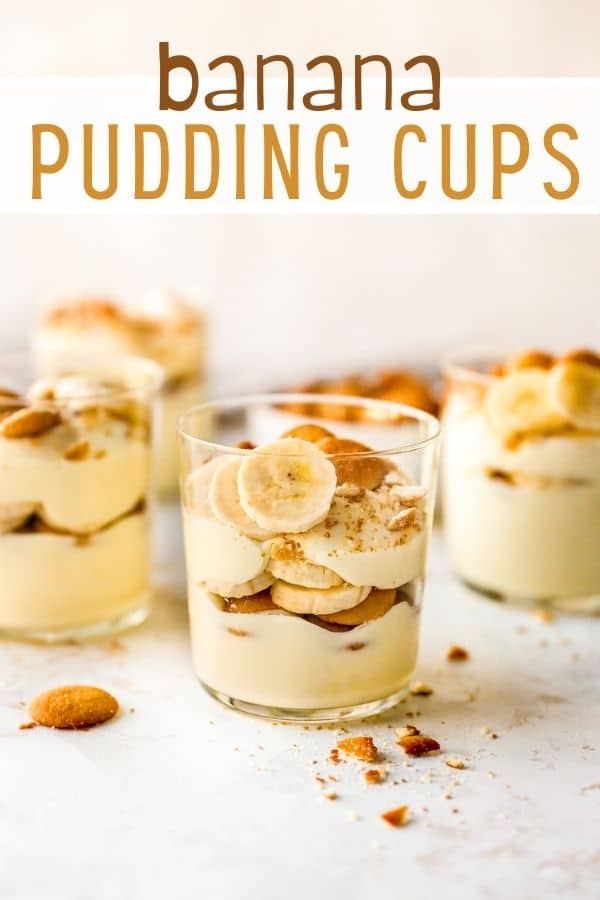
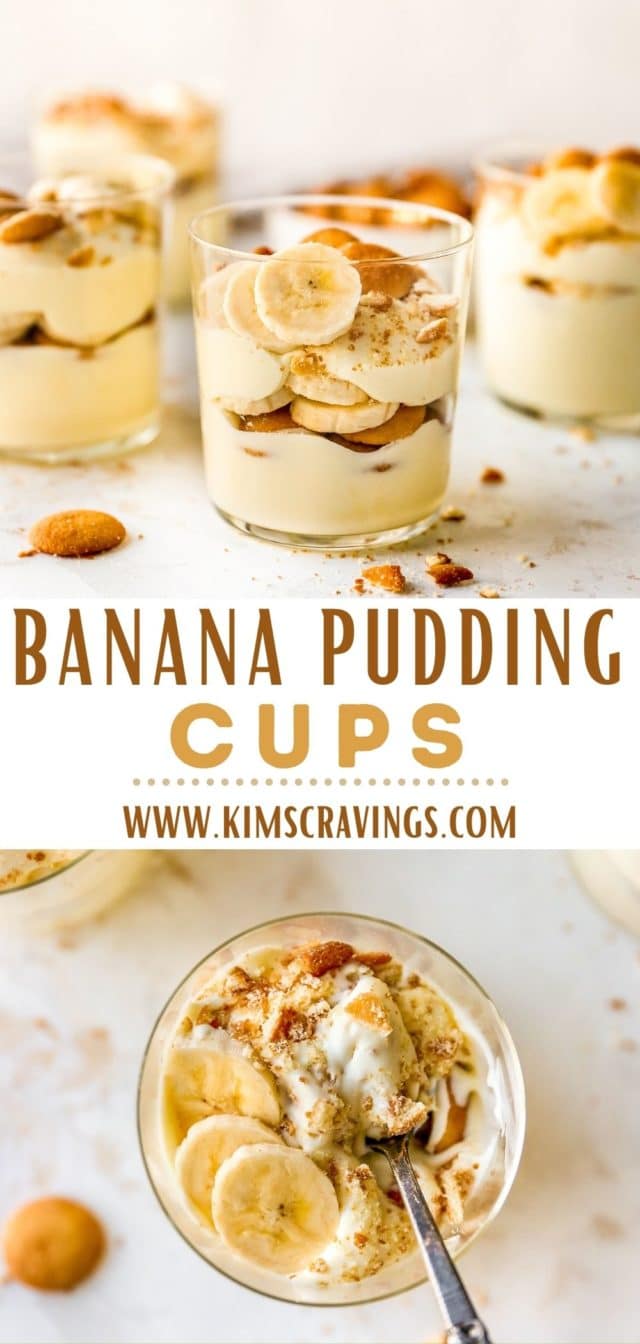
Banana Pudding Cups are an easy and delicious sweet treat for just about any occasion. They’re fun to make, and even more fun to eat! Creamy pudding and fresh bananas are layered with sweet Nilla wafers in small glasses (or cups) to create a perfectly portioned, luscious, decadent dessert that everyone loves!

EMAIL ME THE RECIPE!
If you’re a fan of classic banana pudding, you MUST give these Banana Pudding Cups a try! It’s one of my favorite desserts and I really love the version from Magnolia Bakery in NYC. It has such wonderful flavor and the combination of fresh bananas, vanilla wafers, and fluffy vanilla pudding is just SO good!
My favorite part is definitely the cookie layer. I love how the pudding slightly softens the Nilla wafers, making them almost cake-like.
I’d have to classify this as one of my all-time favorite desserts. Have you tried my recipe for banana pudding made with Pepperidge Farm Chessmen Cookies? It’s the best!
Why you will love this recipe
- Fun size. Everyone loves mini individual desserts. They’re super cute and come with built in portion control, which is definitely a good thing for a dessert as delicious as this one! They also make hosting a breeze… no need to worry about wasting time spooning out banana pudding to everyone.
- Make ahead. We served these at a recent family gathering and it worked so well to make them in advance of the big event! You can have them all ready to go, and once it’s party time, simply grab them from the fridge and everyone gets their own perfectly portioned dessert. Just remember to garnish the tops right before serving.
- Simple to make. With no baking required, a short list of ingredients and very little hands-on time, you’ll have an irresistible sweet treat.
- Perfect for any occasion. This recipe makes 8 individual servings, which is awesome for small get togethers. If you’re serving a crowd, this recipe can easily be doubled to serve 16, making them great for potlucks, picnics, Mother’s Day or any other occasion.
- So delicious. Words cannot describe how wonderful this dessert tastes, but I can promise that once you dive your spoon into all the creamy, cake-y, banana layers, one serving might just not be enough!
Ingredients needed
Homemade Banana Pudding Cups include such simple ingredients, you wouldn’t think they could be all that wonderful. Think again! The individual components may not be anything special, but layer them together and you get an absolutely amazing dessert. Here’s what you need:
- Pudding mix. For the pudding, we’re using the small (4.6 ounce) cook and serve box of banana pudding mix. Do not use the instant pudding mix.
- Milk. To make the pudding, you’ll need the amount of milk called for on the box, 3 cups in my case. Whole milk will yield the best results.
- Heavy whipping cream. We’re making our own whipped topping because it’s easy and so much more delicious than store-bought whipped topping.
- Powdered sugar. To sweeten the freshly whipped cream.
- Bananas. Use just ripe bananas that are bright yellow with no brown spots. If they’re too ripe, they’ll turn brown and mushy too quickly.
- Nilla Wafers. The vanilla wafer cookies are my favorite part of this banana pudding recipe! The cookies soften and taste like little bites of cake in the pudding. Yum!
How to make this recipe
This banana pudding cups recipe is easy to make and the cups are really simple to assemble. Your kiddos could even help! Here’s the simple process:
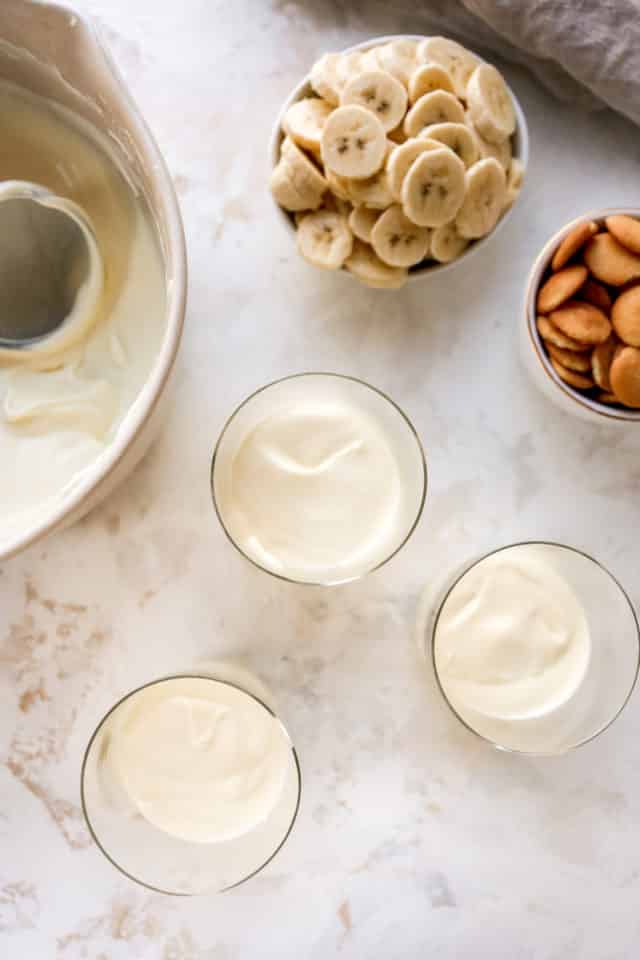
- Prepare the pudding. Whisk together and cook the pudding in a medium saucepan according to package instructions. Then, place in the fridge for 4 hours to set.
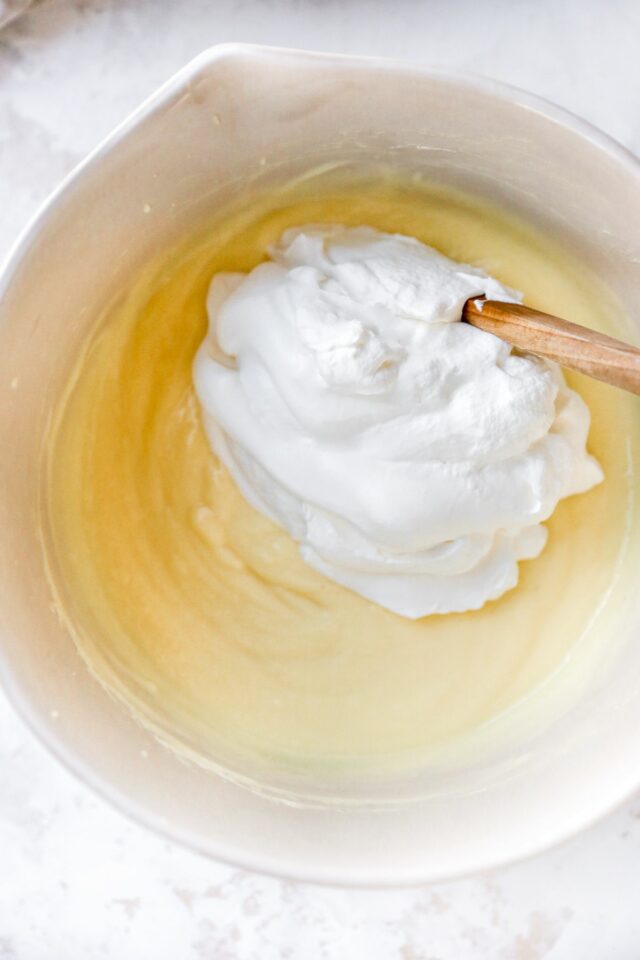
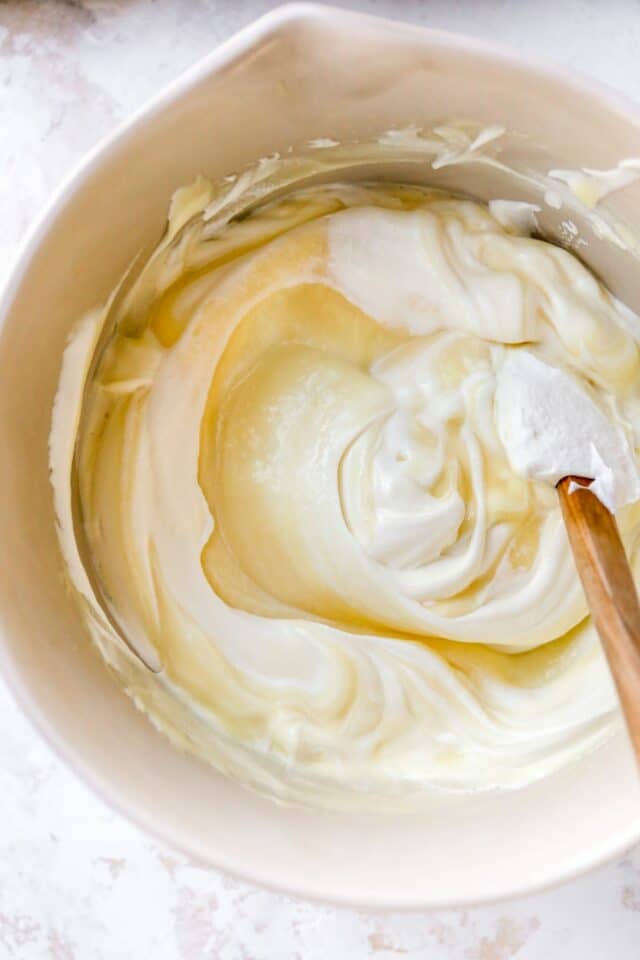
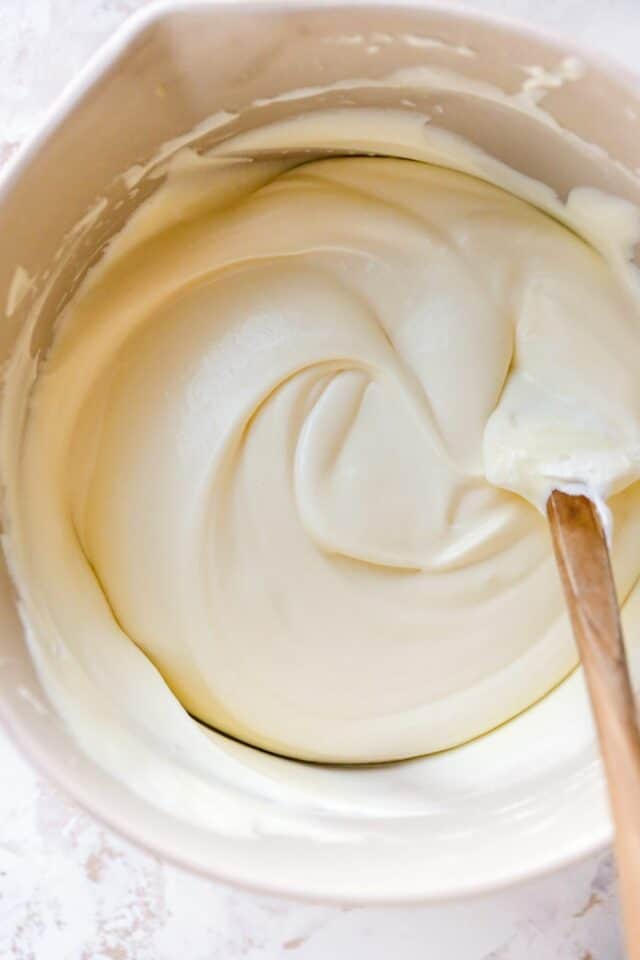
- Make the homemade whipped cream. Once the banana pudding is set, you’ll make the whipped cream. Using a hand mixer or in the bowl of a stand mixer, whip the cream until stiff peaks form. Then, stir in the powdered sugar. Next, gently fold the whipped cream into the pudding.
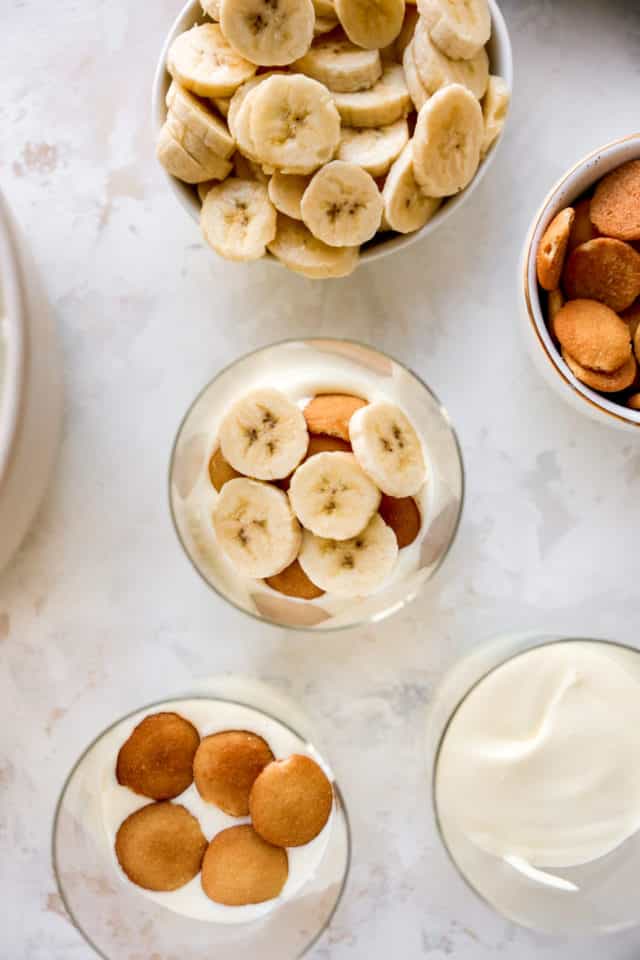
- Assemble cups. Use clear 6-8 ounce cups, glasses or jars to layer the pudding/whipped cream mixture, wafers and banana slices, then fill the pudding mixture to the top. Cover and refrigerate at least 2 hours, or up to 24 hours.
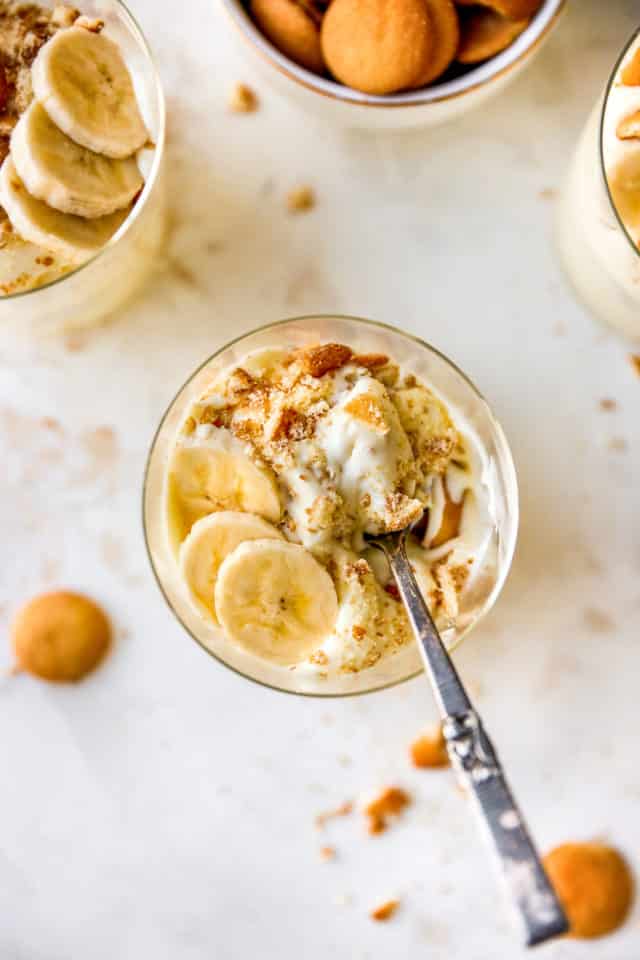
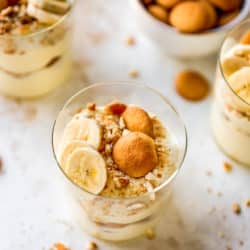
- Enjoy! Just before serving, add wafer crumbs, banana slices and a wafer or two to the top. Serve and dig in!

Expert tips and variations
Even though this recipe really could not be easier, here are some tips, so that your banana pudding turns out fabulous every time!
- Bananas begin to brown as soon as they are exposed to air. To prevent bananas from browning too quickly, make sure to use just ripe bananas that aren’t too ripe. This, honestly, isn’t too much of a worry because this dessert will disappear fast!
- Even though this is really simple to make, you will need to allow quite a bit of refrigeration time. First, you’ll need to let the pudding set for about 4 hours in the fridge, and then the assembled cups will need to be refrigerated for at least 2 hours, but longer or overnight is even better. The flavors meld and the Nilla Wafers get that perfect cake-like texture when refrigerated longer than the 2 hour recommendation.
- If you prefer a less intense banana flavor, vanilla pudding works great. In fact, my favorite banana pudding recipe uses French vanilla pudding.
Frequently asked questions
Really any similar cookie that you like will work. Change things up and try using mini Chessman Cookies. Mini Chessman Cookies can be found in the small individual snack-size packages. Graham crackers are also a great option.
If you’re making this ahead of time, it’s a good idea to slice the bananas and toss the slices in a little bit of lemon juice to keep them from browning. Also, be sure to use bananas that are just ripe, not overly ripe.
Paula Deen’s banana pudding is definitely my favorite homemade recipe. We love it so much that I shared that best banana pudding recipe.
Storage recommendations
These banana pudding cups will keep, covered and refrigerated, for about 3 days. I typically make my banana pudding the evening before I plan to serve it. I’ve found the easiest way to store the cups is on a large baking sheet and then I can cover all of the cups with one large strip of plastic wrap.
We don’t recommend freezing this because it won’t maintain that wonderful creamy texture and the bananas won’t hold up well. For best results, make and enjoy the pudding within about 48 hours.
More no-bake desserts
If you try this recipe, let me know! Leave a comment and if your family loves it as much as mine does, be sure to give it a five star ⭐️ rating! Also, tag @kimscravings on Instagram with a picture of your creation. Be sure to subscribe to our mailing list to receive more healthy delicious recipes straight to your inbox.
Banana Pudding Cups
Ingredients
- 1 (4.6 ounce) box banana pudding mix , (not instant)
- milk that is called for on the box of pudding
- 1 pint heavy whipping cream
- 1/4 cup powdered sugar
- 3 bananas, barely ripe or slightly underripe, cut into thin slices
- 1 box mini Nilla wafers
Equipment
- 8 6-8 ounce clear glasses, jars or cups
- electric hand-held or stand mixer
EMAIL ME THE RECIPE!
Instructions
- Prepare banana pudding according to package directions. Refrigerate for 4 hours or until set.
- Once pudding is set, use an electric hand-held or stand mixer to whip the heavy cream until stiff peaks form. Add the powdered sugar and stir together using a large spoon.
- Gently fold the whipped cream into the banana pudding.
- Use clear individual serving cups, glasses or jars to layer the pudding/whipped cream mixture 1/3 full, then add 5 mini wafers, then 5 thin banana slices, last fill to the top with more of the pudding/whipped cream mixture.
- Cover and refrigerate until ready to serve, at least 2 hours or up to 24 hours.
- Right before serving, garnish the top with some wafer crumbs, a few banana slices, and stand a wafer into the pudding.
Notes
Did you make this recipe?
Tag @kimscravings on Instagram and be sure to subscribe to our mailing list to receive more healthy and delicious recipes straight to your inbox!
Why not instant?
The cooked pudding will be richer and more flavorful. Enjoy!
I have to make this banana pudding for a Christmas’s event how far in advance can I make it. and do I add the banana with the pudding and refrigerators it.
I typically make my banana pudding the evening before I plan to serve it, although you can make it 24 hours in advance. I’ve found the easiest way to store the cups is on a large baking sheet and then cover all of the cups with one large strip of plastic wrap. Go ahead and layer everything at this time but hold off on adding the top garnish until just before serving, or as close to that timeframe as possible. Enjoy!
Question – about how many and what size oz cups does this recipe make? Thanks for the help!
Use a 6 to 8 ounce cup and you should have 8 servings. Enjoy!