Espresso Brownies
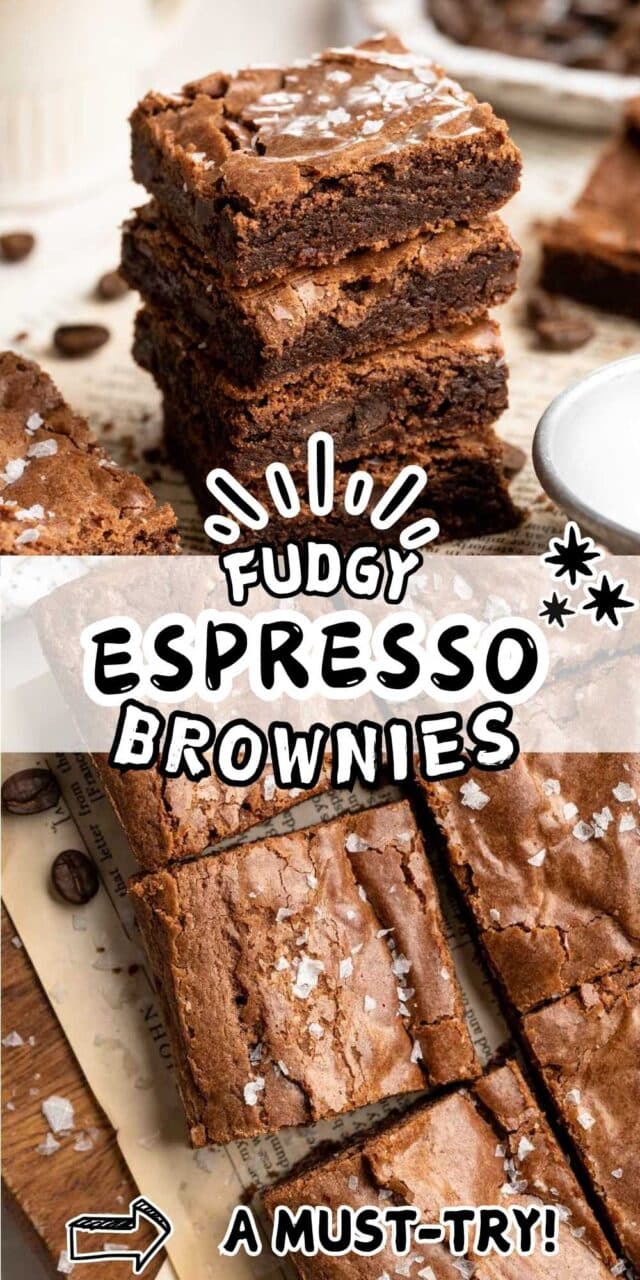
Rich, fudgy, and deeply chocolatey, these espresso brownies are everything you love about a classic brownie, taken up a notch. That hint of coffee makes the chocolate flavor even more intense, and trust me… they’re seriously hard to stop eating.
EMAIL ME THE RECIPE!

A Note from Kim
Fudgy Brownies with a Coffee Twist
These espresso brownies start with my all-time favorite brownie recipe, but the addition of espresso powder takes them to a whole new level. Instead of tasting strongly like coffee, the espresso deepens the chocolate flavor and makes every bite taste richer and more intense.
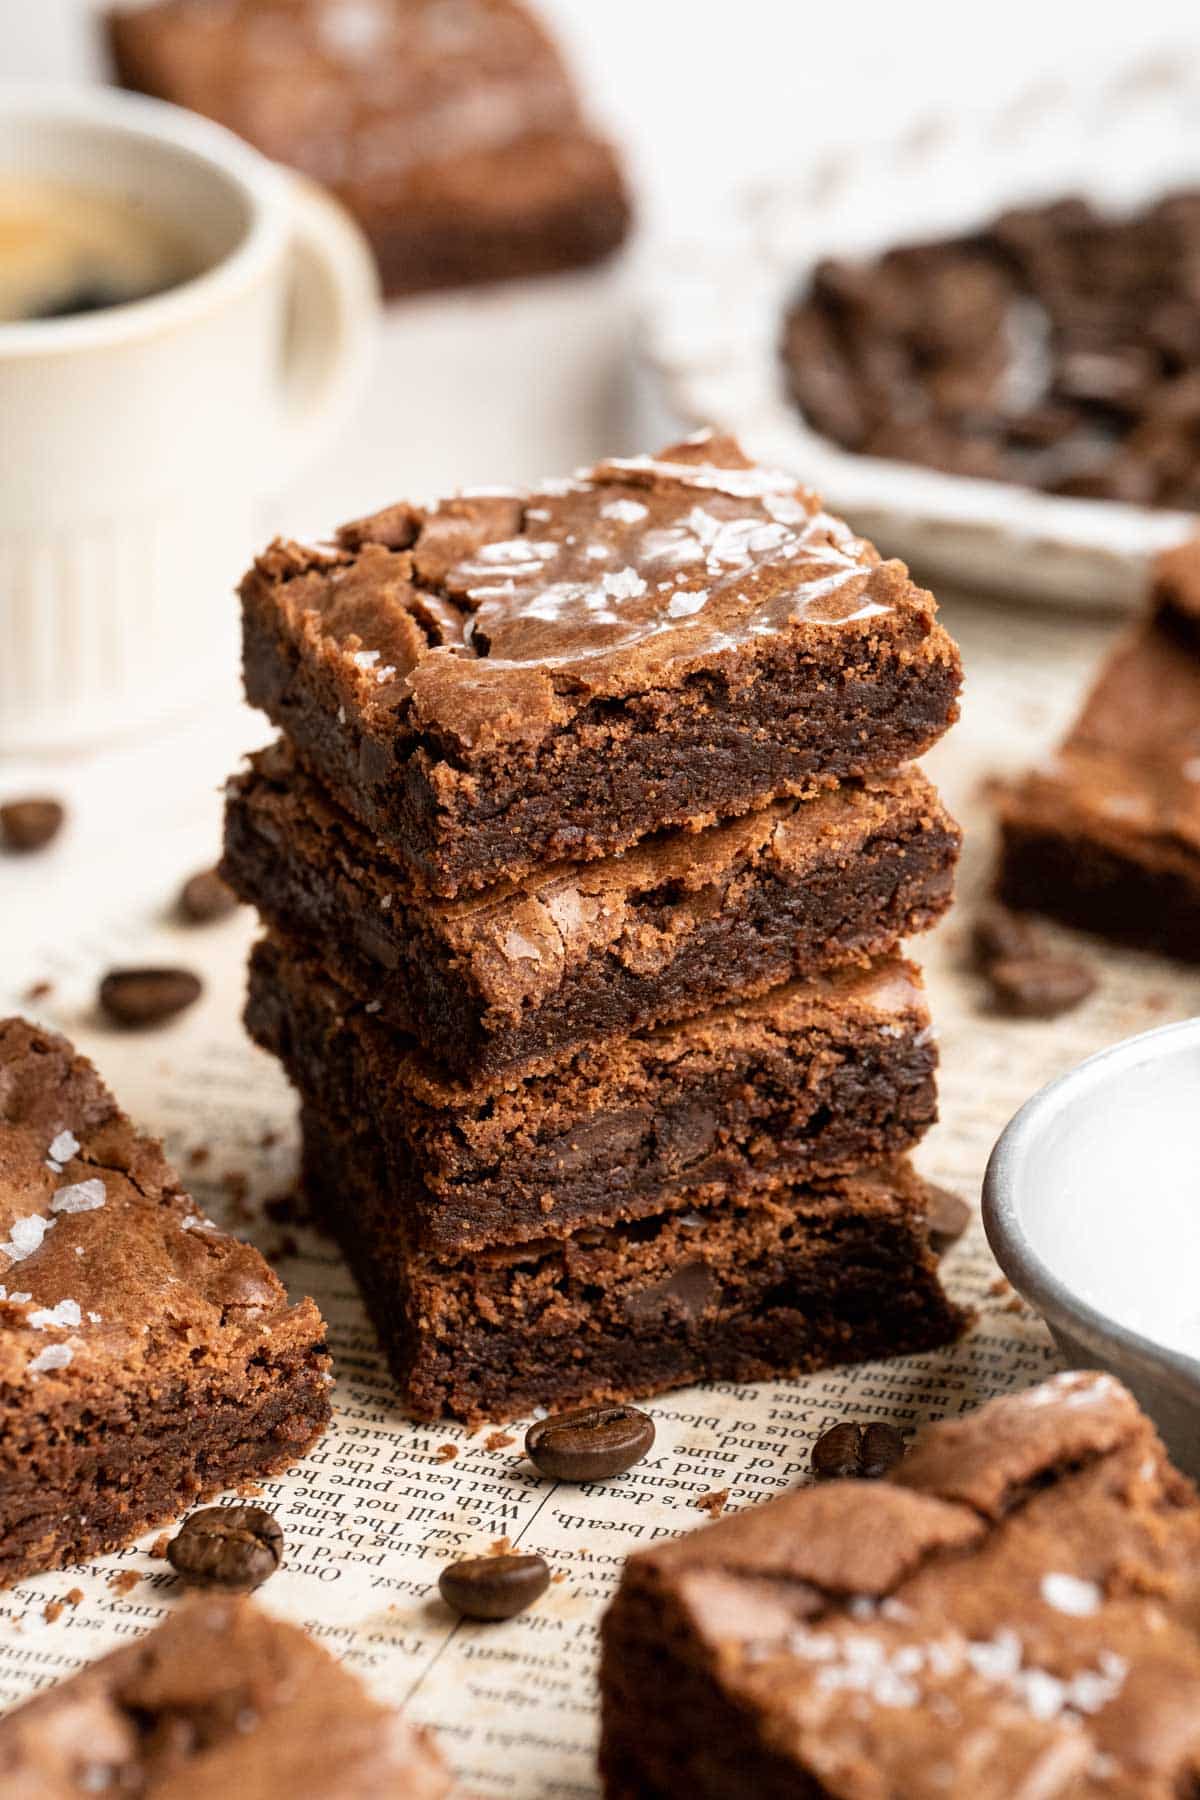
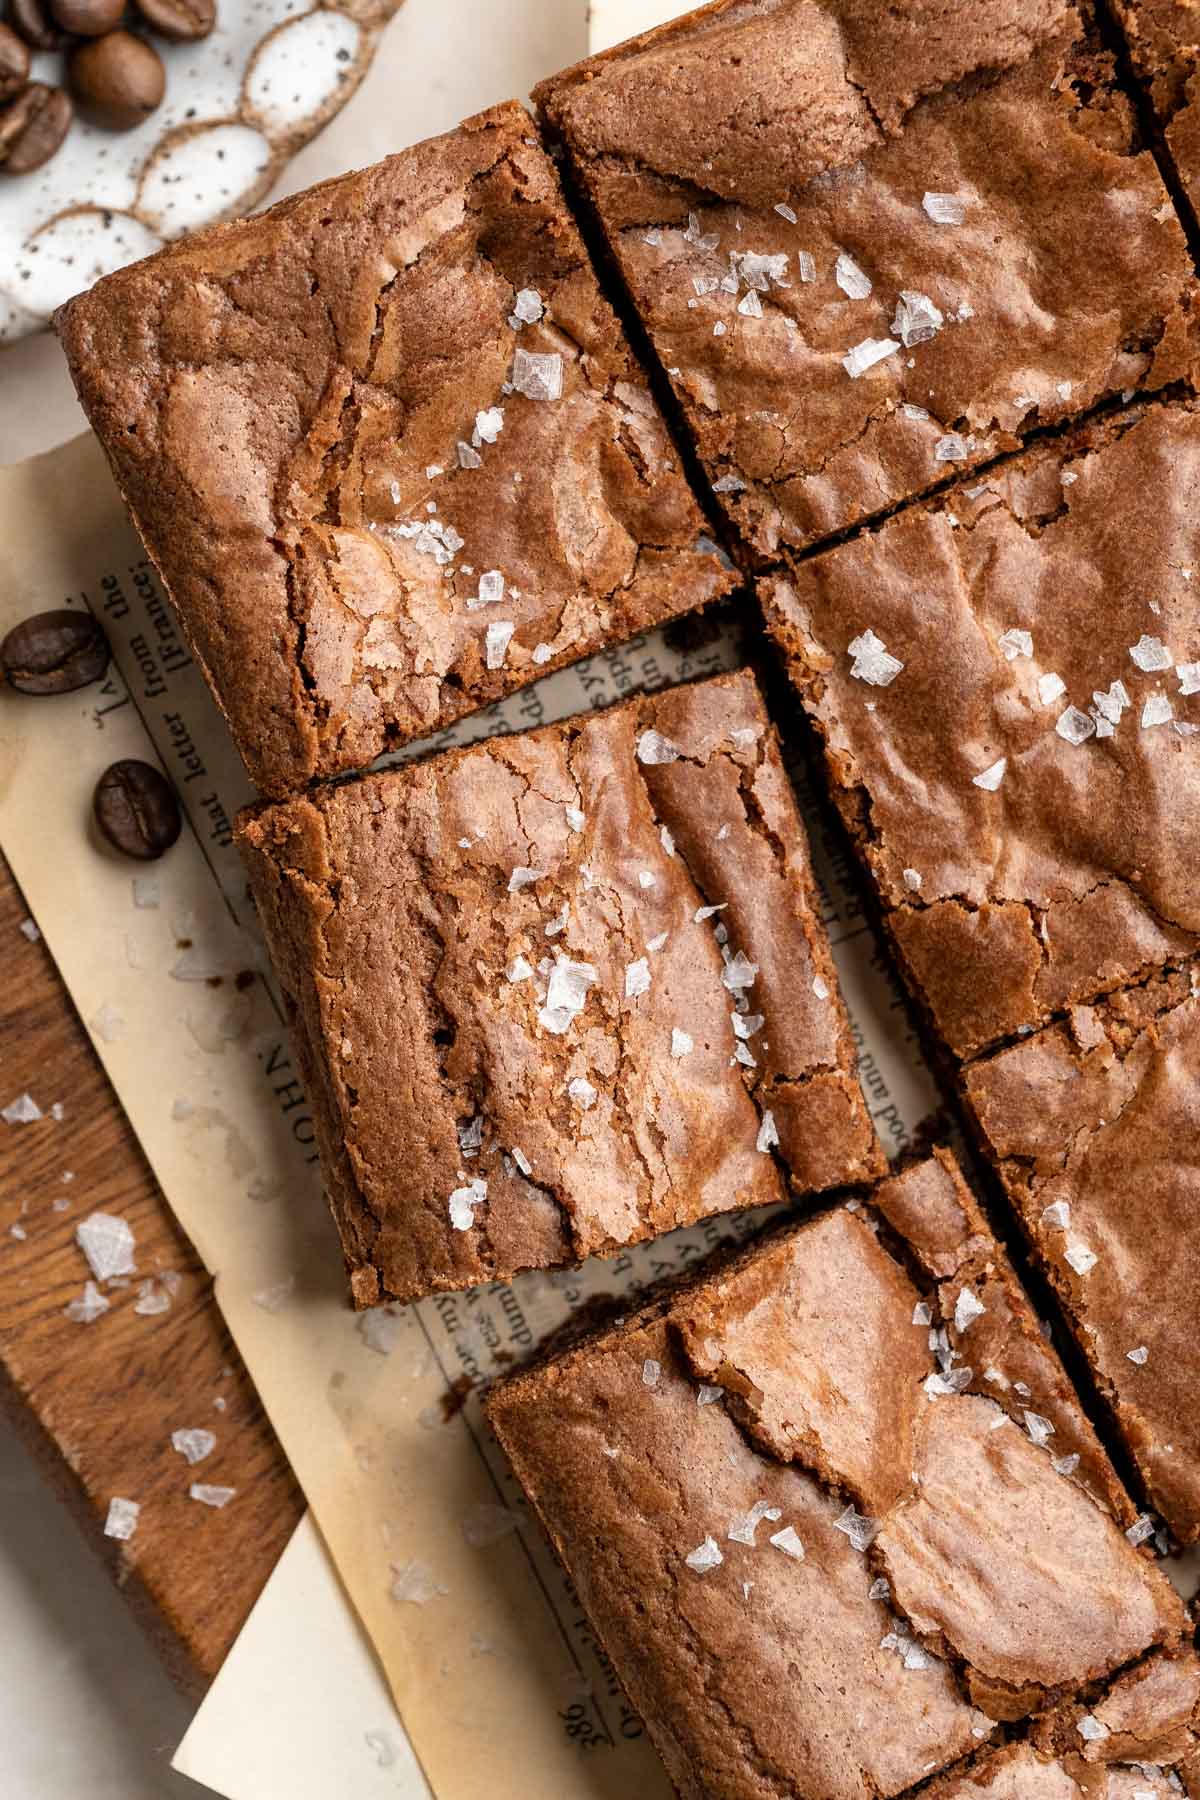
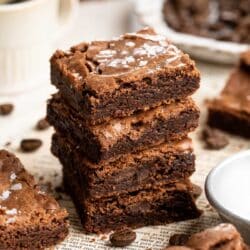
They bake up perfectly too, fudgy, soft centers with chewy edges and that crackly top everyone loves. And tucked into all that chocolate goodness is just a subtle hint of coffee in every single bite that makes them feel a little more grown-up and special.
With love (and lots of good eats), ![]()
My family loved these! So delicious with deep, chocolatey flavor in every bite.
— Makayla
Ingredients You’ll Need
All measurements are listed further down below in the recipe card.
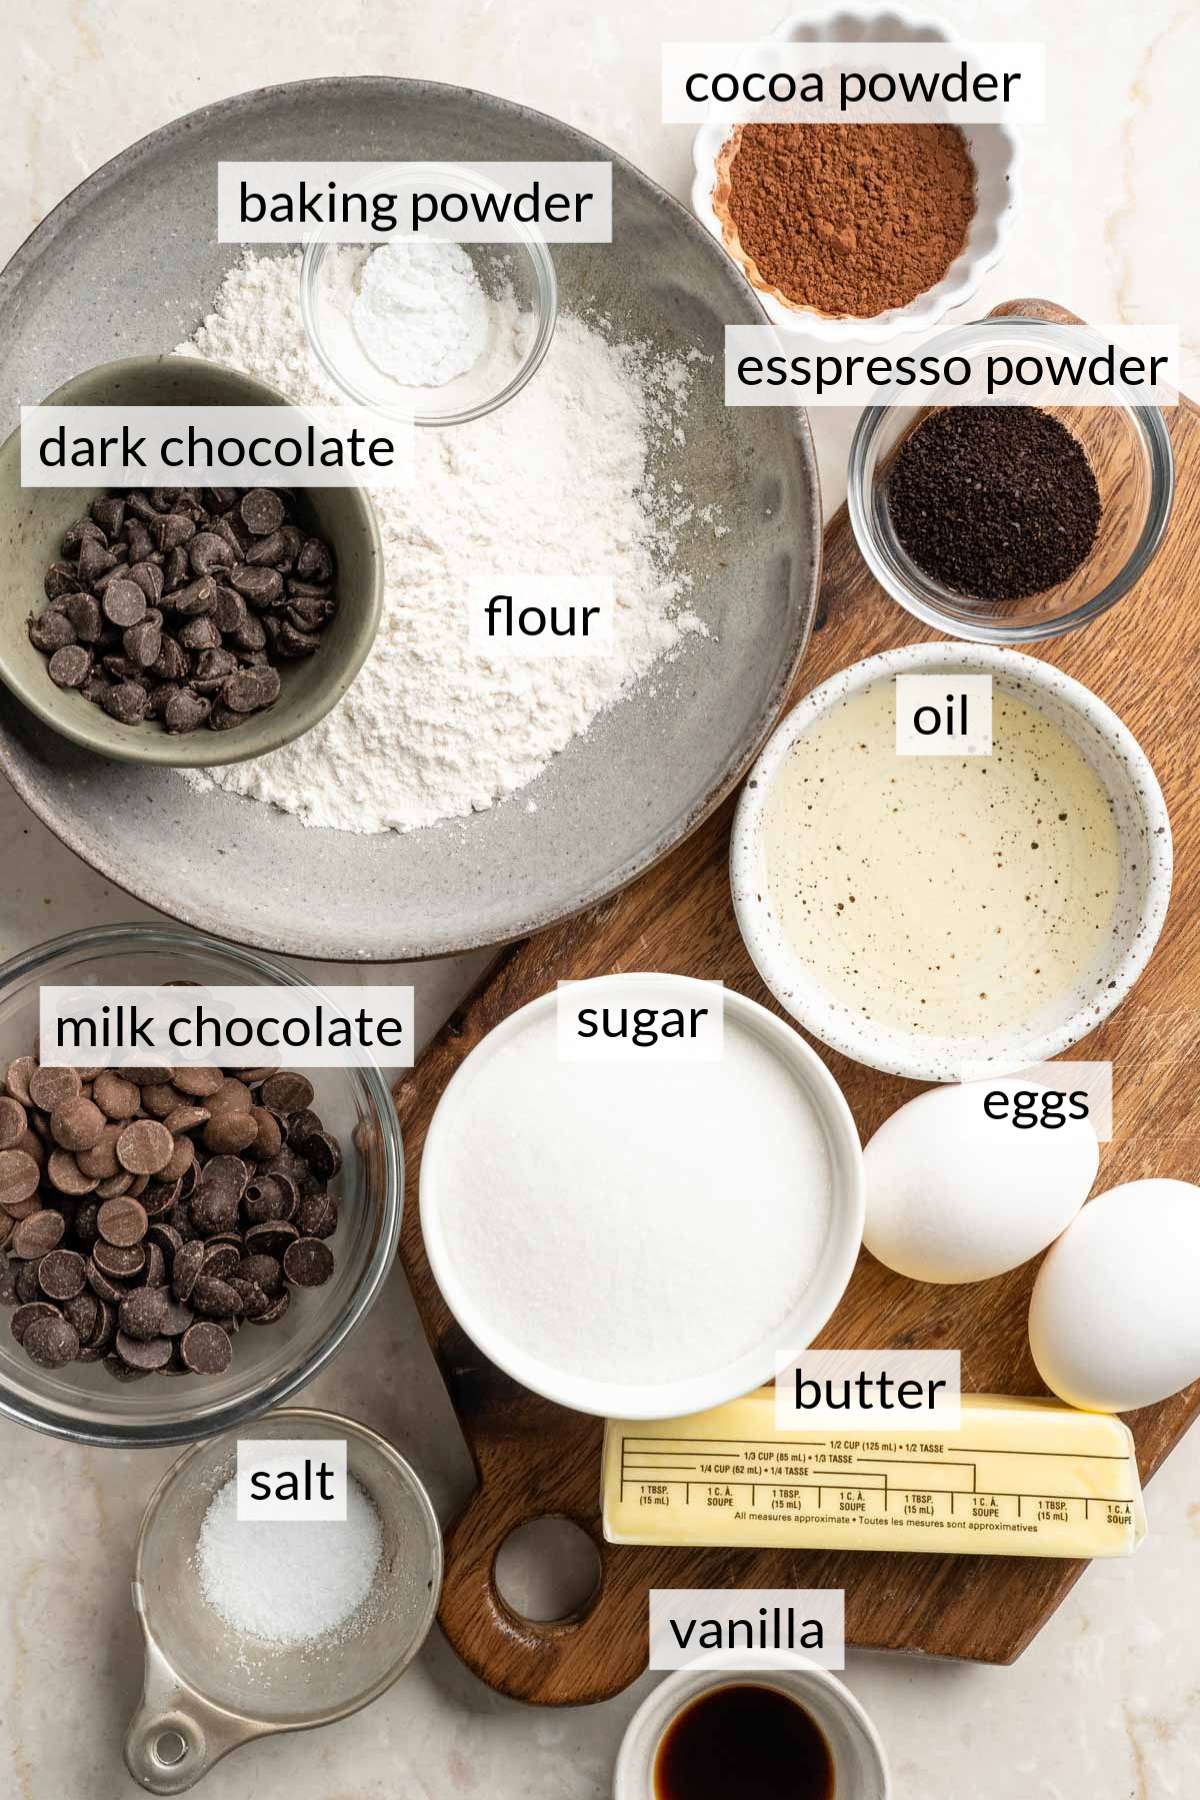
- Butter: Melted with chocolate to create a smooth base and rich, fudgy texture. I use unsalted butter, but you can use salted and then just cut down on the added salt.
- Oil: Keeps the brownies moist even after they cool (this is what gives that soft center).
- Milk chocolate: Adds sweetness and that creamy, classic brownie flavor.
- Dark chocolate: Balances the sweetness and deepens the overall chocolate taste.
- Cocoa powder: Intensifies the chocolate flavor without making the batter too heavy.
- Sugar: Sweetens and also helps create that shiny, crackly top layer.
- Vanilla extract: Enhances all the chocolate flavors and rounds everything out.
- Eggs: Provide structure while keeping the inside rich and fudgy.
- Baking powder: Just a small lift so the brownies aren’t overly dense.
- Salt: Sharpens the chocolate flavor and keeps the sweetness balanced.
- Espresso powder: Deepens the chocolate and adds a subtle coffee flavor without overpowering.
- All-purpose flour: Holds everything together while keeping the texture soft and chewy.
- Chocolate chips: Melt into pockets of extra chocolate for added richness in every bite.
Variations and Substitutions
- Classic brownies: Not a coffee fan? Simply leave out the espresso powder for rich, fudgy chocolate brownies. This is the same recipe I use for my gluten-free brownies, but it works just as well with regular all-purpose flour.
- Chocolate peanut butter: Try my peanut butter brownies with creamy peanut butter mixed into the batter and peanut butter chips throughout.
- Nutty brownies: Fold in ½ cup chopped walnuts or pecans for added crunch and texture.
Kim’s Recipe Tips
- Line the pan with parchment: Makes lifting the brownies out easy and keeps cleanup simple.
- Measure flour correctly: For best results, use a kitchen scale. If you don’t have a scale, spoon and level the flour instead of scooping to avoid dense brownies.
- Don’t overmix: Once you add the flour to the batter, stir the brownie mix just until everything comes together to keep the brownies fudgy, not cakey.
- Use a metal pan if possible: Metal bakes more evenly, which helps with texture. A glass pan still works, just keep an eye on bake time. This light metal 8×8-inch pan is my favorite!
- Check early for doneness: These can go from fudgy to dry fast, so start checking a few minutes before the timer.
- Let them cool before cutting: Cooling helps them set and gives you clean, perfect slices.
How to Make Espresso Brownies
If you’re a coffee lover, you’re going to love how this espresso brownie recipe brings out the best flavor in every bite. Here’s everything you’ll need:
You’ll find the full printable instructions in the recipe card, but here’s a quick visual of the steps:
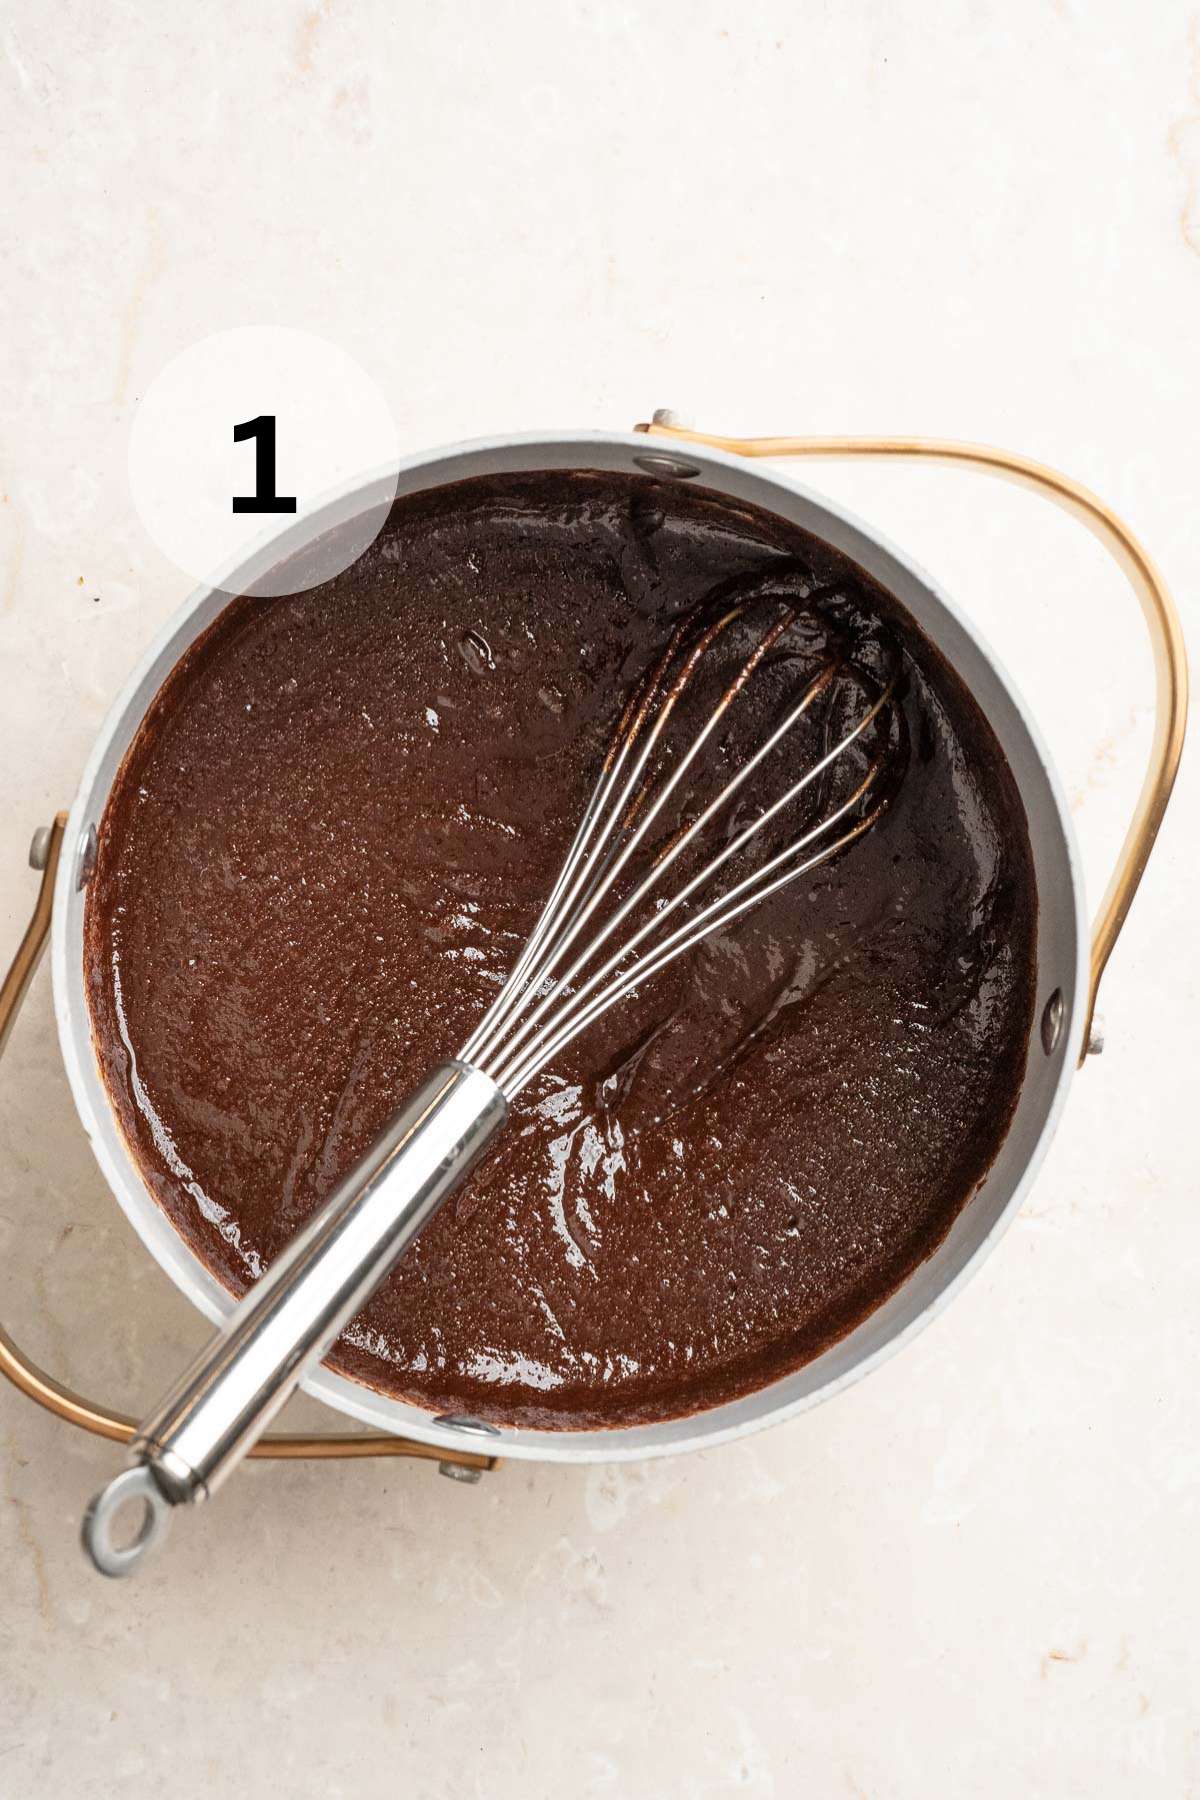
Step 1: Heat and stir melted chocolate mixture: In a large pot or saucepan over medium-low heat, melt the butter, oil, milk chocolate, dark chocolate, and cocoa powder together until fully melted and smooth. Remove from heat.
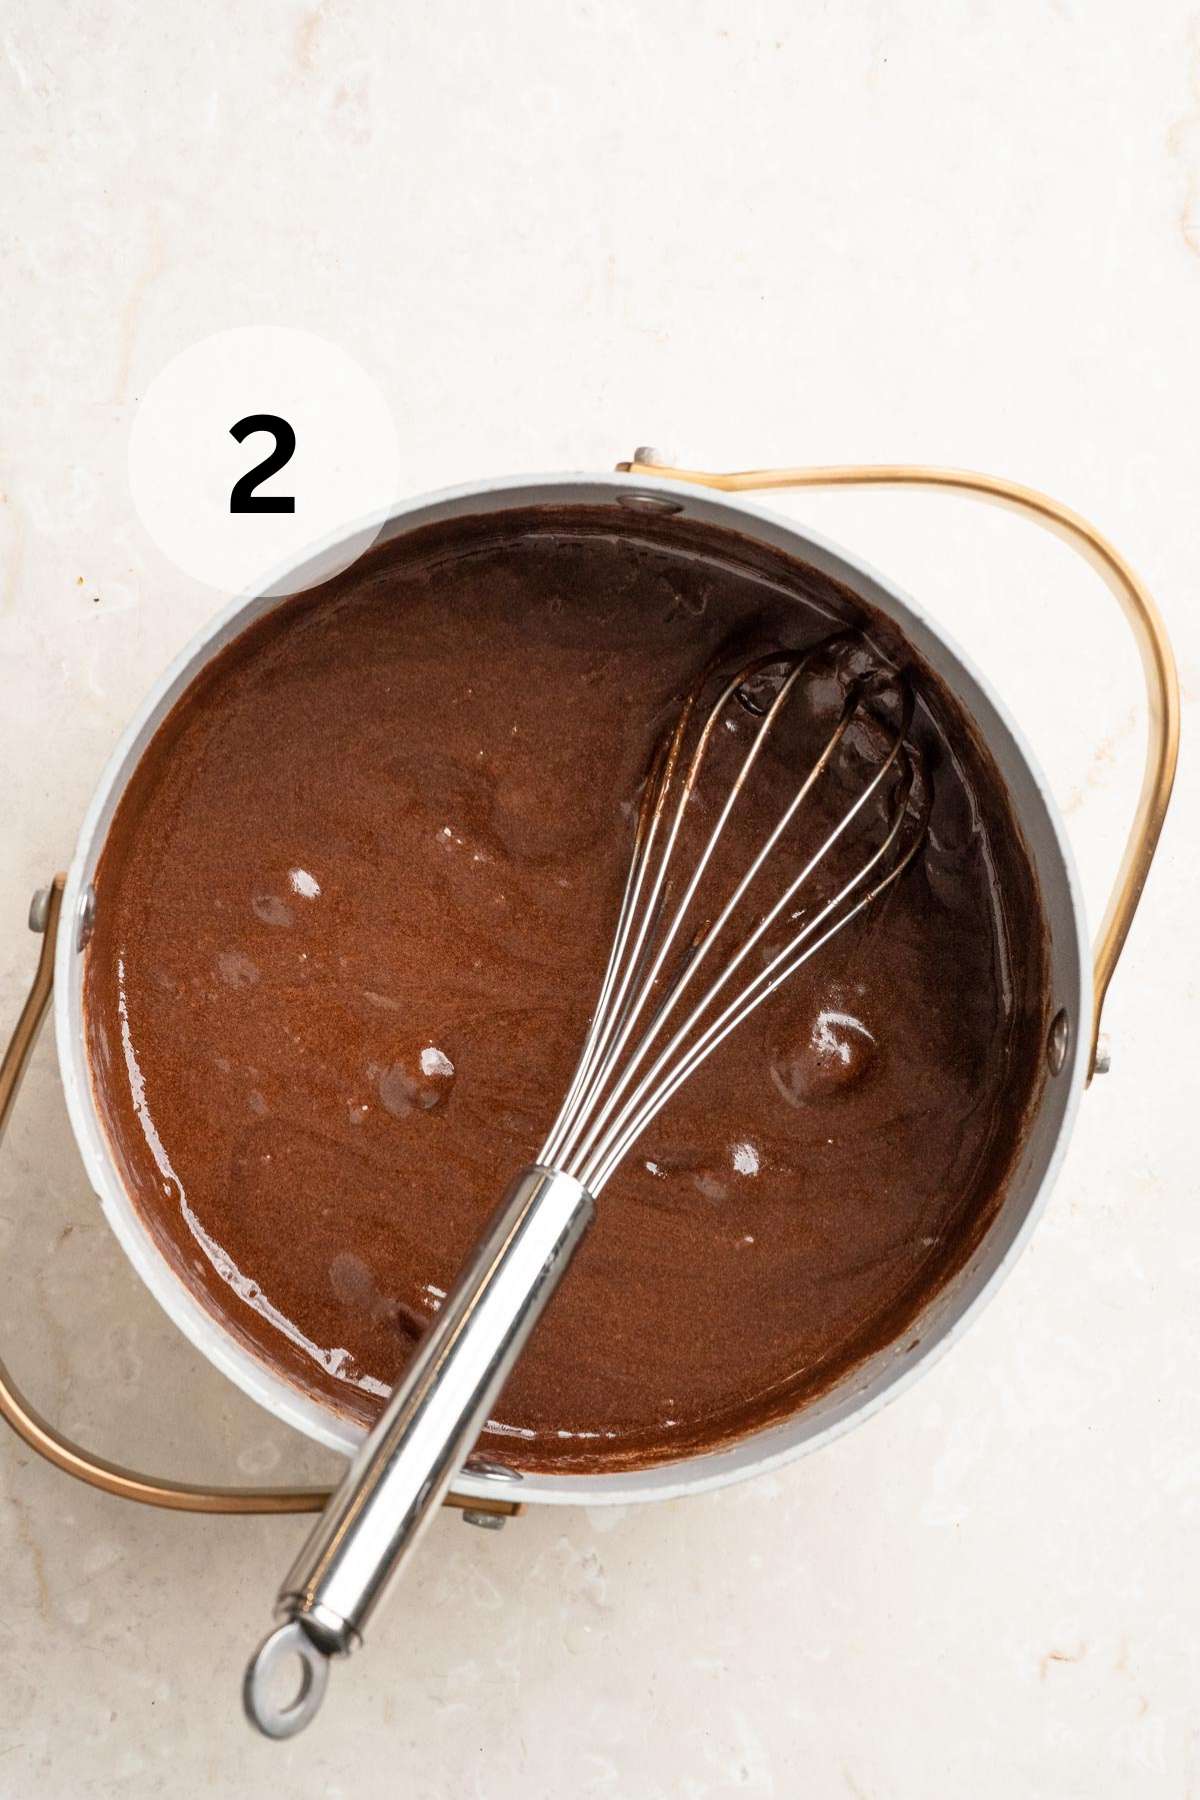
Step 2: Add sugar and eggs. Stir in the sugar and vanilla extract. Add the eggs, one at a time, stirring vigorously after each addition.
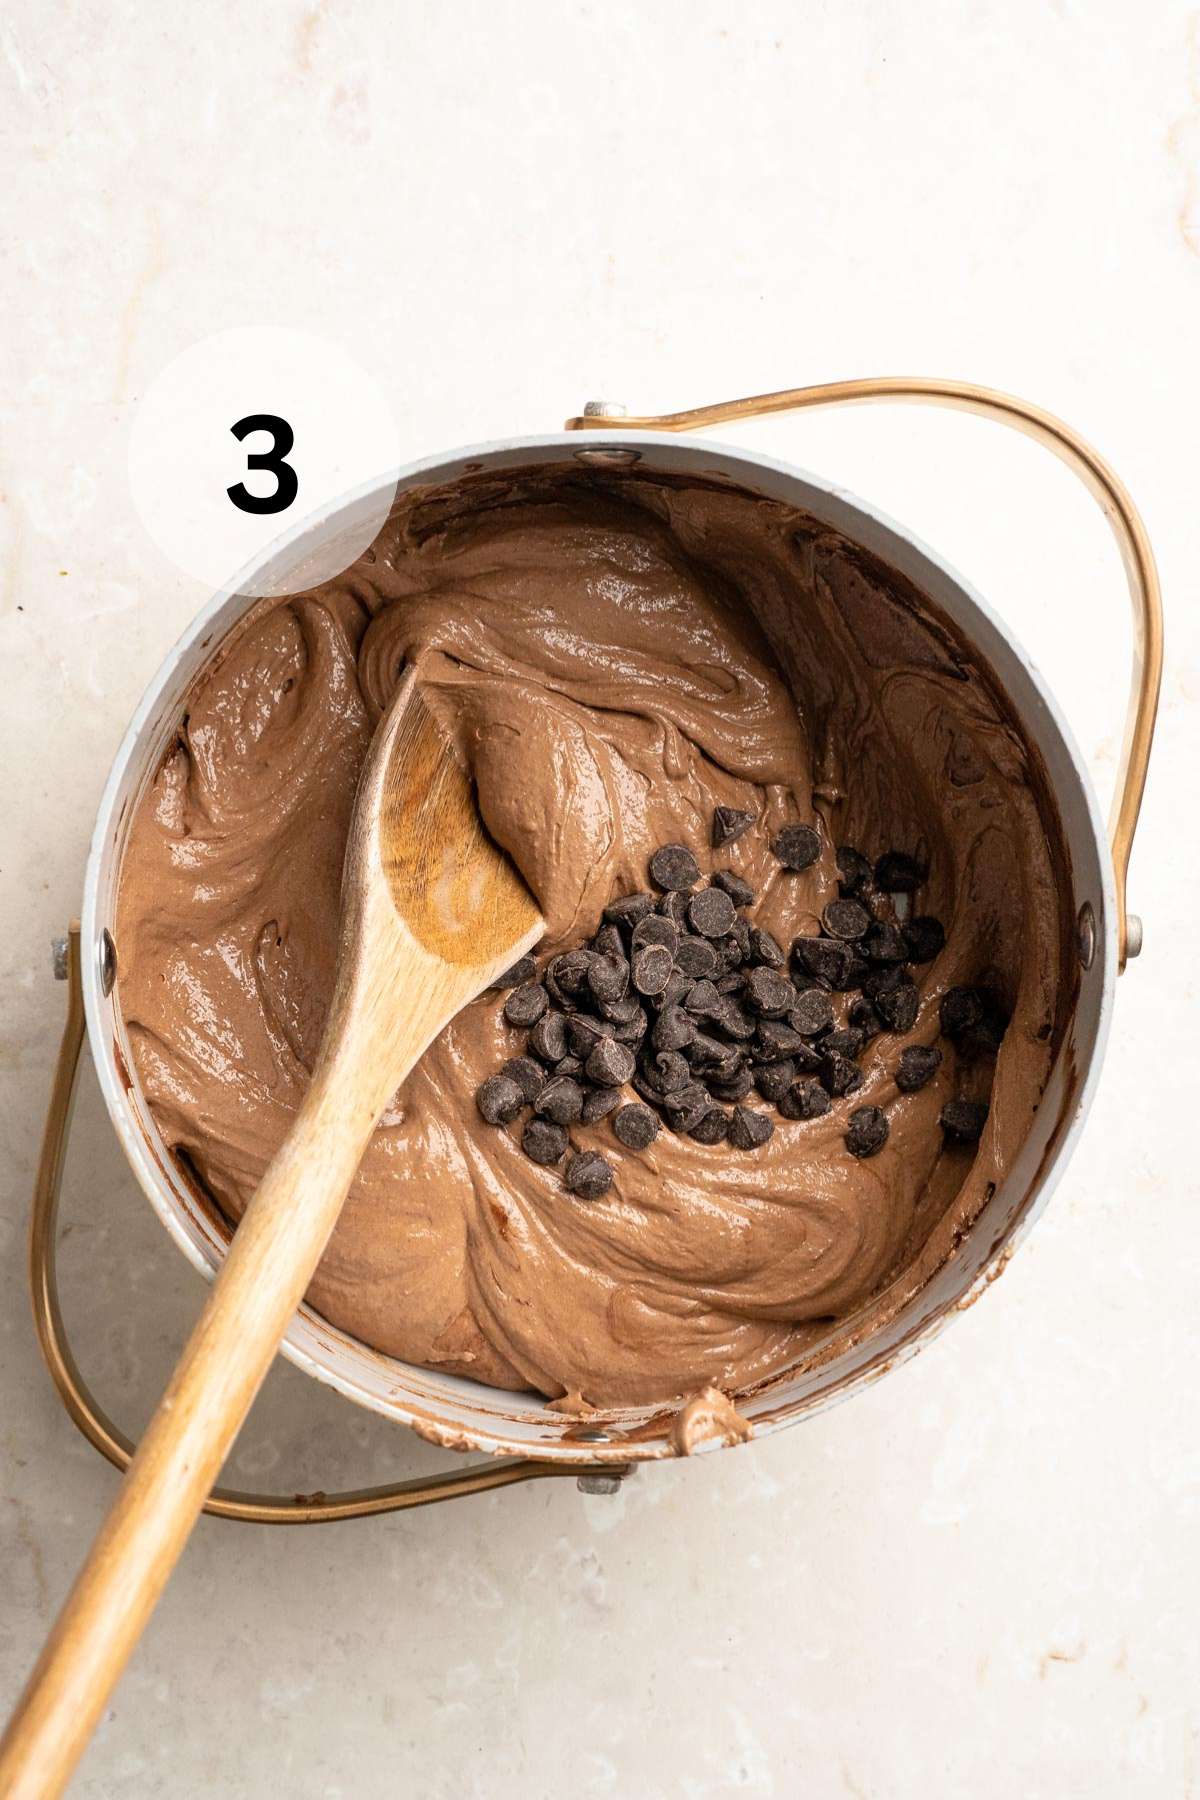
Step 3: Mix in dry ingredients and chocolate chips. Add the baking powder, salt, ground espresso powder, and flour. Fold in the chocolate chips.
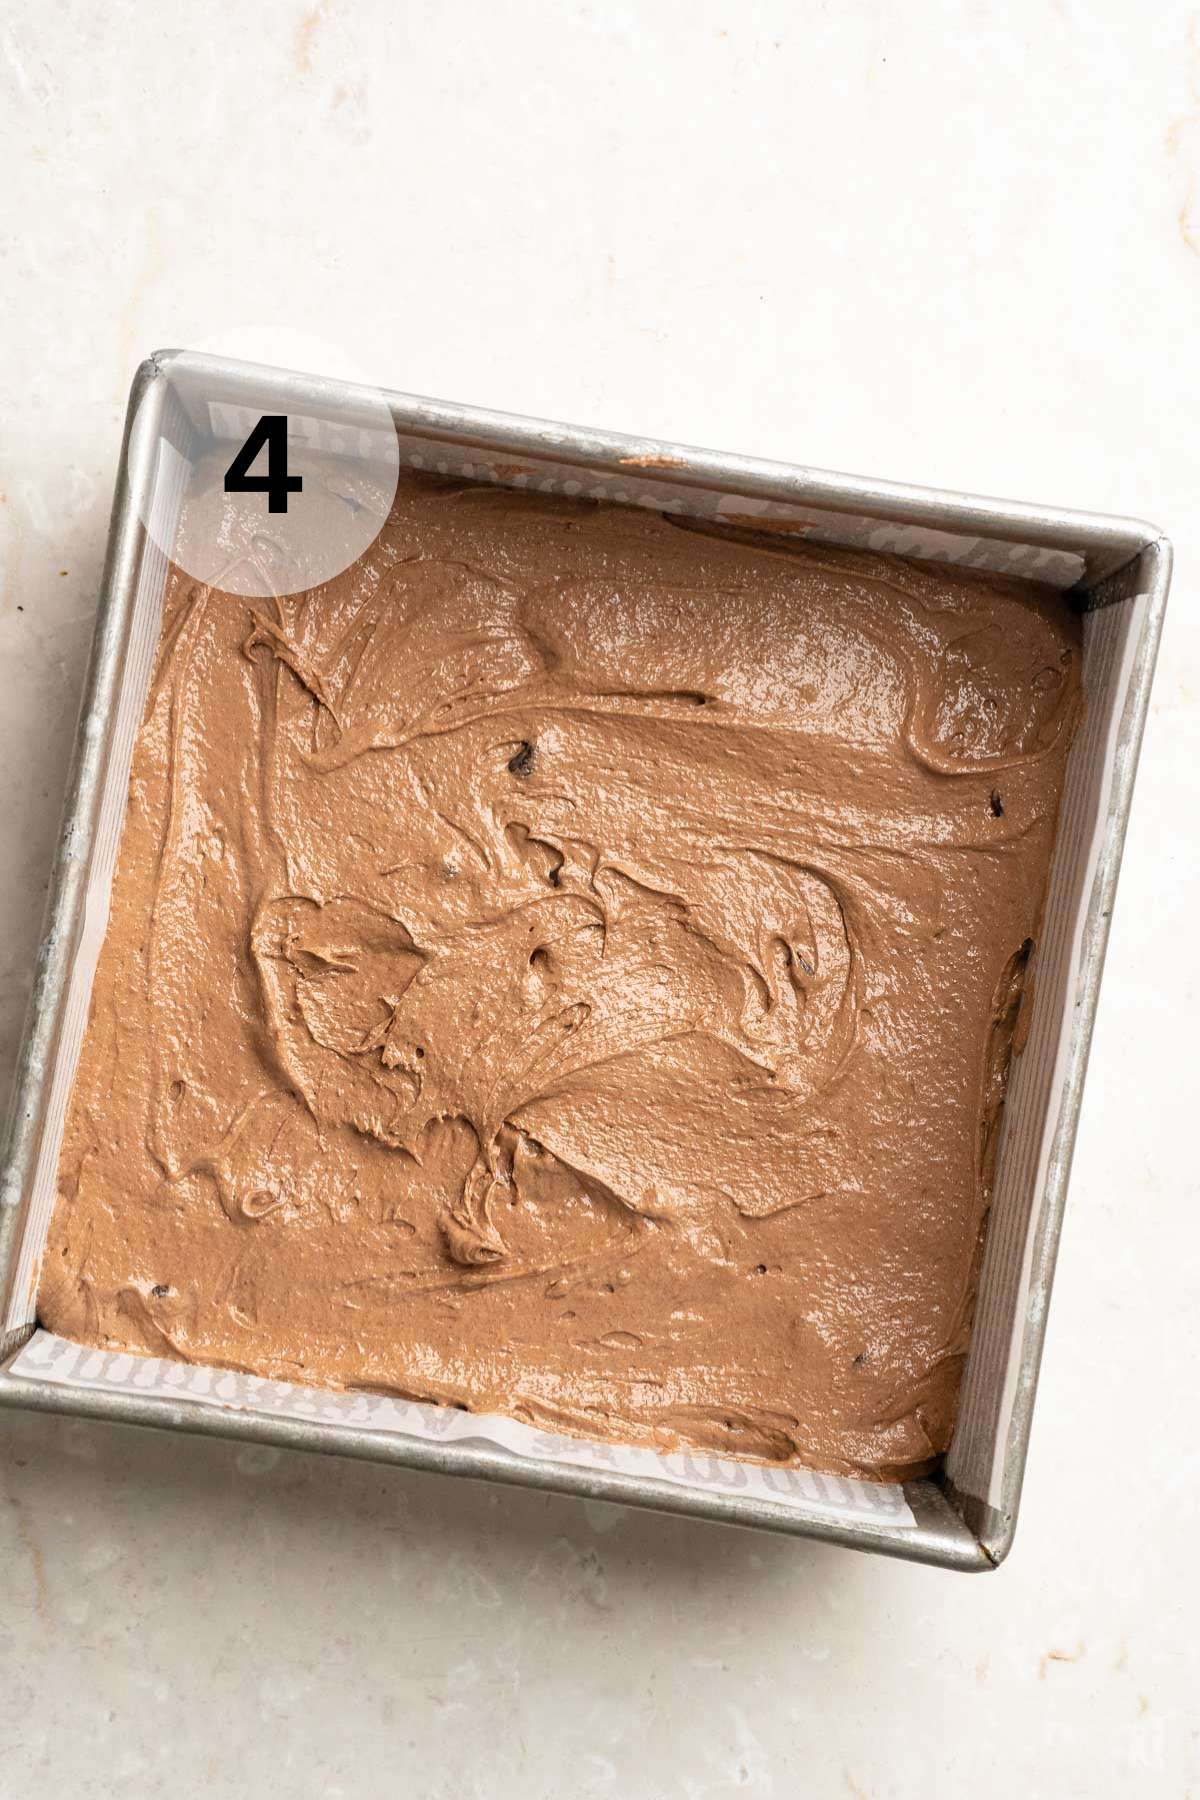
Step 4: Transfer brownie batter to square pan. Pour the batter into the prepared baking pan. Smooth the top, place in the oven, and bake 25-30 minutes, and until a toothpick inserted into the center comes out just barely clean with a few moist crumbs.
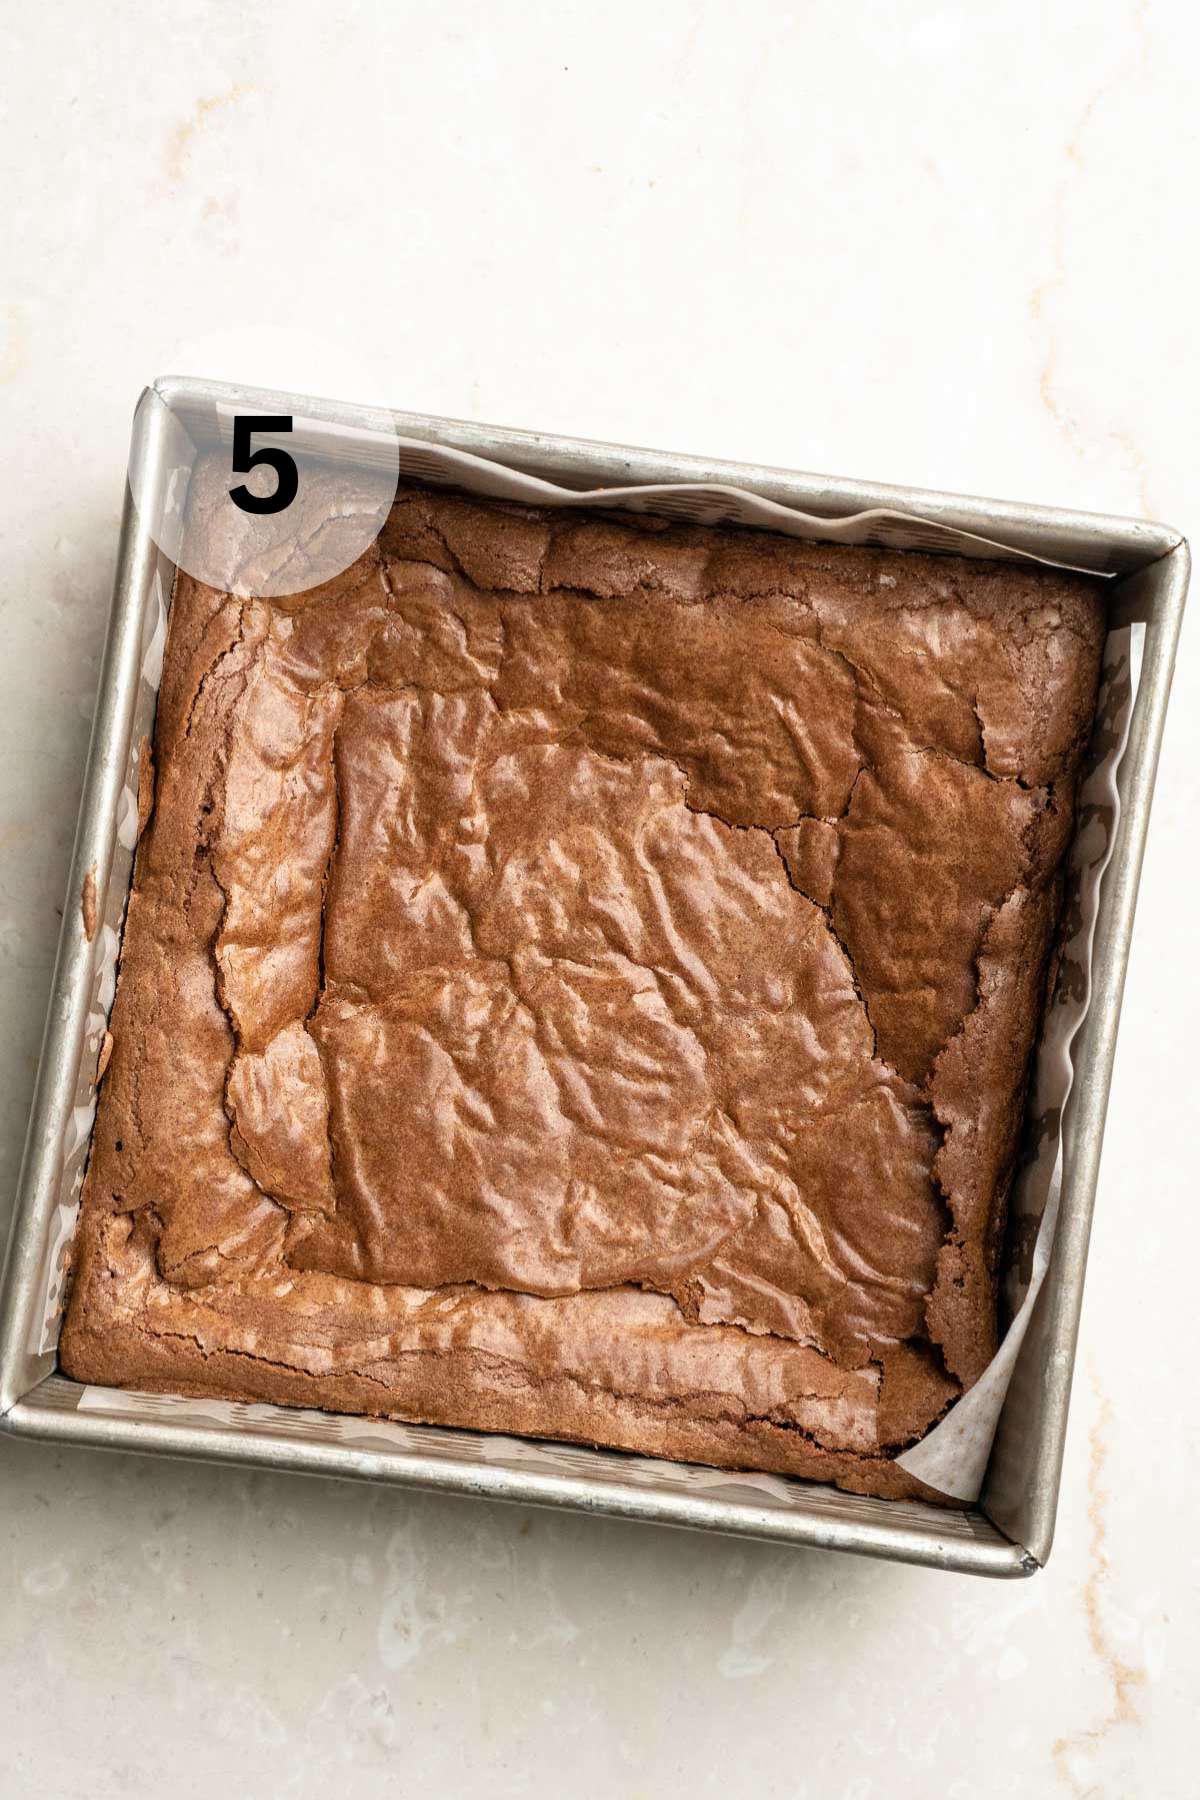
Step 5: Cool. Allow brownies to cool at least 30 minutes in the pan on a wire rack.
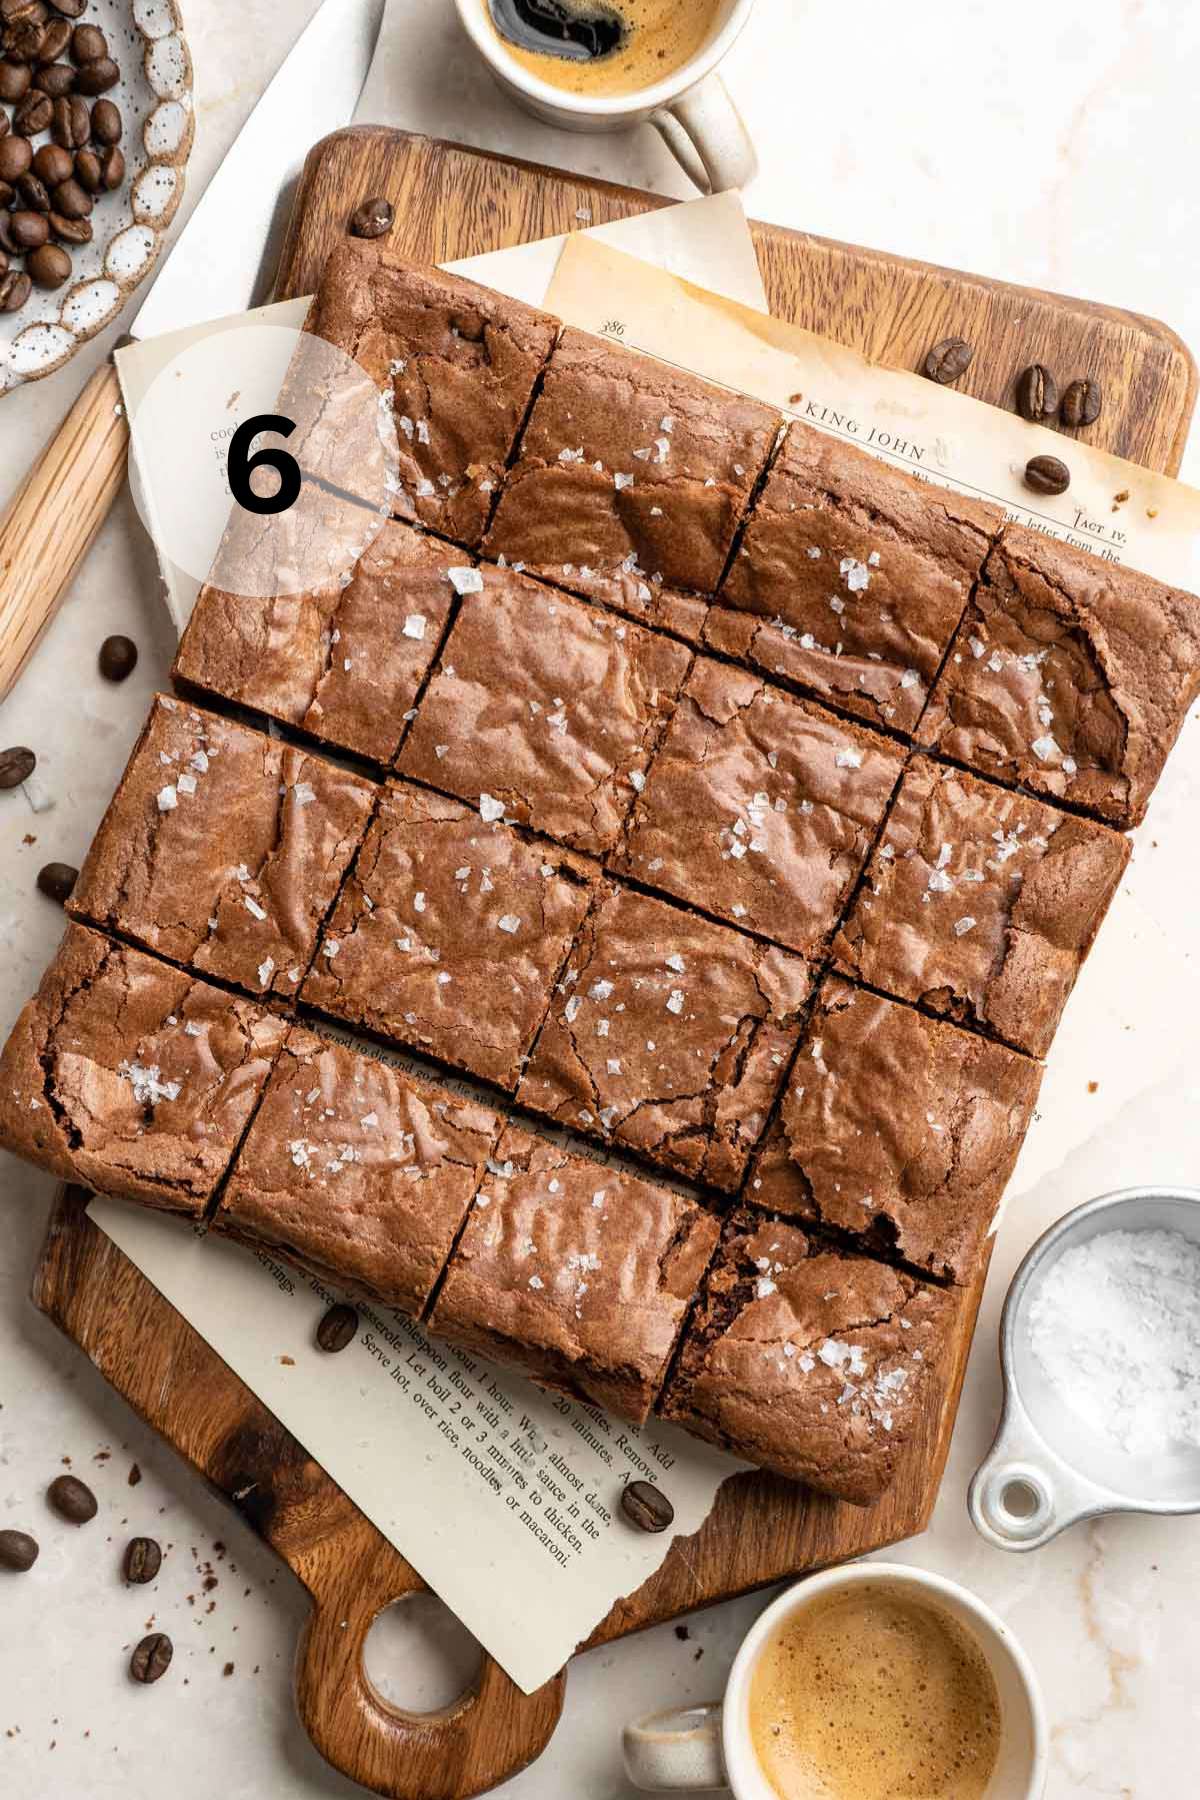
Step 6: Slice and serve. Use the parchment paper to lift them out of the pan. For the fudgiest brownies, slice individual pieces as needed rather than cutting the entire pan at once, which can cause them to dry out faster.
Frequently Asked Questions
Yes, instant coffee works, but espresso powder gives a richer, smoother flavor.
Yes, but bake in a 9×13-inch pan and adjust baking time as needed. Bake time will probably be closer to 30 to 35 minutes.
Yes, but brownies will be thinner and the bake time will not be as long.
Storage Recommendations
- Storing leftovers. Store espresso brownies in an airtight container or cover the pan with plastic wrap and keep at room temperature for up to 4 days. They’ll stay extra moist if you wait to cut them until you’re ready to serve.
- Freezing: If you want to store these brownies for longer than a few days, cut them into individual pieces, wrap each one tightly in plastic wrap, and place them in a freezer bag. Freeze for up to 3 months.
- Reheat: I love these at room temperature for extra chewiness, but if you like a more gooey brownie, warm them up in the microwave in 20-second bursts until warmed and melty.
More Family Favorite Dessert Recipes to Try


If you try this espresso brownie recipe, let me know! Leave a comment and if your family loves it as much as mine does, be sure to give it a five star ⭐️ rating! Also, subscribe to our mailing list to receive more delicious recipes straight to your inbox.
Espresso Brownies
Ingredients
- 6 tablespoons (85g) butter
- 2 tablespoons (24-28g) oil, I use avocado oil, any variety will work
- 2 ounces (56-57g) milk chocolate (about 1/4 heaping cup)
- 2 ounces (56-57g) dark chocolate (about 1/4 heaping cup)
- 1½ tablespoons (8g) unsweetened cocoa powder
- 1 cup (200g) granulated sugar
- 1 teaspoon vanilla extract
- 2 large eggs
- 1/4 teaspoon baking powder
- 1/2 teaspoon salt
- 2 tablespoons (7-9g) espresso powder
- 3/4 cup (93g) all-purpose flour
- 1/4 cup (40g) semi-sweet chocolate chips
EMAIL ME THE RECIPE!
Instructions
- Preheat oven to 350ºF and prepare an 8×8-inch baking pan by spraying it with nonstick cooking spray or lining it with a sheet of parchment paper or aluminum foil, leaving a few inches of overhang on the sides to allow for easy removal. Grease if using foil and set aside.
- In a large pot over medium-low heat, melt 6 tablespoons (85g) butter, 2 tablespoons (24-28g) oil, 2 ounces (56-57g) milk chocolate (about 1/4 heaping cup), 2 ounces (56-57g) dark chocolate (about 1/4 heaping cup) and 1½ tablespoons (8g) unsweetened cocoa powder together until fully melted and smooth. Remove from heat.
- Stir in 1 cup (200g) granulated sugar and 1 teaspoon vanilla extract. Add in 2 large eggs, 1 at a time, stirring vigorously before the next addition.
- Add in the 1/4 teaspoon baking powder, 1/2 teaspoon salt, 2 tablespoons (7-9g) espresso powder , and 3/4 cup (93g) all-purpose flour; stir gently until just combined. Do not over mix.
- Fold in 1/4 cup (40g) semi-sweet chocolate chips and pour batter into prepared pan. Smooth the top and bake 25-30 minutes, and until a toothpick inserted into the center comes out just barely clean. Cool at least 30 minutes before cutting and serving.
Notes
- Gluten-free flour: To make these gluten free, King Arthur Gluten-Free All-Purpose Flour works very well. Keep in mind, not all gluten-free flours are created equal. You may experience different baking results depending on the gluten-free flour blend you choose.
- Measuring flour: Aside from using a scale, the best way to measure flour is to spoon it into your measuring cup and then level it off with the back of a knife. This helps prevent packing in too much flour, which can make your baked goods dry.
- To store: Place brownies in an airtight container at room temperature for up to 4 days.
- To freeze: Wrap tightly in plastic wrap and place in a freezer bag for up to 3 months.
Did you make this recipe?
Tag @kimscravings on Instagram and be sure to subscribe to our mailing list to receive more healthy and delicious recipes straight to your inbox!
These were so good! I didn’t have espresso powder, so I used instant coffee instead and still got a nice coffee flavor. Thank you for this delicious, easy recipe!
These are truly my favorite brownies of all time. They’re rich, fudgy, and packed with deep chocolate flavor. Best of all, they’re super easy to make and always turn out perfect.
Yay, so glad that they turned out perfect for you!
My family loved these! So delicious with deep, chocolatey flavor in every bite.
So happy to hear!