Gluten Free Waffles
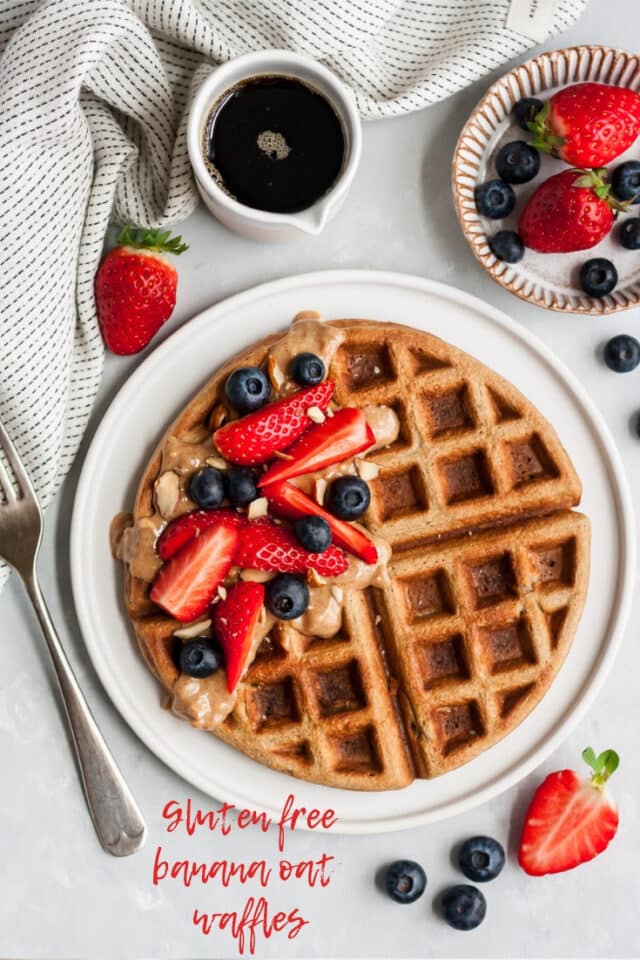
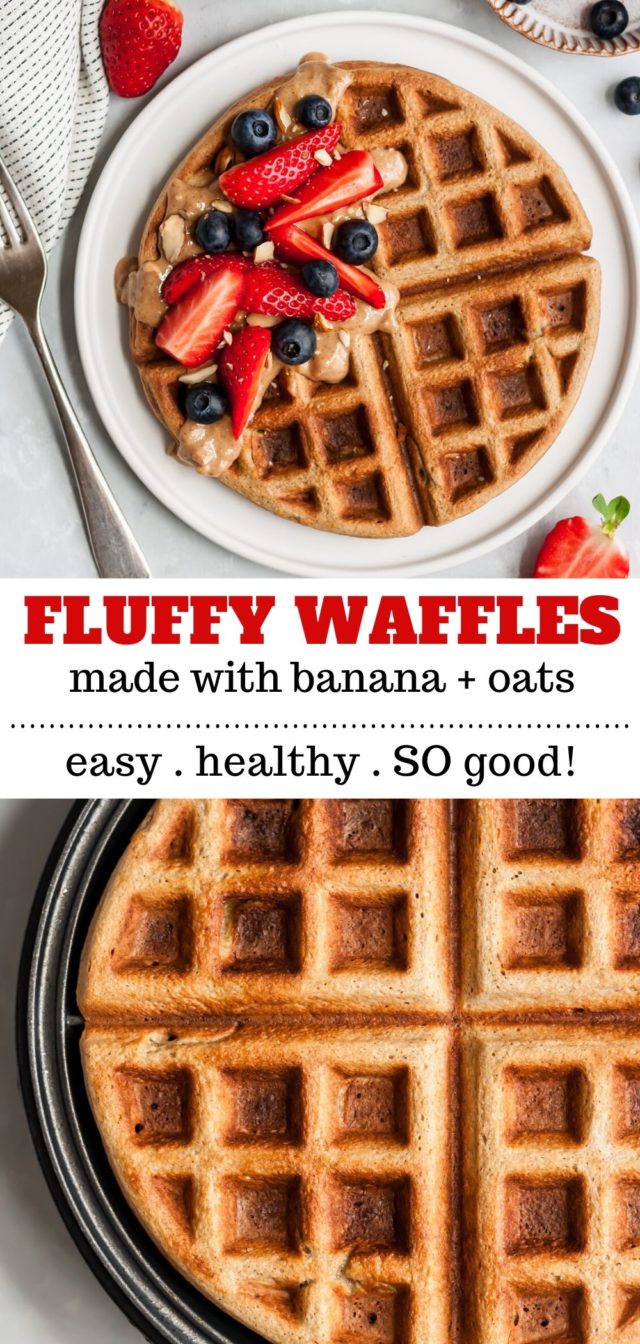

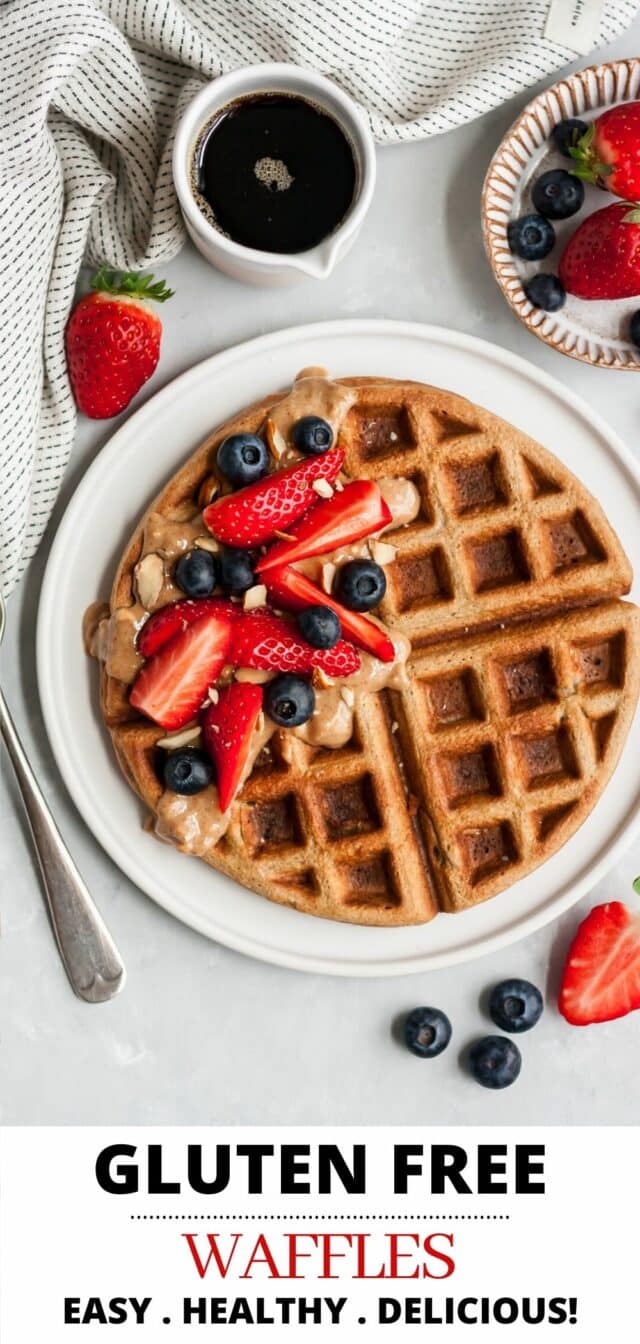
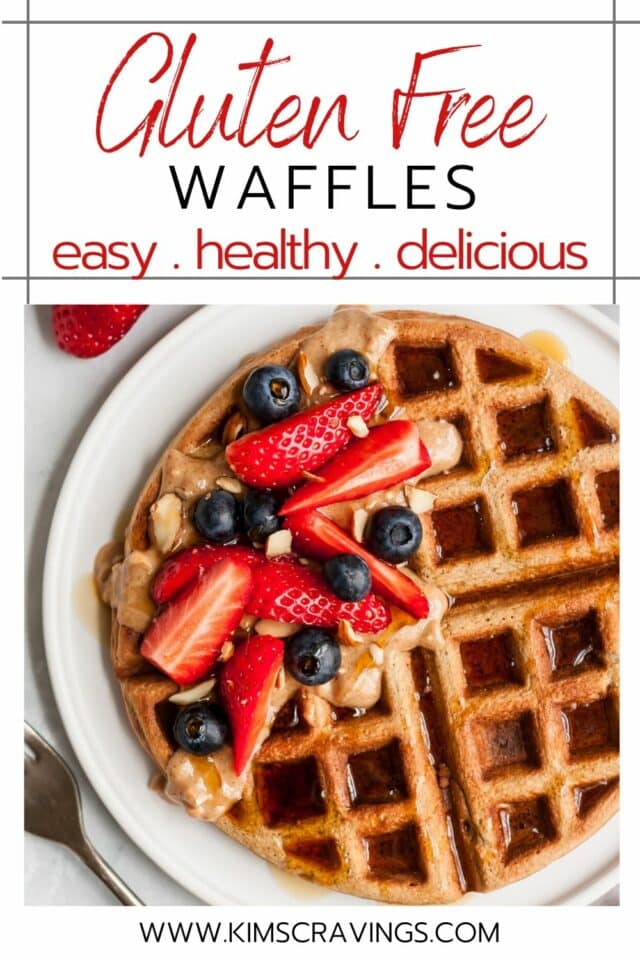

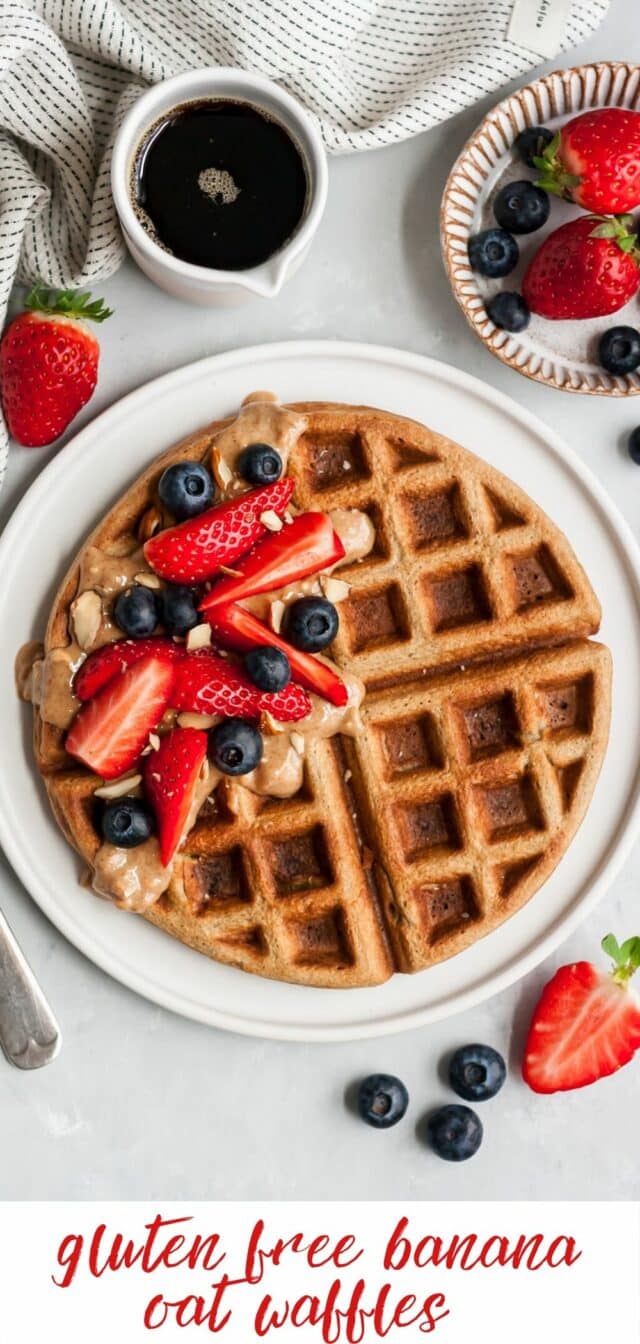
These healthy Gluten Free Waffles are perfectly crisp on the outside and soft and fluffy on the inside. They are made with a combination of oats, almond milk, banana and eggs, all easily whipped up in the blender. Top them with fresh berries and a drizzle of maple syrup for the best breakfast or brunch!
If you or your family are a fan of waffles, you have to try this recipe. It is the healthier waffle version but you would never know it. It is so delicious. I make this for my guests as well and no one can tell they’re gluten free. Frequently they ask me for the recipe. All you need is a blender and few staple ingredients. This is my go to for waffles. I love it!
— Coach Maggie Kim
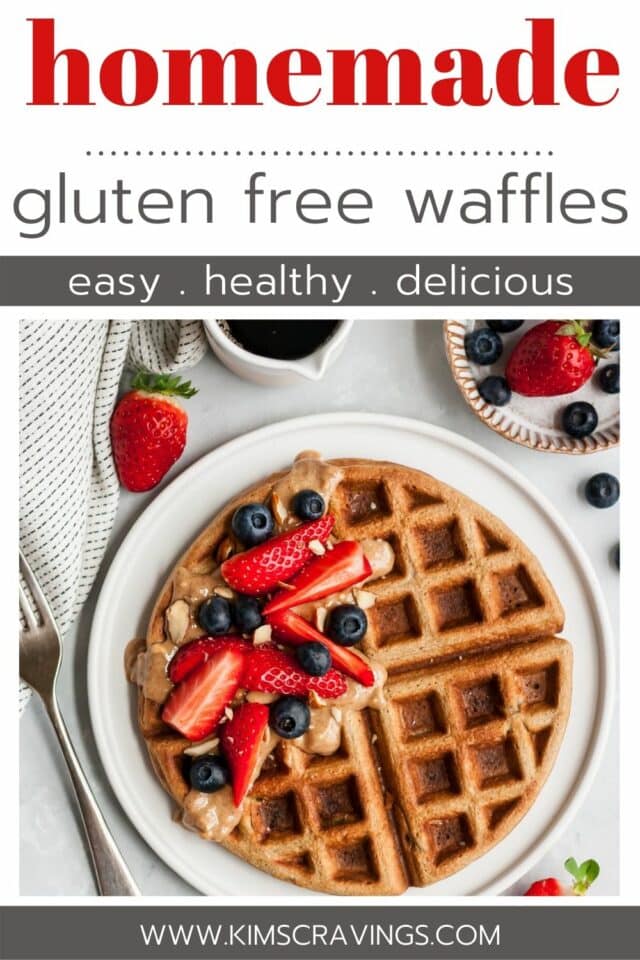
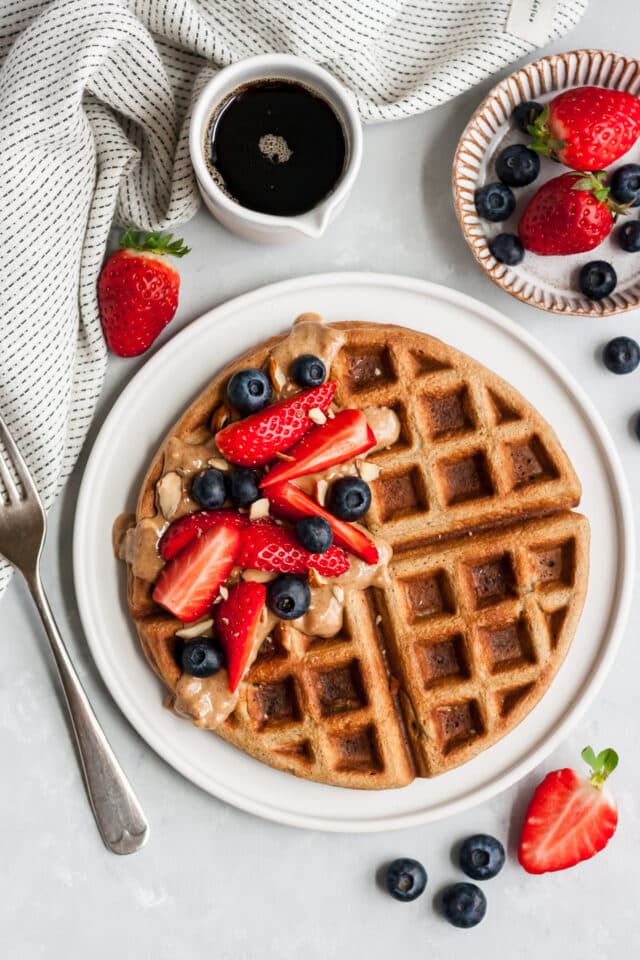
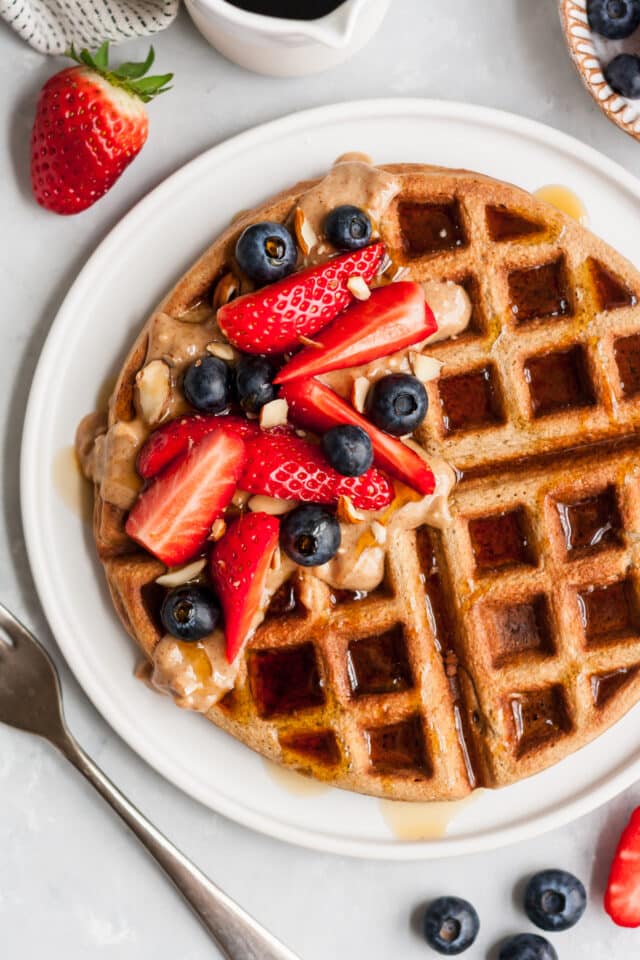
Nothing beats homemade waffles for breakfast! And these Gluten Free Waffles made with simple ingredients are not only nutritious, but they’re incredibly tasty too. Add some sliced strawberries, blueberries, a sprinkle of chopped almonds, a drizzle of almond butter and a little maple syrup and you have one dreamy breakfast. If you have leftovers, you can keep them in the fridge (or freezer) and toast them the next day. It’s a full-blown love affair I’m having with this waffle recipe! Give it a whirl and you’ll see exactly what I’m gushing about.
Why you should make this recipe
- Quick & easy to make. Combine wet ingredients and dry ingredients in a blender, blend and pour onto a waffle maker and cook. Ready to eat in just about 10 minutes!
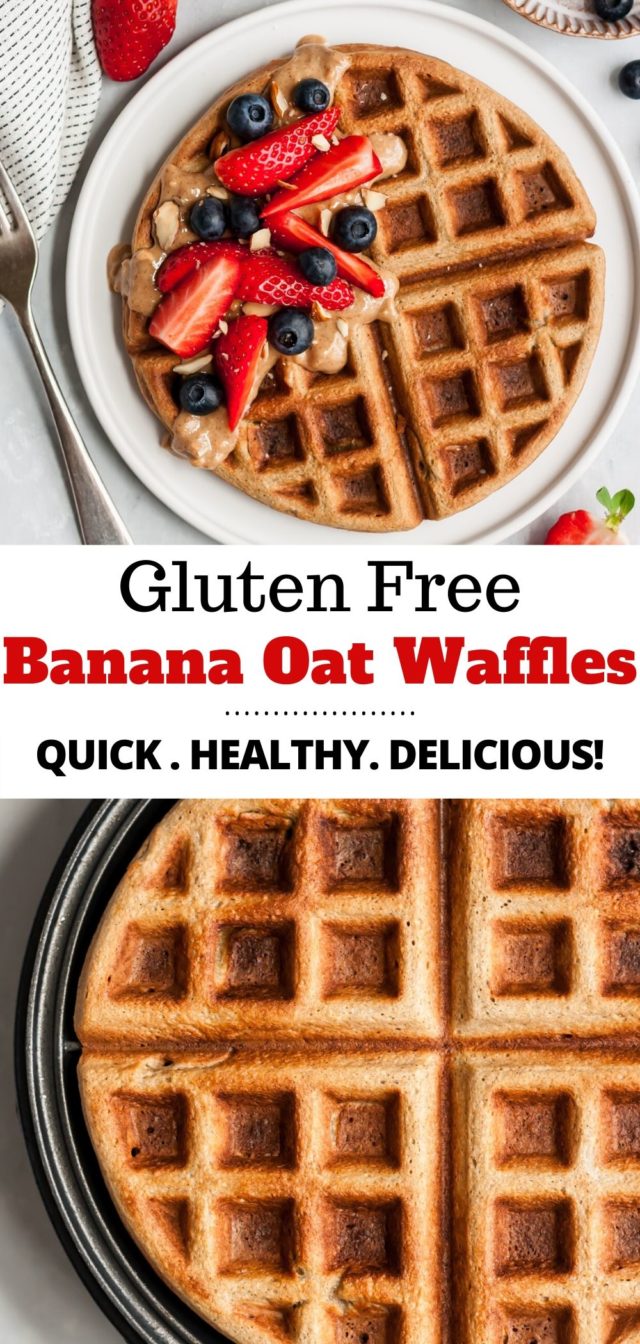
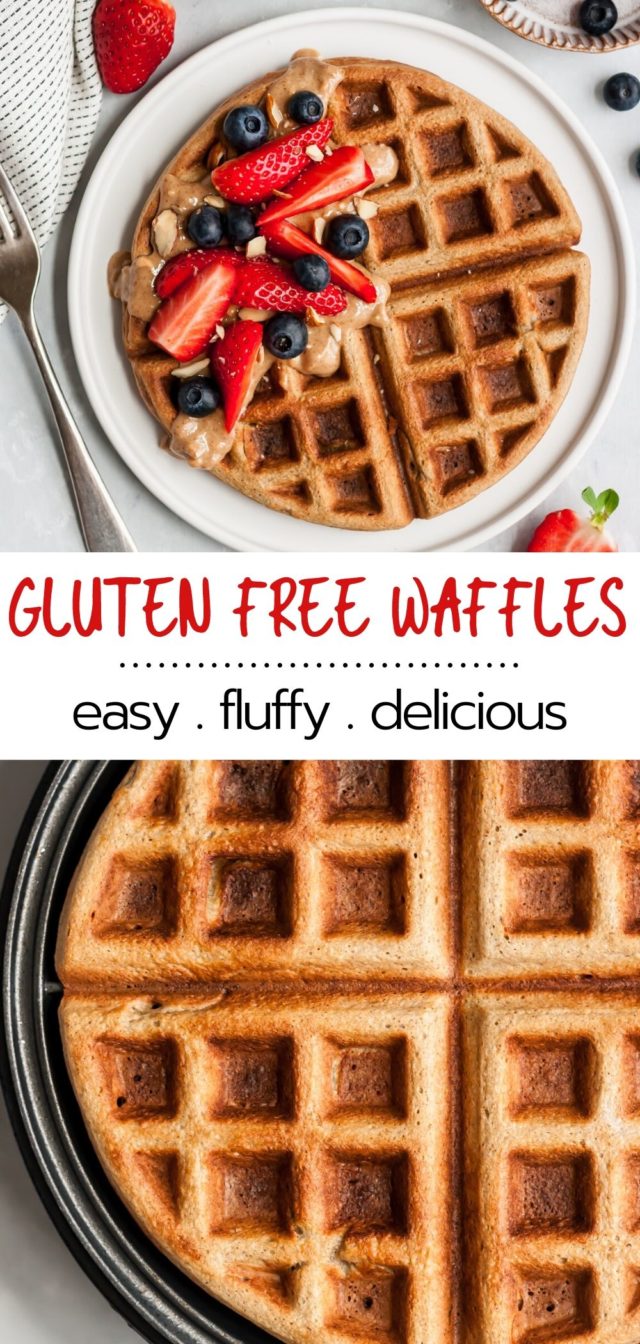
- Perfect texture. These cook up golden brown with a nice crisp exterior and soft center.
- Healthy. These are made with good-for-you ingredients that will keep you satisfied all morning long.
- Make ahead. We love to make double batch and freeze them for no-fuss mornings throughout the week.
- Delicious! These are naturally sweetened with banana and have the best flavor. SO good!
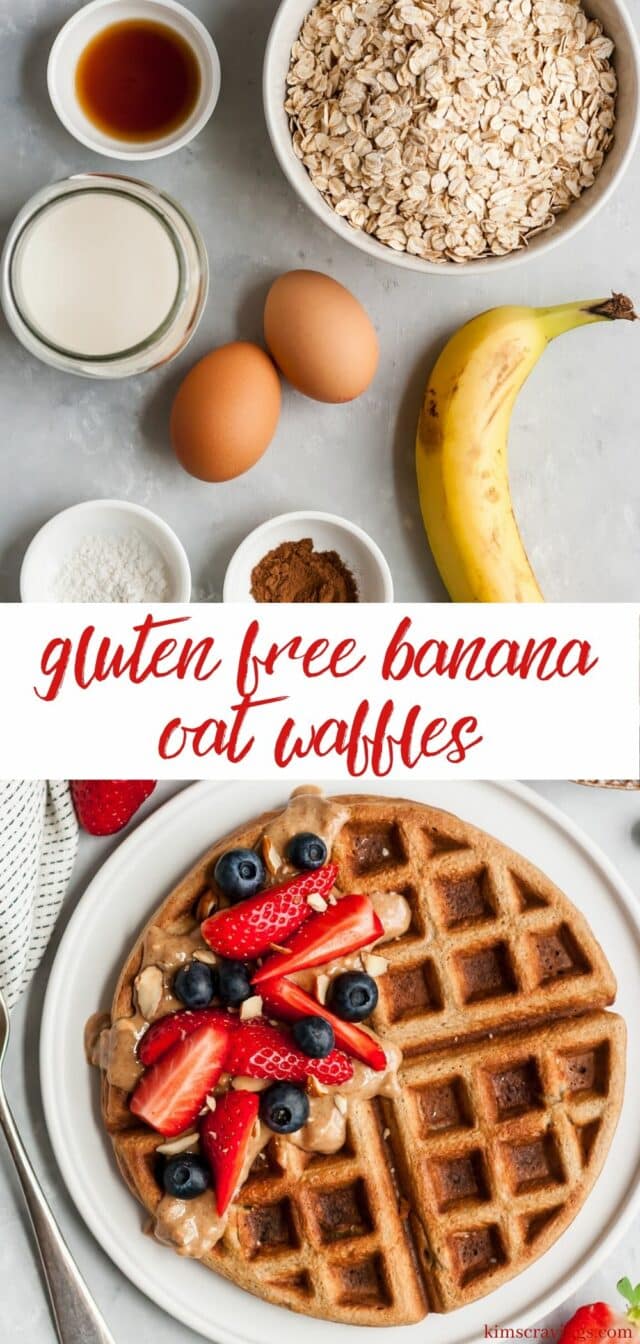
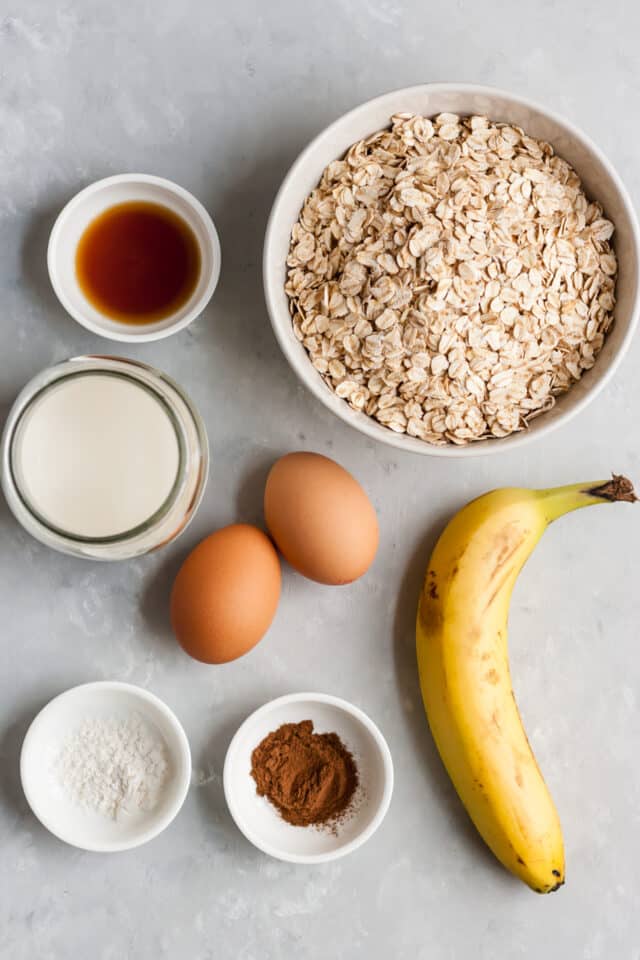
Ingredients needed
This recipe calls for simple ingredients you most likely have on hand. The addition of a ripe banana acts as a natural sweetener, gives the waffles flavor and adds moisture without adding any extra fat. Here’s a note on each of the ingredients:
- Oats. Instead of using regular flour or a gluten-free flour blend, these are made with old-fashioned rolled oats! Use certified gluten-free rolled oats to keep these gluten free.
- Milk. Any milk variety works. I typically use a dairy-free milk, like unsweetened almond milk or cashew milk.
- Vanilla extract & cinnamon. For a boost of flavor!
- Eggs. You’ll need two eggs to help with binding, give the waffles structure and ensure they cook properly.
- Banana. Use a ripe banana with brown to black spots for the most flavor and extra sweetness.
- Baking powder. To ensure these have plenty of fluff.
- Sweetener. We usually don’t add any sweetener to the batter because adding a drizzle of maple syrup is enough sweetness, but feel free to add a packet of stevia or a tablespoon or two of sugar or maple syrup.
How to make this recipe
This gluten-free waffle recipe is super easy and is made with just seven key ingredients. These also come together super fast, in your blender. Here’s the simple method:
For full, printable instructions, reference the recipe card at the bottom of the post.
- Blend ingredients. The recipe is pretty straight forward – it’s just a matter of throwing all ingredients into a blender and blending for only a few seconds and just until the batter is smooth.
- Heat waffle iron. If you notice that the batter is overly thin, let it rest for about 5 to 10 minutes to give the oat flour time to soak up all the moisture. While the batter rests take this time to heat and grease the iron and then you’re all set.
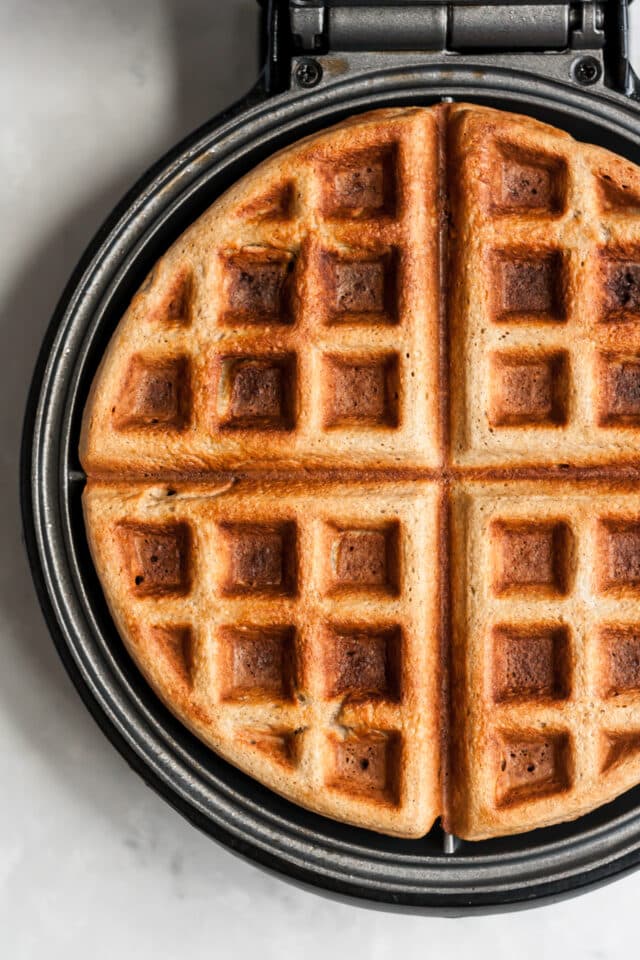
- Cook and enjoy. Use a 3/4 cup measuring cup to pour batter mixture onto iron. Cook on the highest setting and a little longer from when the iron goes off, so the waffles are a little crispier, otherwise these will be very soft. Top with plenty of maple syrup and berries, then serve and enjoy.
Expert tips
- Cook time. Cook for around 5 minutes. Once there is no longer steam coming from the waffle maker, the waffles are generally ready to remove. For a crispier crust, leave them a minute or two longer before removing.
- Don’t have a waffle iron? You better get one asap! Mine was really cheap, but works like a charm and has been going for over 10 years. It’s similar to this waffle iron on Amazon.
- If you’d like to keep the waffles warm while you’re making the whole batch, heat your oven to 200ºF and place a large sheet pan inside to transfer them to while you’re cooking.
- Make ahead. This waffle batter can be made in advance. You can refrigerate the batter for up to 4 hours before you plan to use it.
- Toppings. These gluten-free waffles are good enough to eat plain, but are especially delicious topped with extras like berries, chopped nuts, almond or peanut butter, whipped cream, powdered sugar, jelly, syrup, chocolate… the possibilities are endless!
Variations
I love these as is, but you can enhance them by adding about 1/4 cup of mix-ins to the batter. I also suggest adding some fun and delicious toppings. Here are some options:
- Chopped nuts
- Mini chocolate chips
- Berries
- Almond or peanut butter
- Dried fruit
- Shredded coconut
Frequently asked questions
Typically the batter is made from all-purpose flour, milk, sugar, butter, and eggs with vanilla extract and salt for flavoring. In this particular recipe, we’re making them gluten free by substituting oats for the flour.
While these don’t taste quite like my classic buttermilk waffles, they are delicious. They have a subtle banana flavor and a nice fluffy texture.
Both waffle and pancake recipes share some of the same basic ingredients, like eggs, milk and flour, but with most recipes their batters are not exactly the same. However, this is pretty much the exact recipe that I use for my gluten free pancake recipe.
Storage recommendations
- Storing leftovers. These will keep in the fridge for up to 4 days or in the freezer for up to 3 months. To keep in the refrigerator, store them in an airtight container. To store waffles in the freezer, wrap them individually in plastic wrap, then place all the wrapped waffles in a large freezer bag.
- Reheating. For best results, reheat in the toaster oven. They will come out crunchy and golden brown. If you’re starting with frozen waffles, you’ll want to add an additional 1-2 minutes to the toasting time. I find that with my toaster oven, a refrigerated waffle needs to toast for 5 minutes, and a frozen waffle will cook in 7 minutes.
More healthy breakfast recipes
- Fluffy Yogurt Pancakes
- Spinach Mushroom Frittata
- Baked Blueberry Donuts
- Healthy Banana Bread
- Banana Baked Oatmeal
If you try this recipe, let me know! Leave a comment and if your family loves these as much as mine does, be sure to give it a five star ⭐️ rating! Also, tag @kimscravings on Instagram with a picture of your creation. It’s so fun to see what you’re cooking! Be sure to subscribe to our mailing list to receive more healthy delicious recipes straight to your inbox.
Gluten Free Waffles
Ingredients
- 2 cups old-fashioned rolled oats, gluten free as needed
- 1 cup unsweetened vanilla almond milk or other milk
- 1 1/2 teaspoons pure vanilla extract
- 2 large eggs
- 1 medium ripe banana
- 1 teaspoon cinnamon
- 1 teaspoon baking powder
- 1 packet stevia or other preferred sweetener (optional)
- Optional toppings: almond/peanut butter, coconut butter, coconut oil, honey, maple syrup and/or fresh fruit
Instructions
- Preheat waffle iron and spray with cooking spray.
- Blend all ingredients in a blender until almost smooth. If the batter seems overly thin, let it rest for about 5-10 minutes to give the oats time to soak up all the moisture.
- Pour about 3/4 cup batter onto waffle iron. Allow waffle to cook. I cook mine on the highest setting and a little longer from when the waffle iron goes off, so the waffles are a little crispier, otherwise these will be very soft.
- Continue with the rest of the batter. Depending on the size of your waffle iron, recipe should make about 4 waffles. Enjoy with your favorite toppings!
Notes
Did you make this recipe?
Tag @kimscravings on Instagram and be sure to subscribe to our mailing list to receive more healthy and delicious recipes straight to your inbox!
I’ve tried many oatmeal banana waffle recipes and this by far the best recipe. Leave them on the waffle iron for a few mins after the light goes off to get them crispy on the outside.
Good recipe, needs salt!
Glad you enjoyed! Thanks for your feedback!
My wife and I absolutely love these waffles! They consistently turn out well and they store and reheat perfectly in our toaster oven. I prefer mine topped with avocado and fried egg… just sayin’. Our one recipe mod: no sweetener and instead we use an extra banana. And we often end us using over-ripe bananas, but I can’t really tell the difference between that and the standard recipe bananas.
This makes me so happy to hear! Thanks so much for taking time to leave feedback!
If you or your family are a fan of waffles, you have to try this recipe. It is the healthier waffle version but you would never know it. It is so delicious. I make this for my guests as well and no one can tell they’re gluten free. Frequently they ask me for the recipe. All you need is a blender and few staple ingredients. This is my go to for waffles. I love it!
So happy to hear that you enjoyed! 🙂 Thanks so much for taking time to comment!
I made these for breakfast and topped them with some whipped Greek cream cheese and berries with a drizzle of honey! Amazing! I will tag you on my video going to have to post these!!!
That sounds so good! so happy you enjoyed!
Thank you for the recipe and how to keep the leftover 😀
Yes! Happy you enjoyed!
These were delish! I had to use some ingredients available to me. Soy milk for almond milk, and blended in a few raisons for sweetness portion, and a bit of chia and hemp seeds for extra nutrition… So very delish! Thanks! This will be going into the breakfast rotation for sure 🙂
So happy you enjoyed!! Thanks for taking the time to leave feedback!
Could I leave out the banana?
You could possibly leave out the banana, but you would need to sub with something similar – yogurt, applesauce or pumpkin. I haven’t tried this, though. Let us know if you try it, how it turns out.
This was delicious and light. Thank you for the recipe 😊
So happy you enjoyed!
My whole family absolutely loves these waffles! Even my kids that don’t eat gluten free beg for them in the morning! Thanks for a great recipe!
New favorite healthy waffle recipe! These will definitely be on repeat!
Can you use this recipe to make pancakes instead?
I would recommend using this very similar recipe https://www.kimscravings.com/banana-oat-blender-pancakes/
So good! Made these for my toddler but the whole fam loves them.
Thanks so much for taking time to leave feedback! So happy your family enjoyed!
Hi Kim, would the amount of oats flour be the same as the rolled oats? I already have oats flour at home and just stumbled on your recipe.
I would use about 1 1/2 cups of oat flour. If the mixture seems too thin, you can always add a little bit more oat flour. Enjoy!
They taste amazing! I blended the oats separately to make oat flour, so they’re getting much lighter! Will keep it as my basic waffles recipe! Thanks!
Thanks so much for sharing your feedback! So glad you enjoyed!
Good one to use up a very ripe banana. I don’t even use the blender as I like the texture of the whole oats in these. A keeper! Thank you
So glad you enjoyed and thanks for the comment!
So easy and so delicious! I could almost make them for breakfast on weekdays, but making ahead works perfectly!
It’s very easy to make half of the recipe too (have to because my food processor is small…), but that gives opportunities for making more flavours in one prep. Been experimenting a bit and adding some cocoapowder works great. I added blueberries to the batter too, but my waffles split. Maybe waiting longer would do the trick, any other suggestions to improve?
So glad you love these as much as I do! You might try using less blueberries or just add them to the top after the waffle has cooked.
Any chance I could replace the eggs with 2 chia eggs? These look wonderful!
Thank you! I haven’t tried it, but I really think it would work. Let us know if you give it a try.
These are wonderful! I’ve made them twice with great success and love that they can be GF and DF with ingredients I always have on hand. Thanks for sharing!
So glad to hear that you enjoyed them so much! Thanks for your feedback!
Crazy delicious, perfectly crisp outside, tender inside. Added a bit of honey, chia seed, and hemp hearts.
Yay! Love hearing that! Thanks so much for taking time to comment!
Just found this recipe. Best banana waffles ever! I no longer have to make banana bread. These waffles are beyond better….they’re light. I topped them with Yacon Syrup and coconut whipped cream. Yummy!
That’s awesome! I’m so happy that you enjoyed these so much!
Absolutely delicious! My go-to breakfast recipe. I like to make a few on Sunday, so they’re ready to enjoy throughout the week.
Thank you for a such great recipe. have a question about the serving size. What do you confider as one waffle? Is it the whole circle or just one quarter of it?
Thank you!
So glad you enjoyed! The serving size is the full circle of a large waffle, like the one pictured.
Delicious and I forgot the sweetener smh. Will definitely make it again!
Love hearing this! Thanks so much for your comment!
Hello!
Can these be frozen? Want to make a batch for my daughters breakfasts for during the week.
Thank you 🙂
Adrienne
Yes, I’ve had really good look freezing them and then reheating in my toaster oven. You could also reheat them in a regular oven or microwave. I don’t think the texture will be quite as good in the microwave, though. Enjoy!
Amazing!!!!!!
Yay! So glad you enjoyed!
Just made these yummy waffles it’s my 3 year old grandson and they were a hit thanks Kim
I love hearing that! Thanks so much for taking time to comment!
Hi Kim,
Thank you so much for the delicious and healthy recipes. I have been making these Oatmeal Banana Waffles for a year now and I never tired of them. The aroma alone is pure heaven and the taste is unbelievable! I am from Louisiana and breakfast is mainly grits, eggs and sausage or or bacon! These are a permanent weekly or twice weekly breakfast for my family. My grandkids adore them! My four year old granddaughter asked for some for her birthday 😍! I Love these soooo much! Thank again Kim!
That is such a sweet comment, Wanda! Thank you so much for taking time to leave feedback. It makes me SO happy that your family and even the kiddos enjoy these! 🙂
LOVED these! Rich, crispy, and absolutely divine. Used agave as the sweetener and it added a lovely robust tang. Thank you so much!!
So glad you enjoyed and thanks so much for taking time to comment!
Hello! I am DYING to try these… but I unfortunately do not have time to prepare them in the mornings for a snack before the gym. Does anyone know if they keep well if I were to prepare and cook them the night before and then warmed them up to eat the next morning?
They keep very well! I often times make the whole batch just for me to have throughout the week. I would suggest warming them in a toaster oven or regular oven as opposed to a microwave. hope you enjoy!
hey how much sugar would i put in instead of the stevia?
If you’re going to top with syrup, I would worry about adding in sugar or sweetener. That being said, 1 stevia is equal to about 1 tablespoon sugar.
My favorite recipe! I’m not much of a cook (and my family knows it) so it made me feel amazing when they all agreed that these were the best waffles they have EVER had! I make them about once a week and make an extra batch to store in the fridge for the next couple of mornings. I add a dash of almond extract, because I love anything almond flavored!
This is an excellent recipe and has become my ‘go to’. You feel satiated after eating but not yucky full. The banana helps give some nutritional base so you’re not hungry in a half hour after just eating carbs. I’ve subbed a plantain for the banana and and added cardamom & it’s been great. I’ve also used a mix of other flours instead of the oat and it’s been excellent (blue corn, sorghum, millet) as well. The recipe is great as is and is also able to be successfully tinkered with.
That is so awesome to hear!! I love that all of your tweaks have worked out great. Thanks so much for taking the time to comment!
Hi Kim, these sound amazing. I am too debating whether to get a waffle iron as I love waffles but we have a small kitchen so I really have to think about that. Although your recipe might change my mind.
Thanks so much! I totally understand. I love waffles and have them almost every morning, so it’s one of my favorite appliances. Hope you get a chance to give them a try!
I actually ended up going out last night and buying a small inexpensive waffle iron. That’s how much I wanted to try your recipe and I did this morning. These waffles are amazing. I am so glad I found your recipe! Thanks again.
Please check out my blog, I mostly make smoothies: https://liveyourlifezestfully.wordpress.com/category/food/smoothies/
That’s awesome! And I’m so glad you enjoyed!!
Great recipe thanks! So easy with minimal dishes and they turned out great. I’m saving this recipe!
Awesome! So glad you enjoyed… it’s one of my favorites too!
These were amazing, sweeter than I expected. Calorie information was accurate as well, thank you! This was my first time making a batter and these were super easy to make too… I am wondering if the batter can be made in advance a day or two?
I’m so glad you loved the waffles as much as I do! I’ve never made the batter in advance. It would probably work, but you may need to add a little almond milk to it before cooking, to thin it out some. I have made the whole batch and then stored leftovers in the fridge for a week.
Thanks, These were delicious.
Dang it! I need a waffle maker.
That said, do you think it could work to substitute half the oats for gluten-free flour? Large amounts of oats can bother my tummy sometimes.
Yes, you do! And I’m sure the gluten-free flour would work just fine. Good luck!
Honestly the best waffle recipe I’ve found anywhere! I got a waffle maker for Christmas and these are my go to waffles. I double this recipe and freeze extras then just put them in the toaster to reheat. Everyone loves them they’re perfect!
Great recipe Kim… crispy on the outside & light on the inside! I made them this morning for my husband’s birthday & we both loved them! Thank you.
For sure! Waffles are a delicious change-up!
Great recipe! I loved it and I will continue to use it. I’ve had trouble making good waffles in the past but these were a 10 out of 10!
These turned out so delicious! They were perfectly crispy on the outside, but soft on the inside!
So good! I was afraid I wouldn’t like because I’m not a fan of oats. Loved it! I’ll be making this again!
So happy to hear that you enjoyed, Rhonda! Thanks so much for taking time to leave a comment.